The Art Of Stereoscopic Photo, part 2

Introduction
In the previous article we reviewed the main rules and principles that allow you to get high-quality stereo photographs. In this article we will focus on the practical side of things. We will discuss how to make a simple DIY-style stereoscopic camera from a StereoPi, how to take your first stereo photographs and process them in the StereoPhoto Maker app.
We’ll use a regular mobile phone for a viewfinder, a controller for our camera and a monitor to view the resulting images.
Hardware
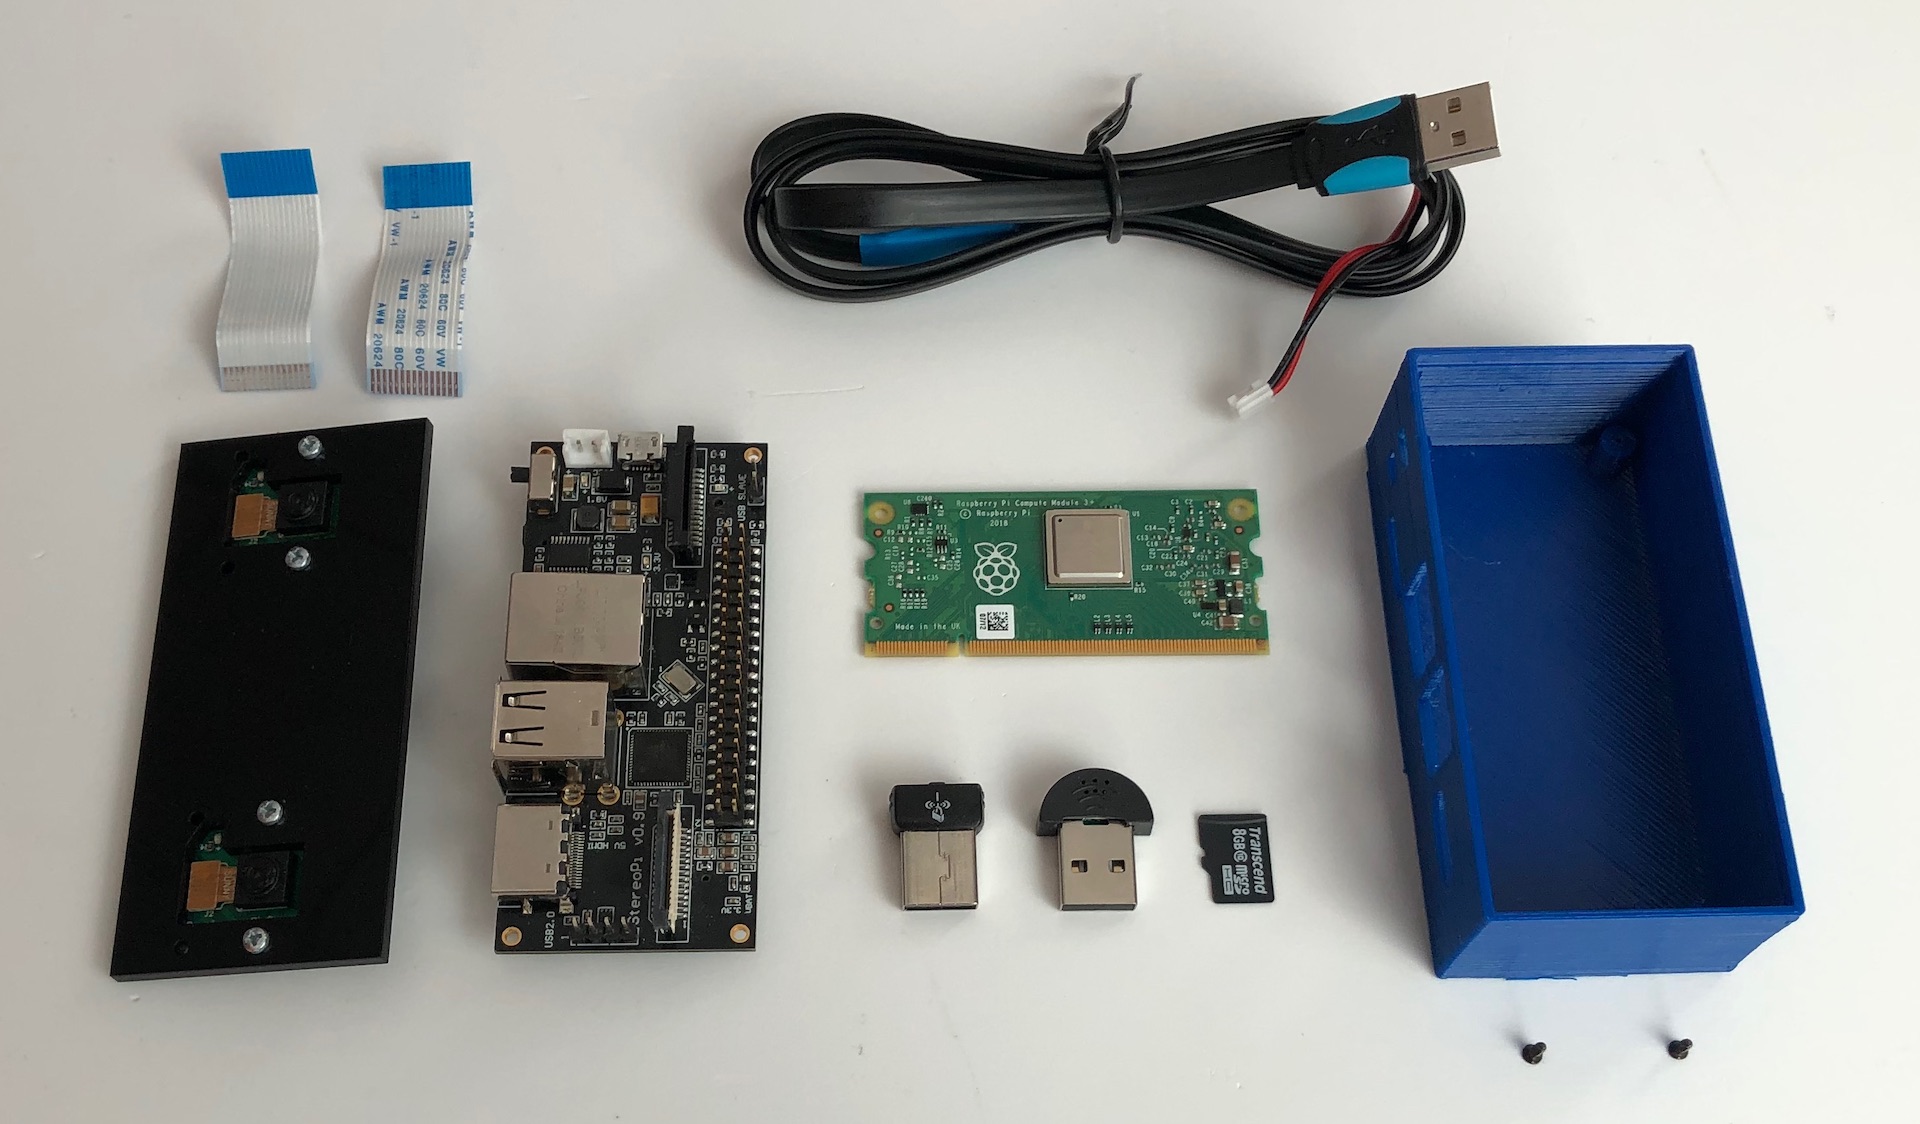
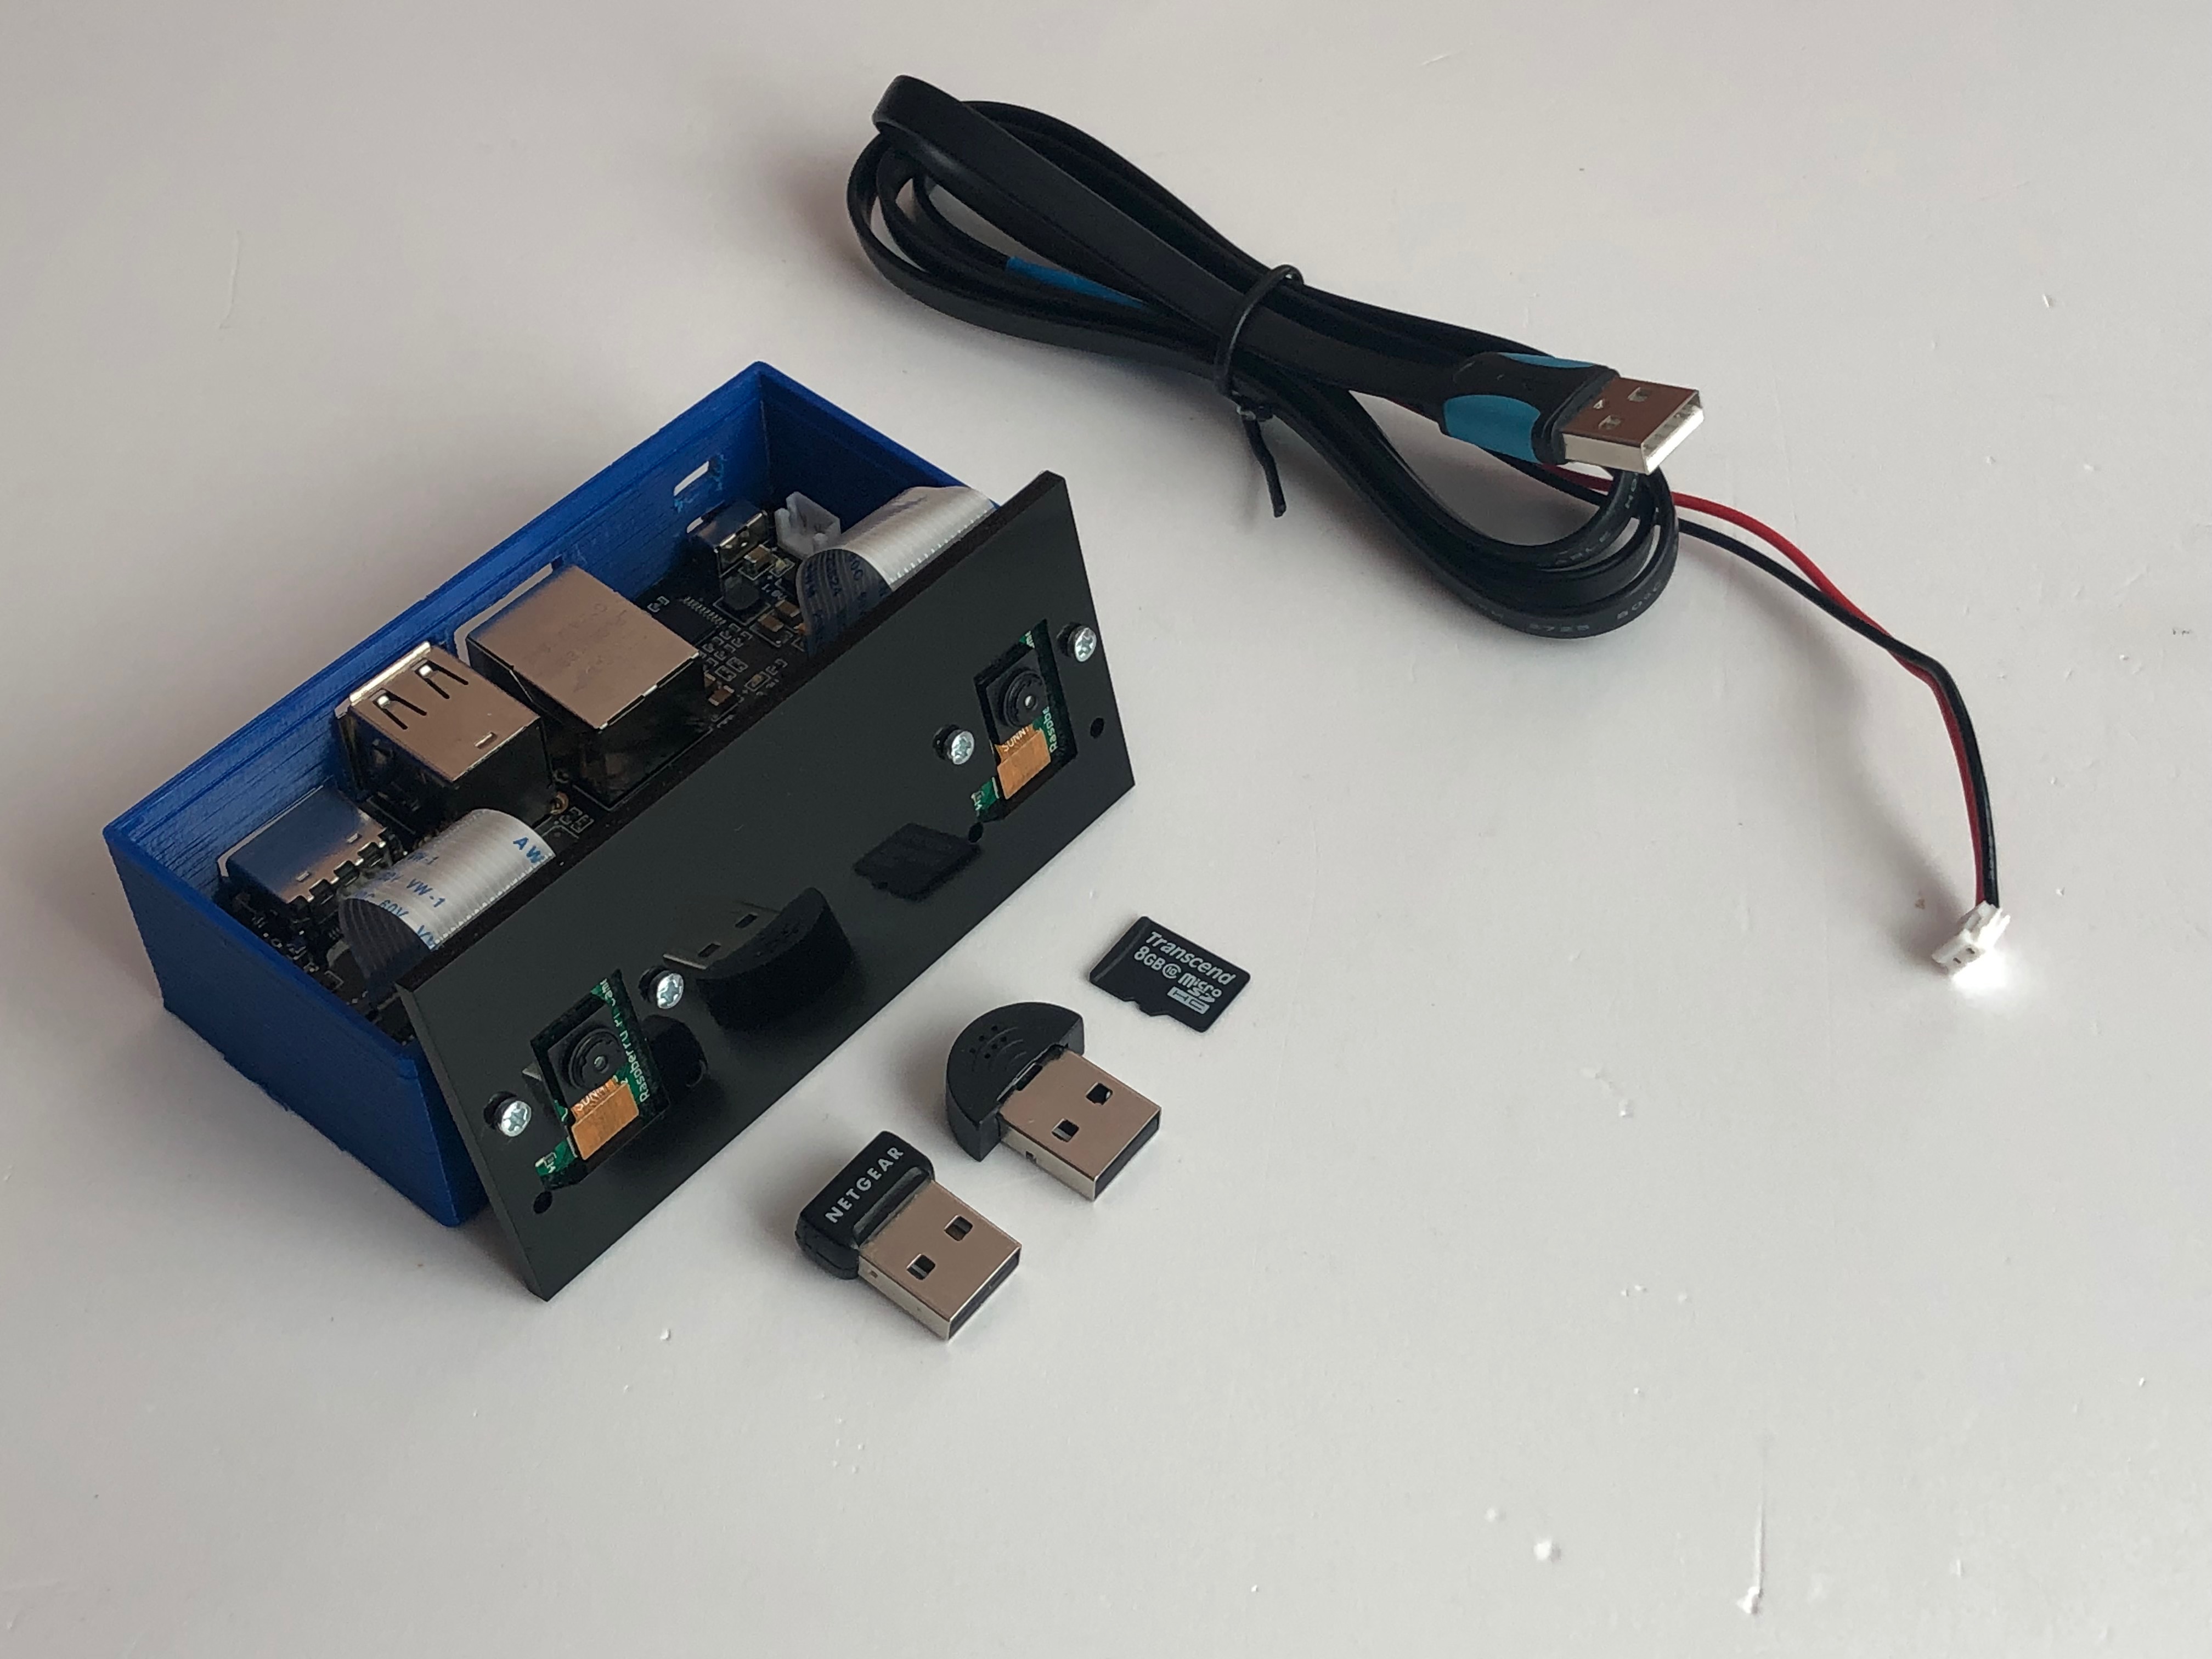
You will need the following components:
- A StereoPi board
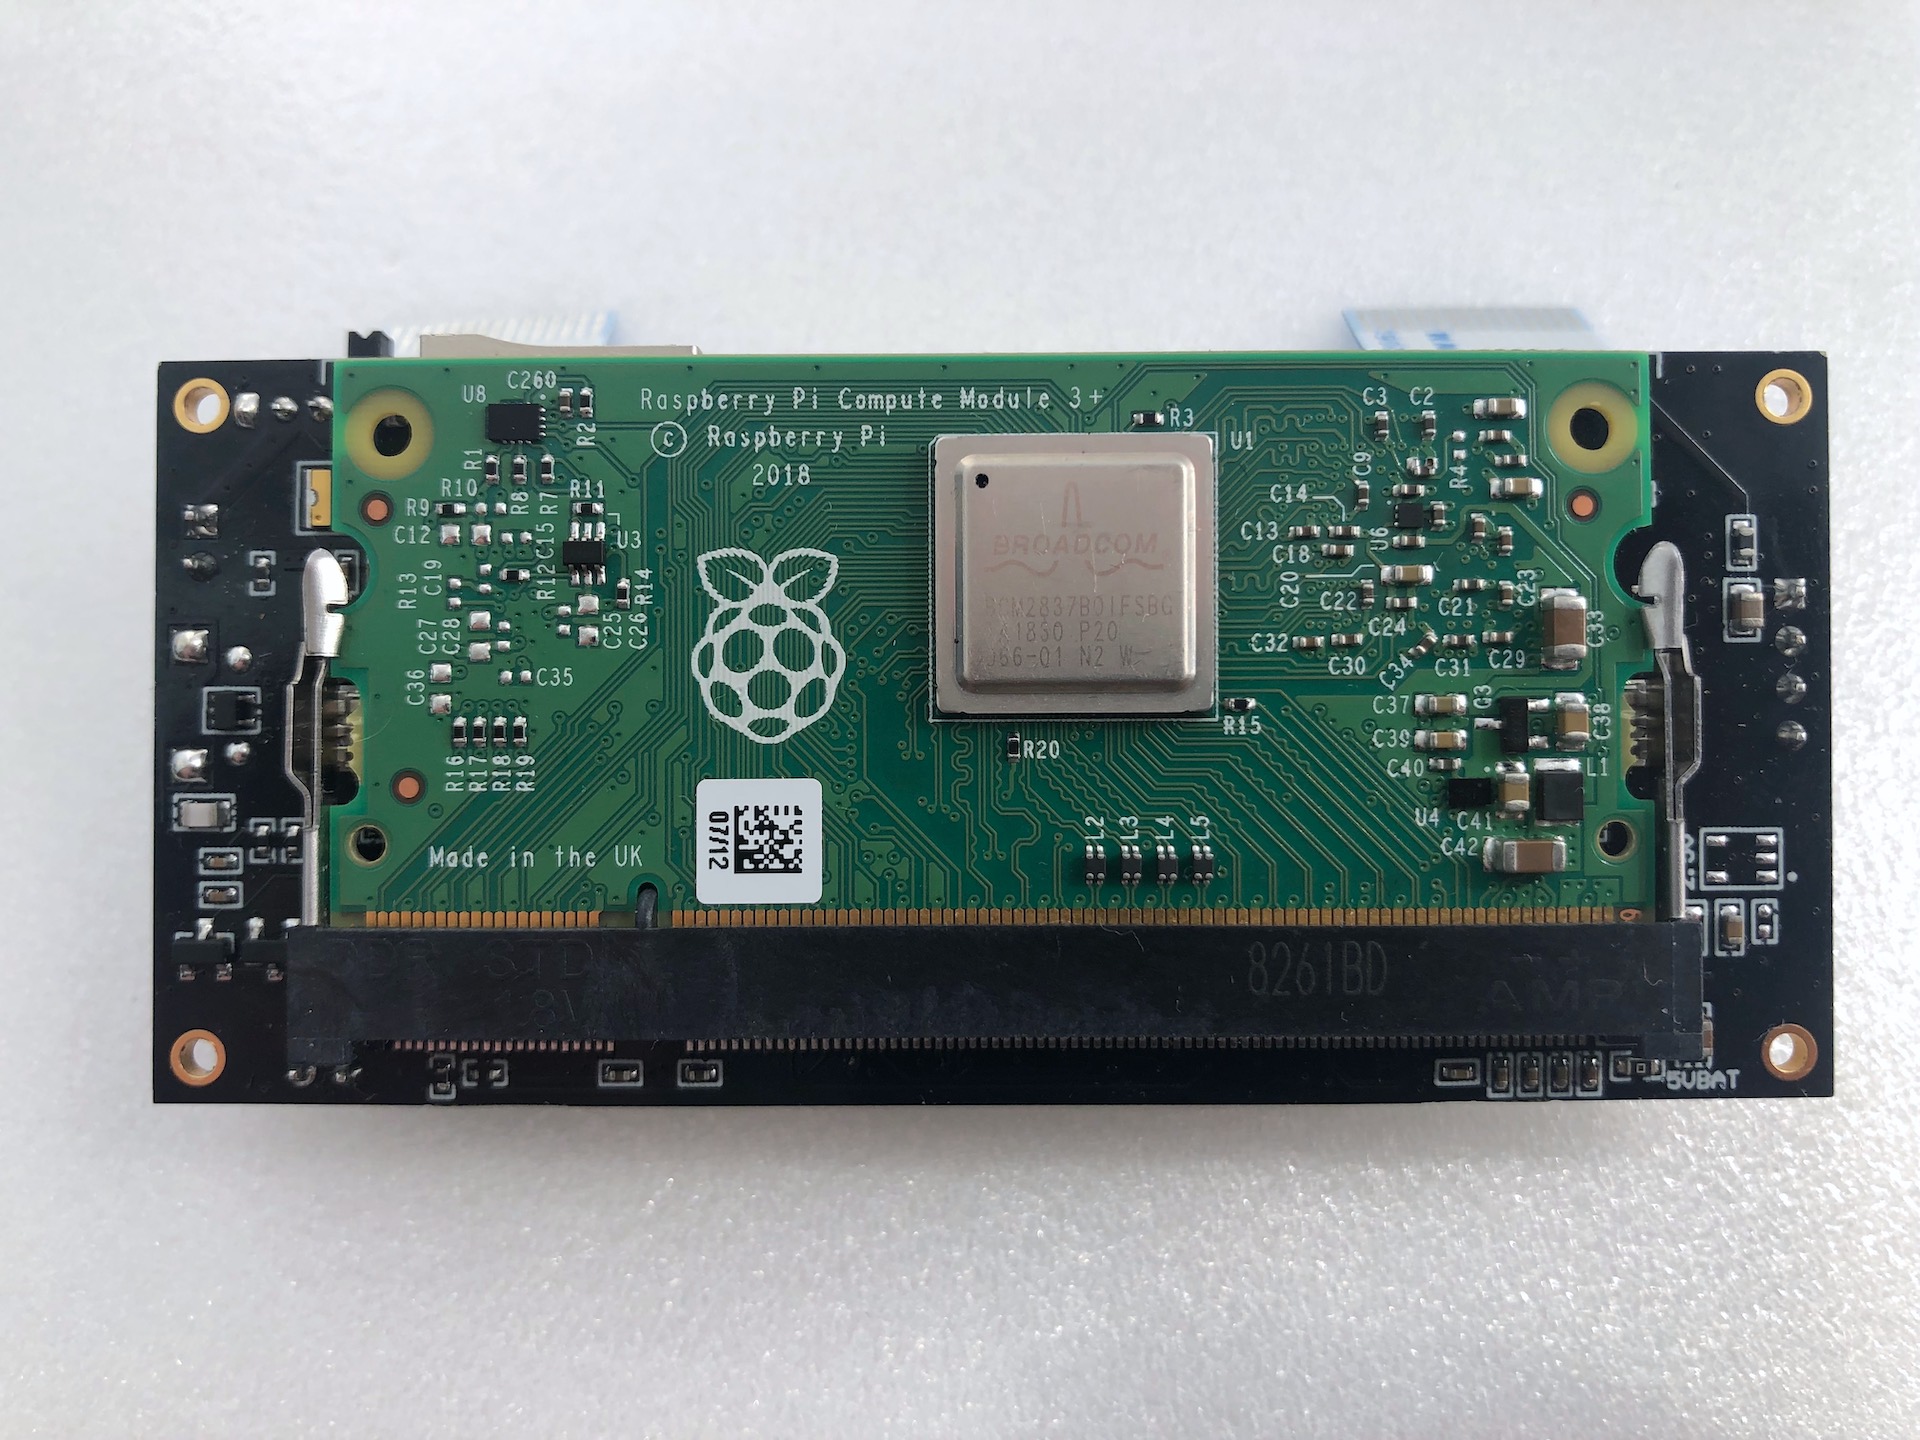
- A Raspberry Pi Compute Module 3 Lite (or non-Lite with eMMC for advanced users)
- Two cameras for the Raspberry Pi with short cables (V1 cameras in our case)
- A WiFi module
- A power cord
- A MicroSD card
- An external battery (a power bank)
For convenience of assembling the device, you need a plate for mounting the cameras, as well as a 3D printed case.
If you are the lucky owner of a Starter Kit or a Deluxe Kit, then you already have most of the components needed.
First steps
In order to test performance, you’ll need the latest version of our Raspbian image to experiment with photos and videos. We’ve added several new features specifically for this experiment.
Preparing the SLP Raspbian image for the stereo camera
1. If you own a Starter Kit or a Deluxe Kit
Your kit contains a card with the SLP image. To enable the new features, you need to install an update for the SLP. The update file weighs only 2 megabytes, and the installation process takes very little time.
The easiest way:
A) Connect your micro SD card to your computer
B) Copy the update file to the partition named BOOT
C) Insert the card into StereoPi and turn on the power. After booting, the system will automatically install the update, delete the file from the BOOT partition, and reboot.
2. If you do not have a card with an SLP image
A) Download the latest image from any of the links in our Wiki.
B) Write it onto the micro SD (as explained in the Wiki).
If you own a Compute Module with an integrated eMMC memory, then you need to upload the image to the eMMC, since simultaneous operation of micro SD and eMMC is not supported. Instructions for writing an image to the eMMC are provided here.
Configuring the image for work
You need to enable the two camera operation mode and specify the network access parameters via WiFi.
To do this, connect the micro SD card to a computer and open the stereopi.conf file on the BOOT partition.
1. On the ‘video_mode=’ line add the 3D parameter, so that the line looks like this:video_mode=3D
2. On the ‘wifi_iface=’ line add the wifi0 parameter, so that the line looks like this:wifi_iface=wlan0
3. On the following lines enter the name and password of your WiFi network:wifi_ssid=WIFI-NAME
wifi_psk=WIFI-PASSWORD
IMPORTANT! At the experiment stage, you can put here the parameters of your home WiFi network. But afterwards, to work in the field, it would be wiser to enter the parameters of your phone’s WiFi hotspot. Don’t forget to enable your hotspot for this to work.
First check
Before assembling the device in the case, let’s first connect all the internals on the table and check that everything works. After making sure that everything operates as expected, proceed to install everything into the case.
So:
- Install the Compute Module 3
- Install the micro SD card
- Connect both cameras
- Connect the WiFi dongle
- Connect the power cord
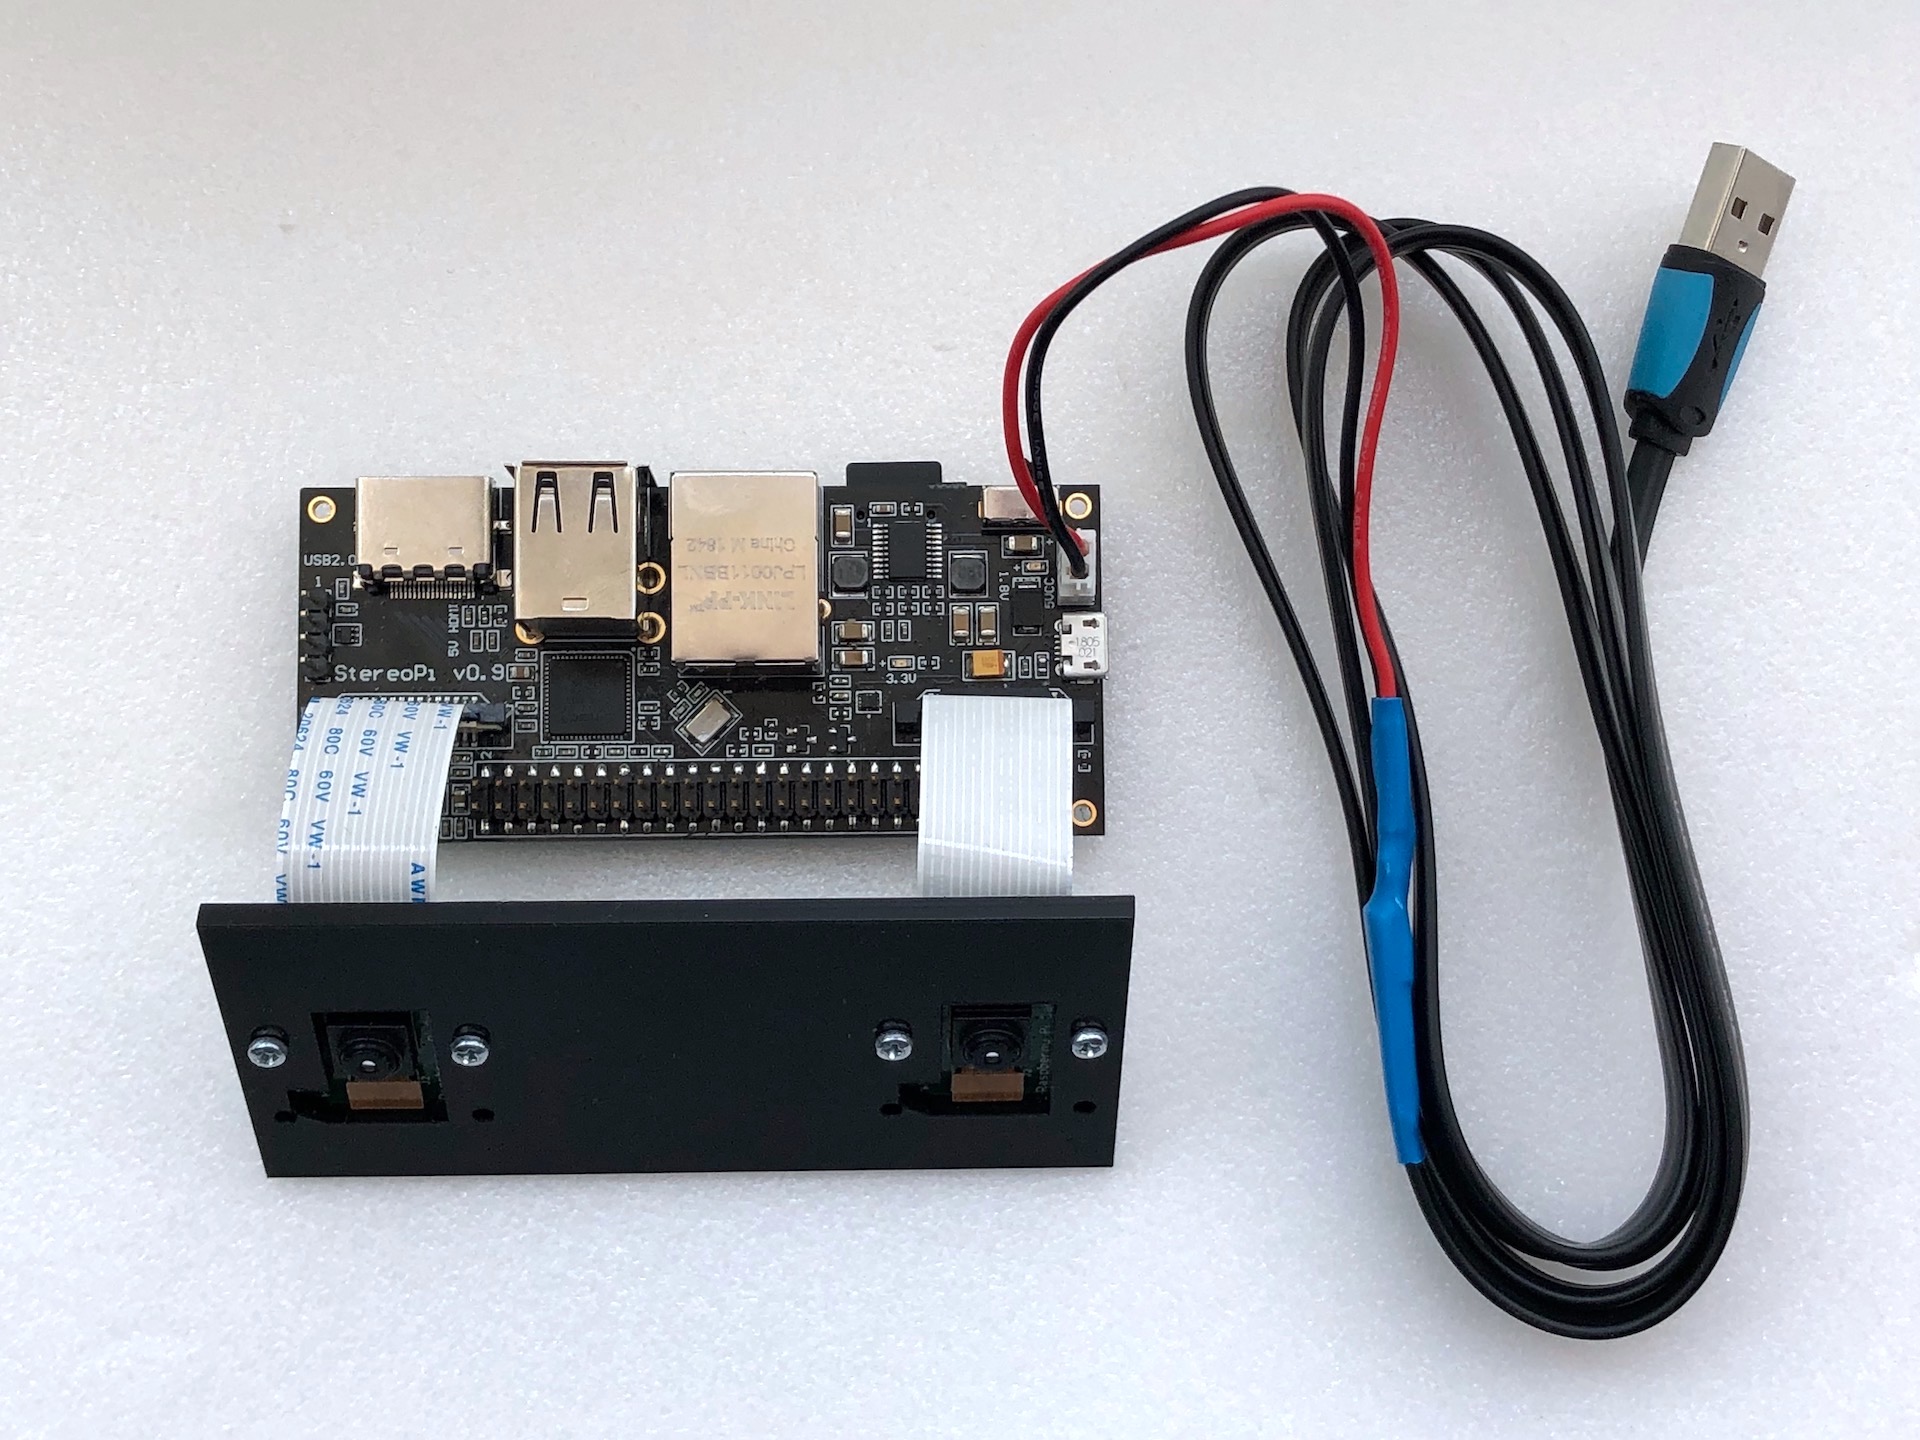
First, an important note. The SLP image is not made to work with a keyboard and mouse, but is designed to operate through an administration panel. But you can connect a monitor to the HDMI output to conduct a simple quick test and check the device is assembled correctly.
Turn on the power. If this is the very first boot of the SLP image, then during bootup it will create an additional partition on the micro SD card (or on the eMMC), taking up all the free space. This partition is used to store photos and videos. Creating a partition may take some time, and then the system will automatically restart.
If you have connected a monitor, then after full bootup you will see feeds from both cameras simultaneously. If you see a white screensaver with raspberries, then something is wrong with the cameras’ connections. Check that the camera flat flexible cables are plugged correctly into the connectors (i.e. they are not turned upside down).

If you did not connect a monitor, then you need to go to the administration panel.
Here are some ways to quickly find StereoPi on your network:
1. If you have an Android device, install our app. If the device is on the same network as the StereoPi, the application will automatically find StereoPi’s address and display video from the cameras. If you tap on the screen, the app will show a tooltip with StereoPi’s network address. Tapping the tooltip will open the default browser on the administration panel page straight on your device. You can also enter this address manually in a browser on a computer.
2. If you have an iOS device, or a macOS or Windows 10 computer, you can use the network search mechanism to find the device by typing stereopi.local in the browser. It can take anywhere from a couple to several dozens of seconds, depending on the characteristics of your network.
3. If the device is not found — check the WiFi network settings in the stereopi.conf file. If the settings are correct, you can use the IP address scanner on your network (check our Wiki for more details).
Administration Panel
When you first log in to the admin panel, you will see the following picture: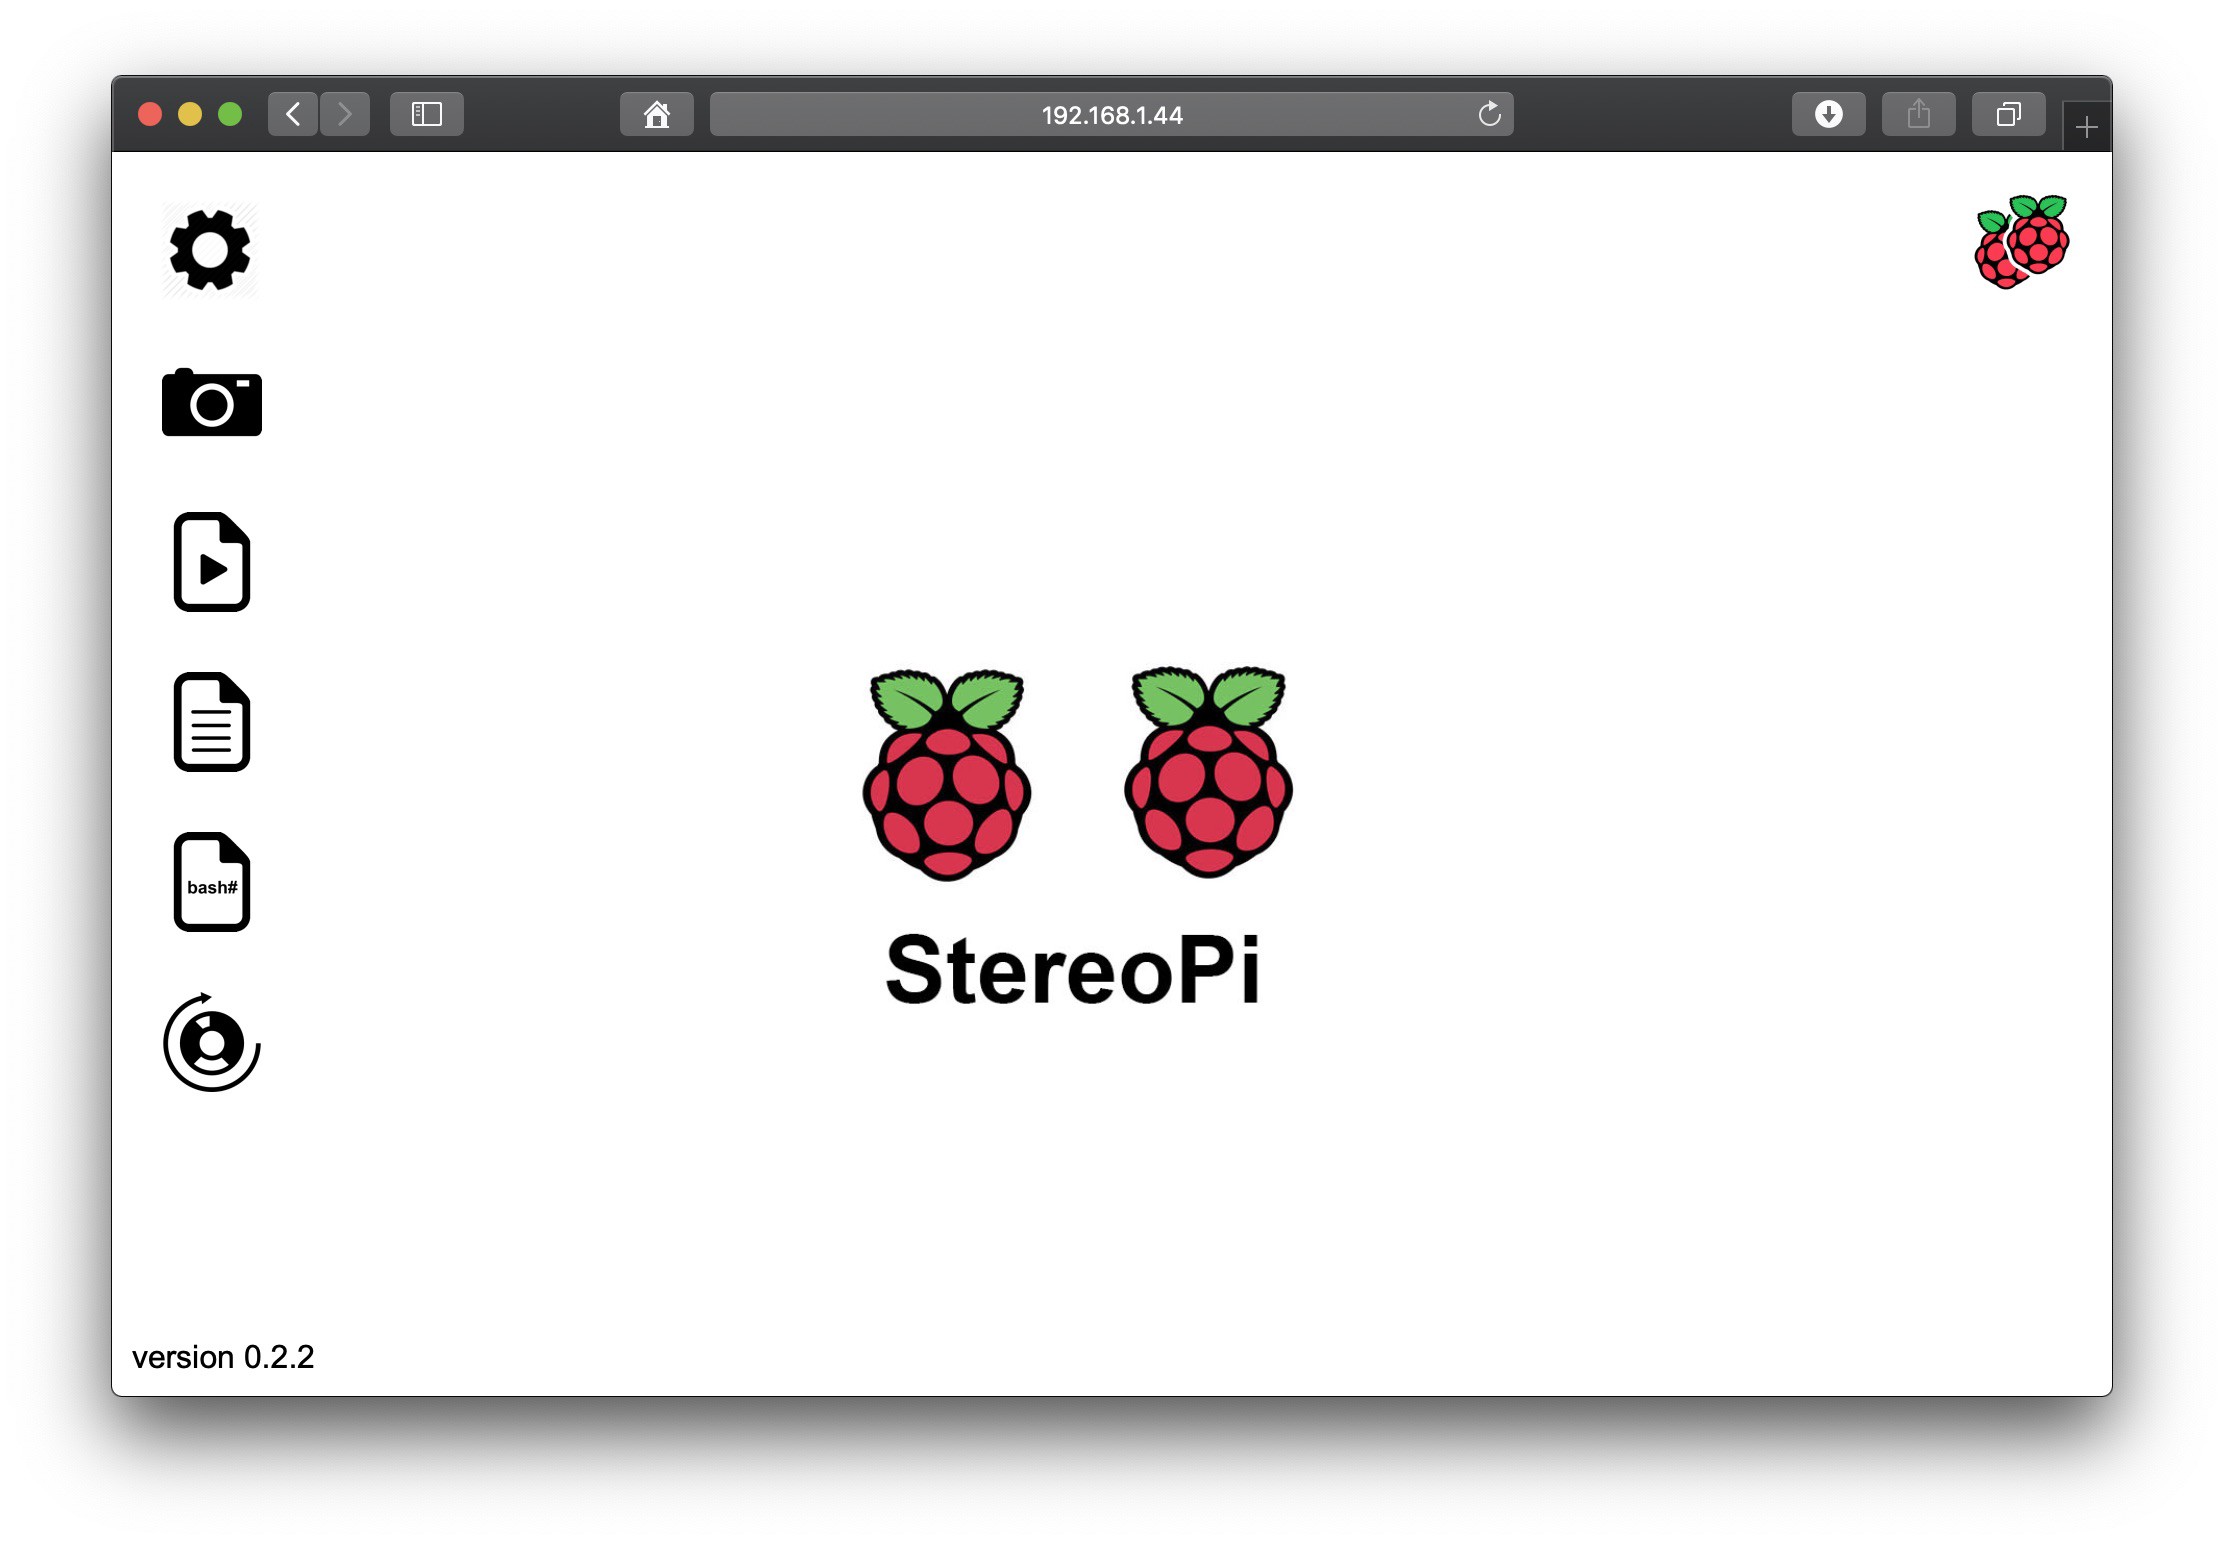
Turn on the video streaming mode so that you can see what the StereoPi cameras see.
Click on the gear, check the ‘Browser stream’ box, and then click the ‘Save’ button at the bottom.
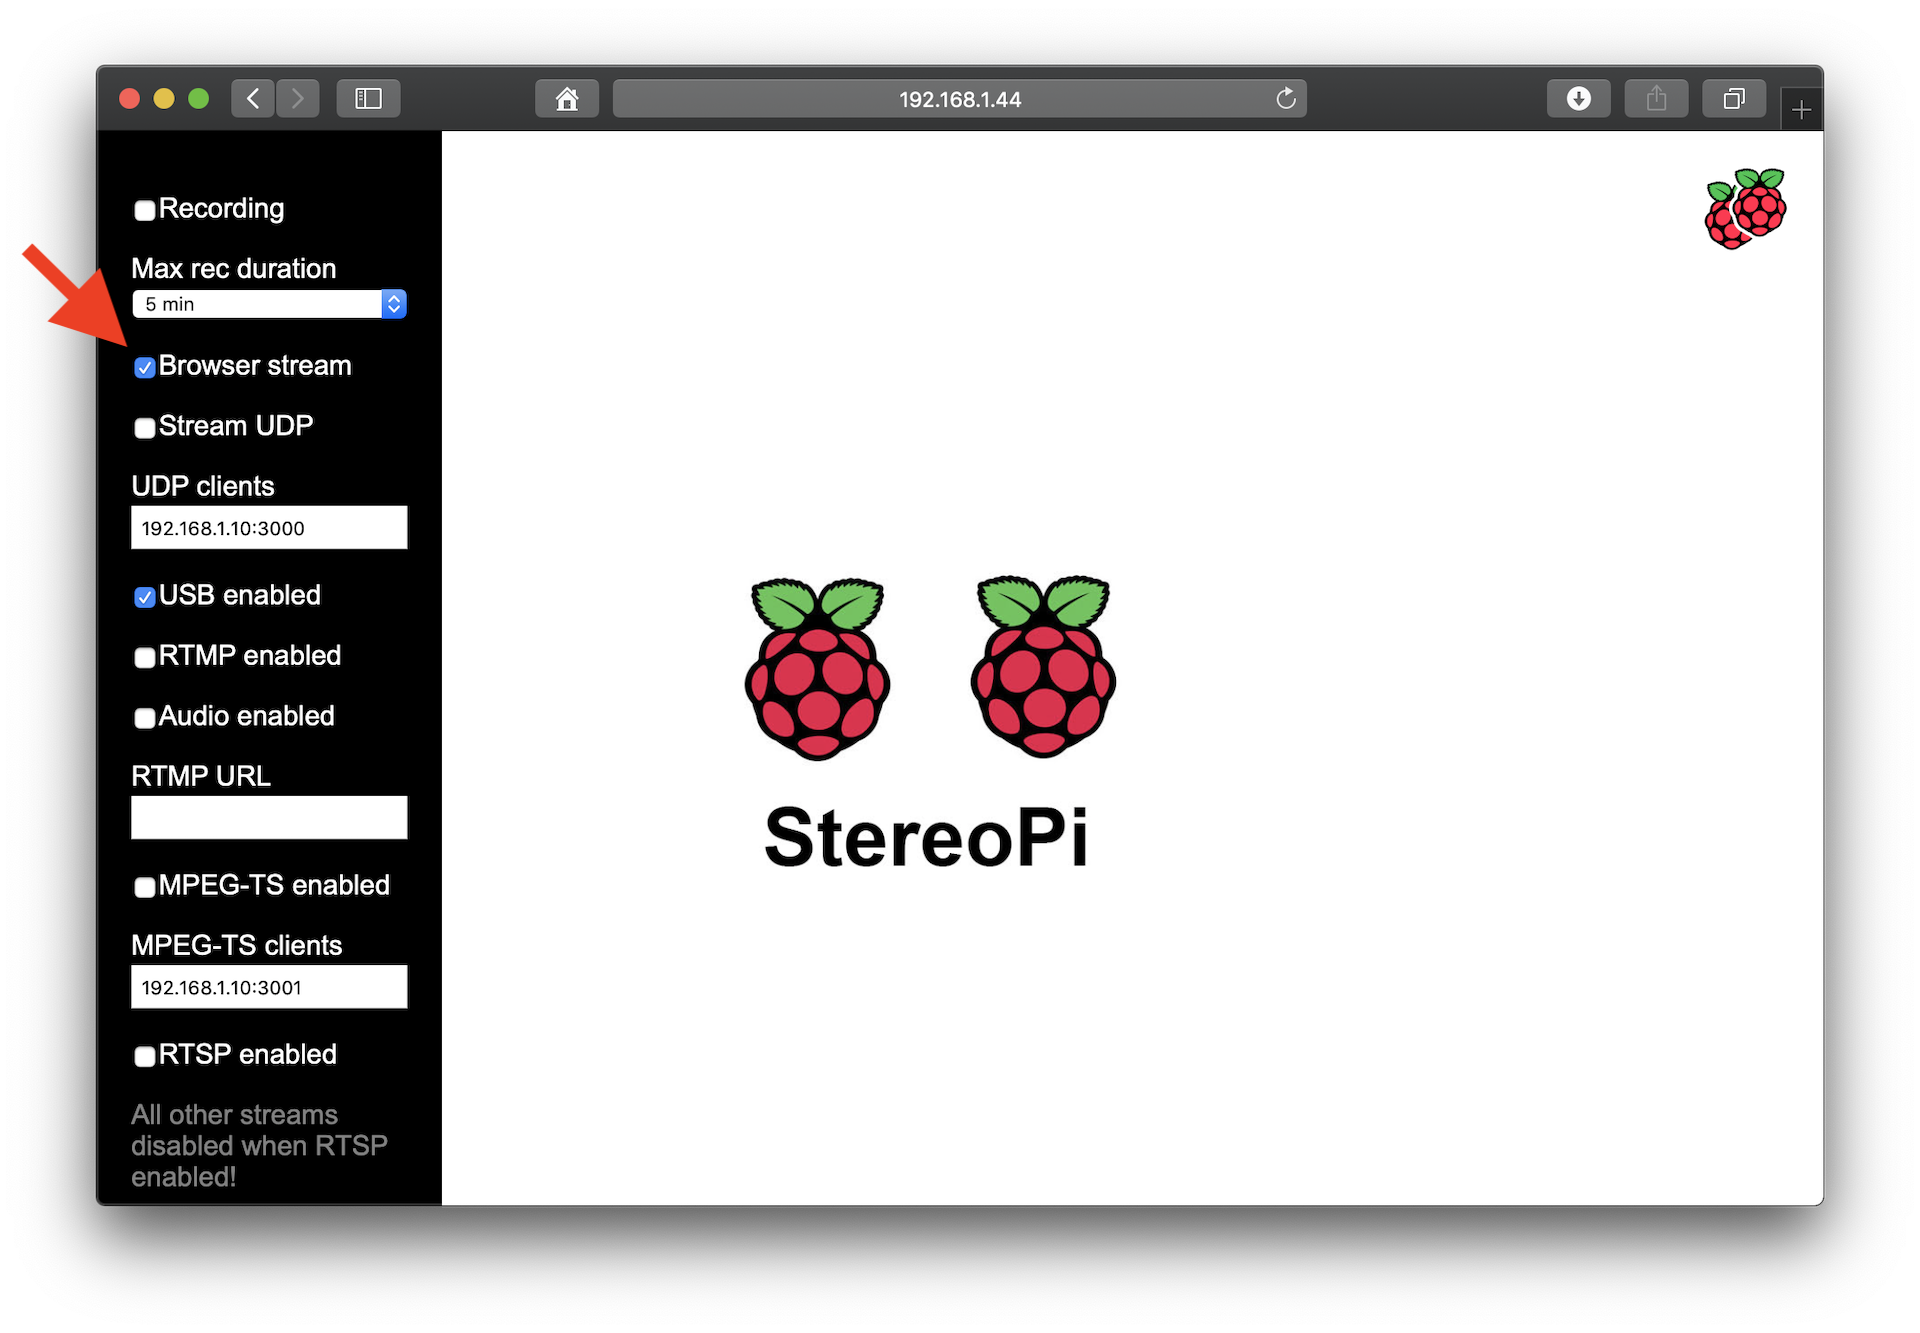
In a few seconds you’ll see the video stream.
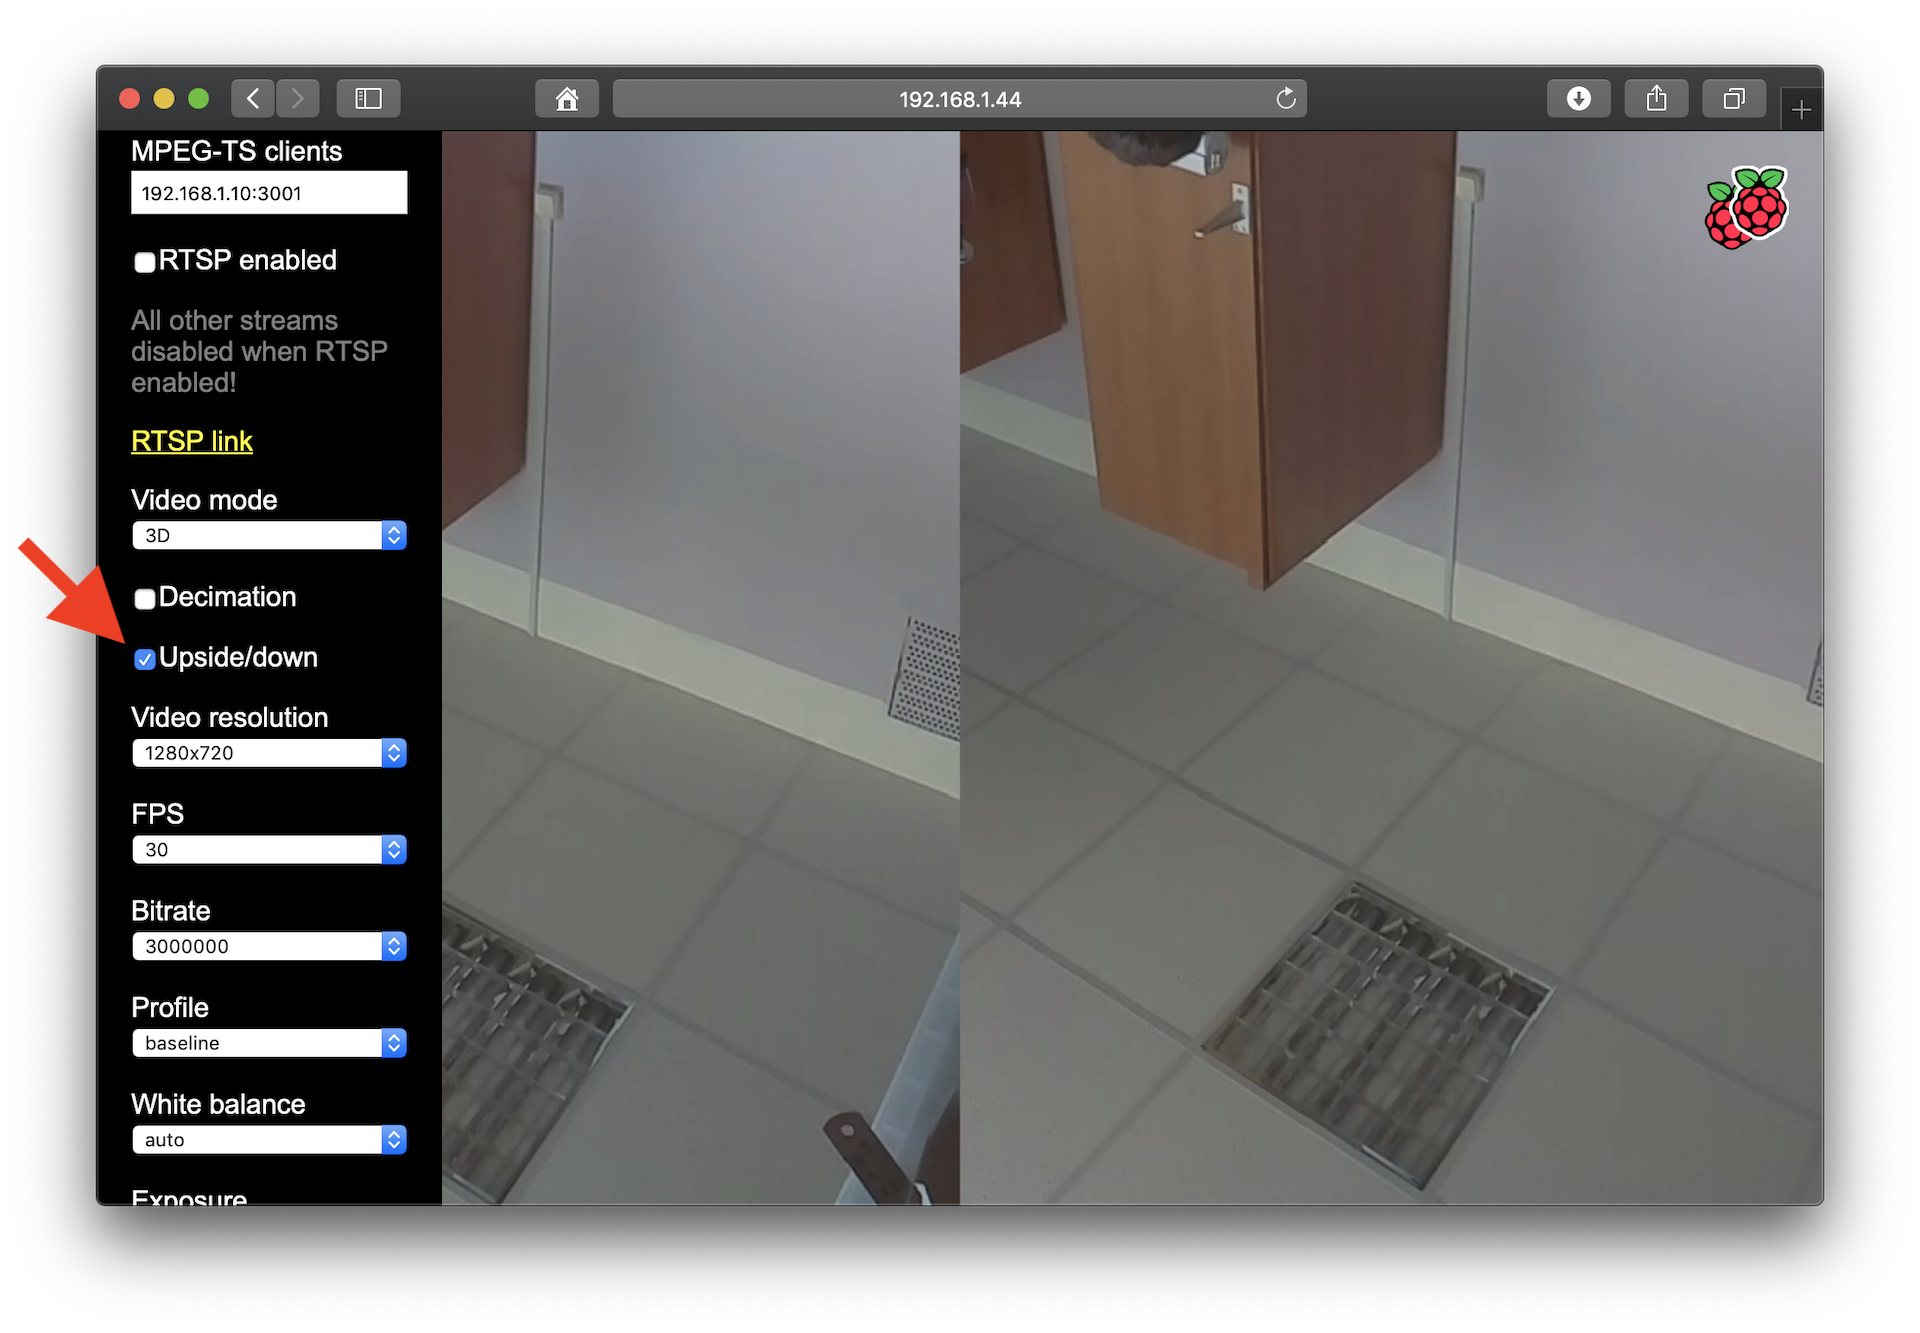
In my case, the video was upside down. So I went into the settings and checked the ‘Upside/down’ box:
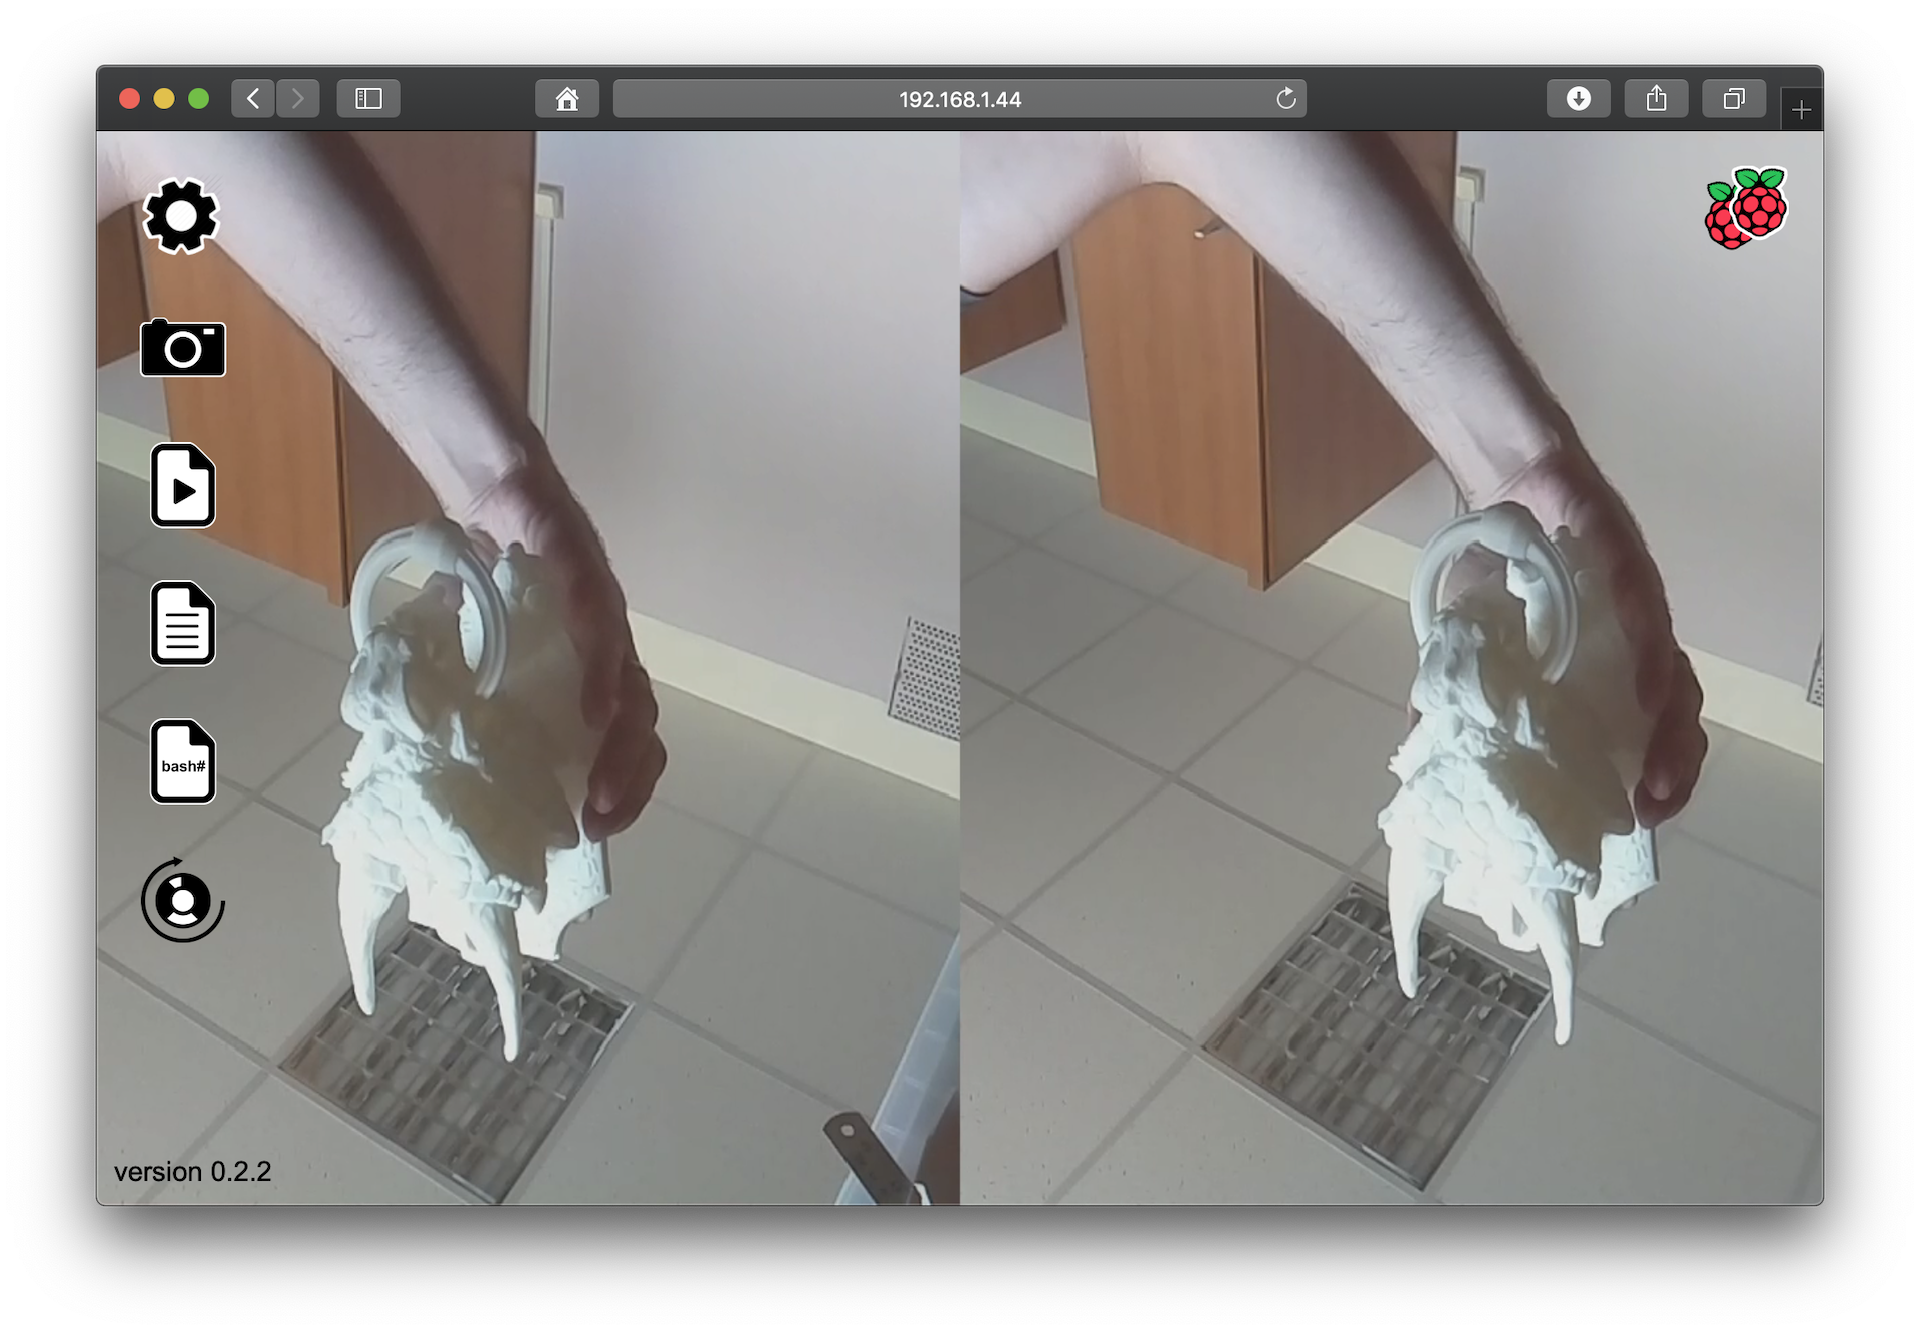
Here’s the result:
Note: if you plan to use a phone as a viewfinder, we do not recommend setting high resolution and video quality. In order for large video streams not to overload your WiFi and the phone’s processor (and, as a result, consume battery power), it makes sense to leave the resolution at 1280x720. The bitrate can be reduced to 1 megabit.
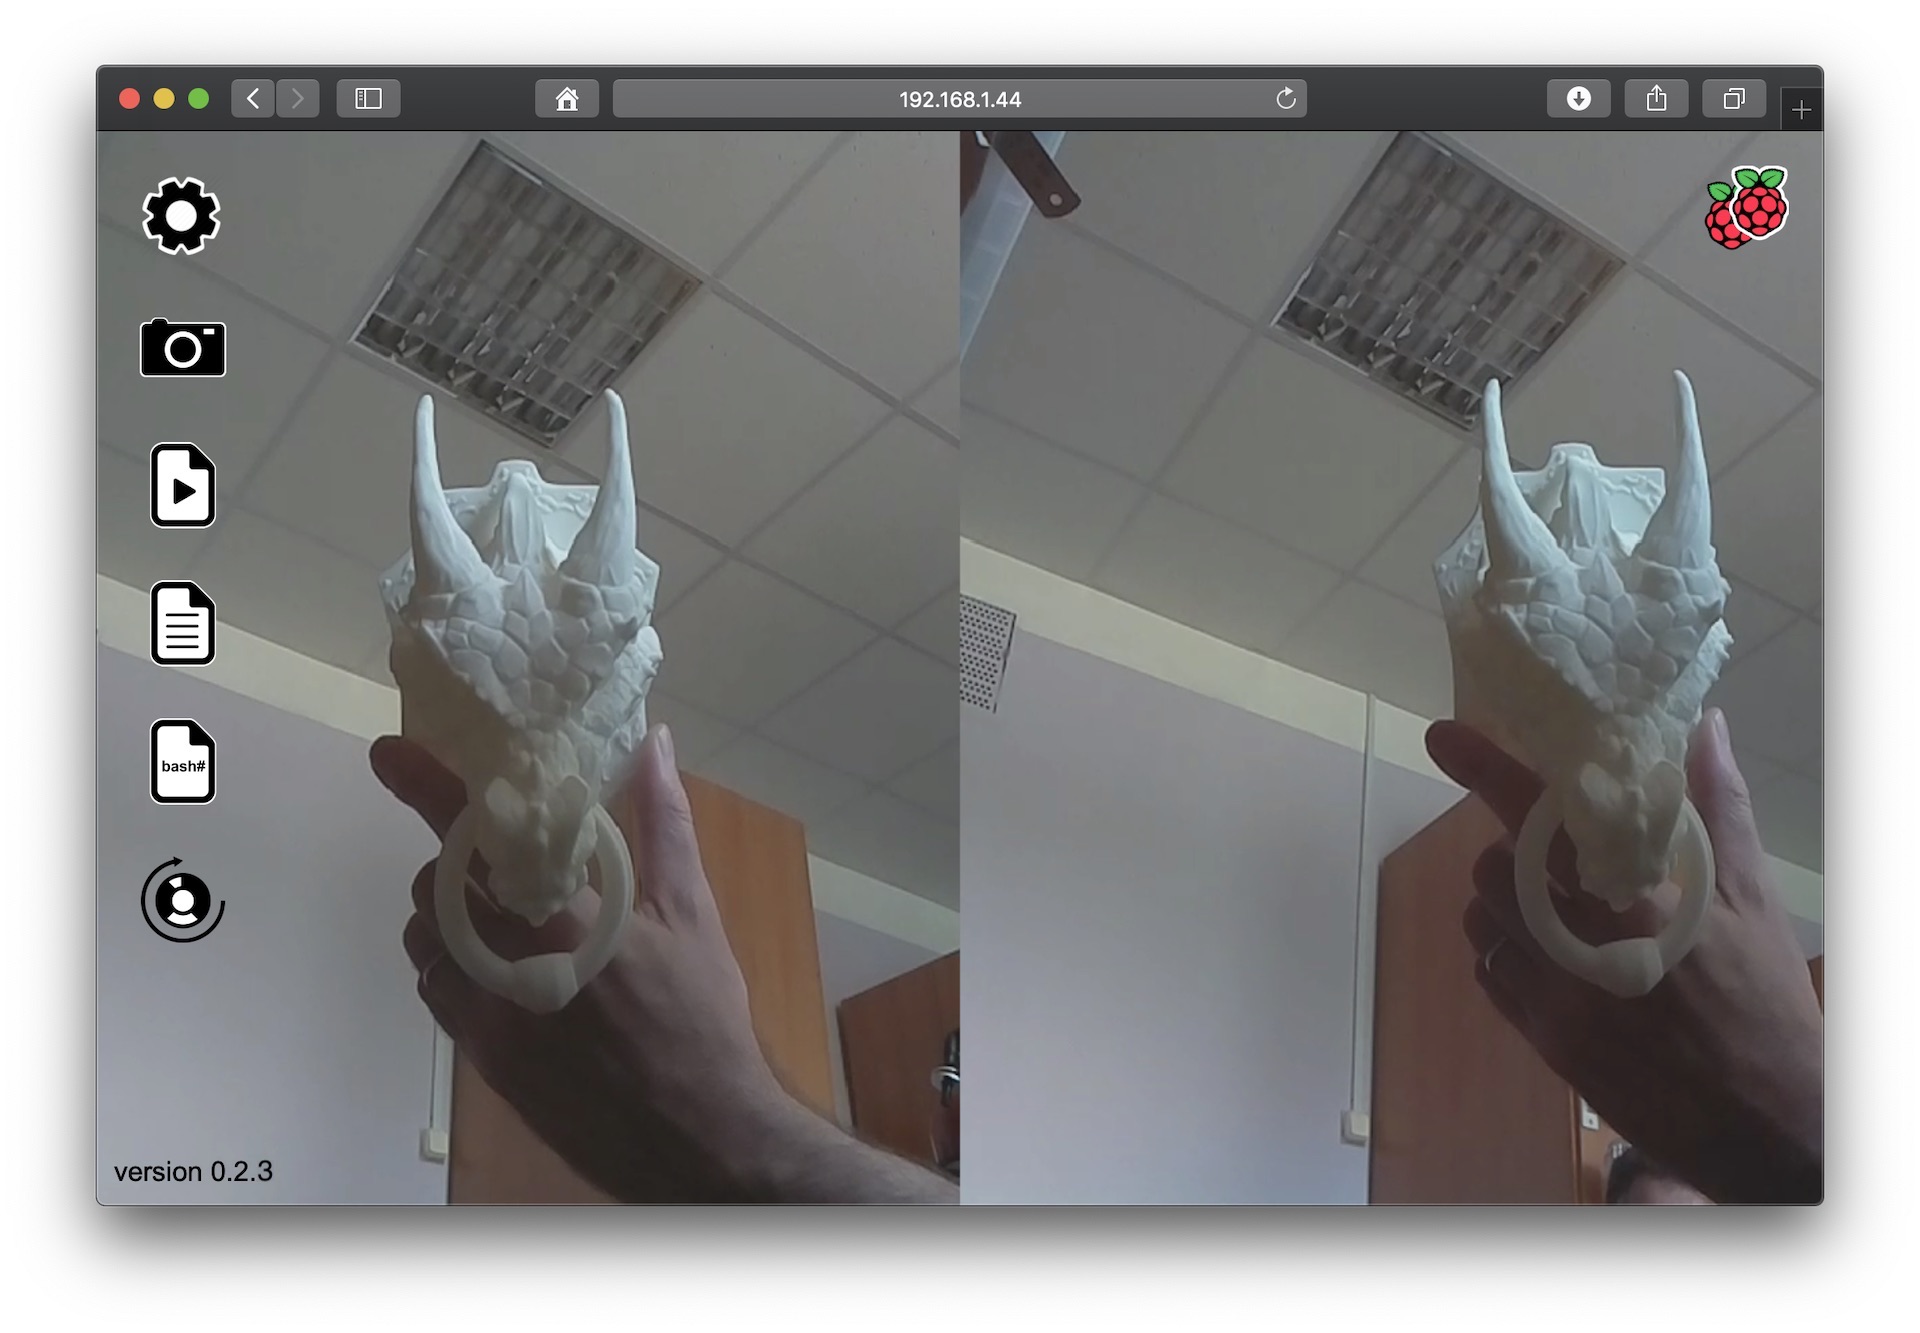
Now let’s check how the ‘Camera’ mode works.
Click on the camera icon (with the tooltip that says ‘Make a photo’). The system displays messages about the capturing process, writes the image to the micro SD, and displays a link with its name.
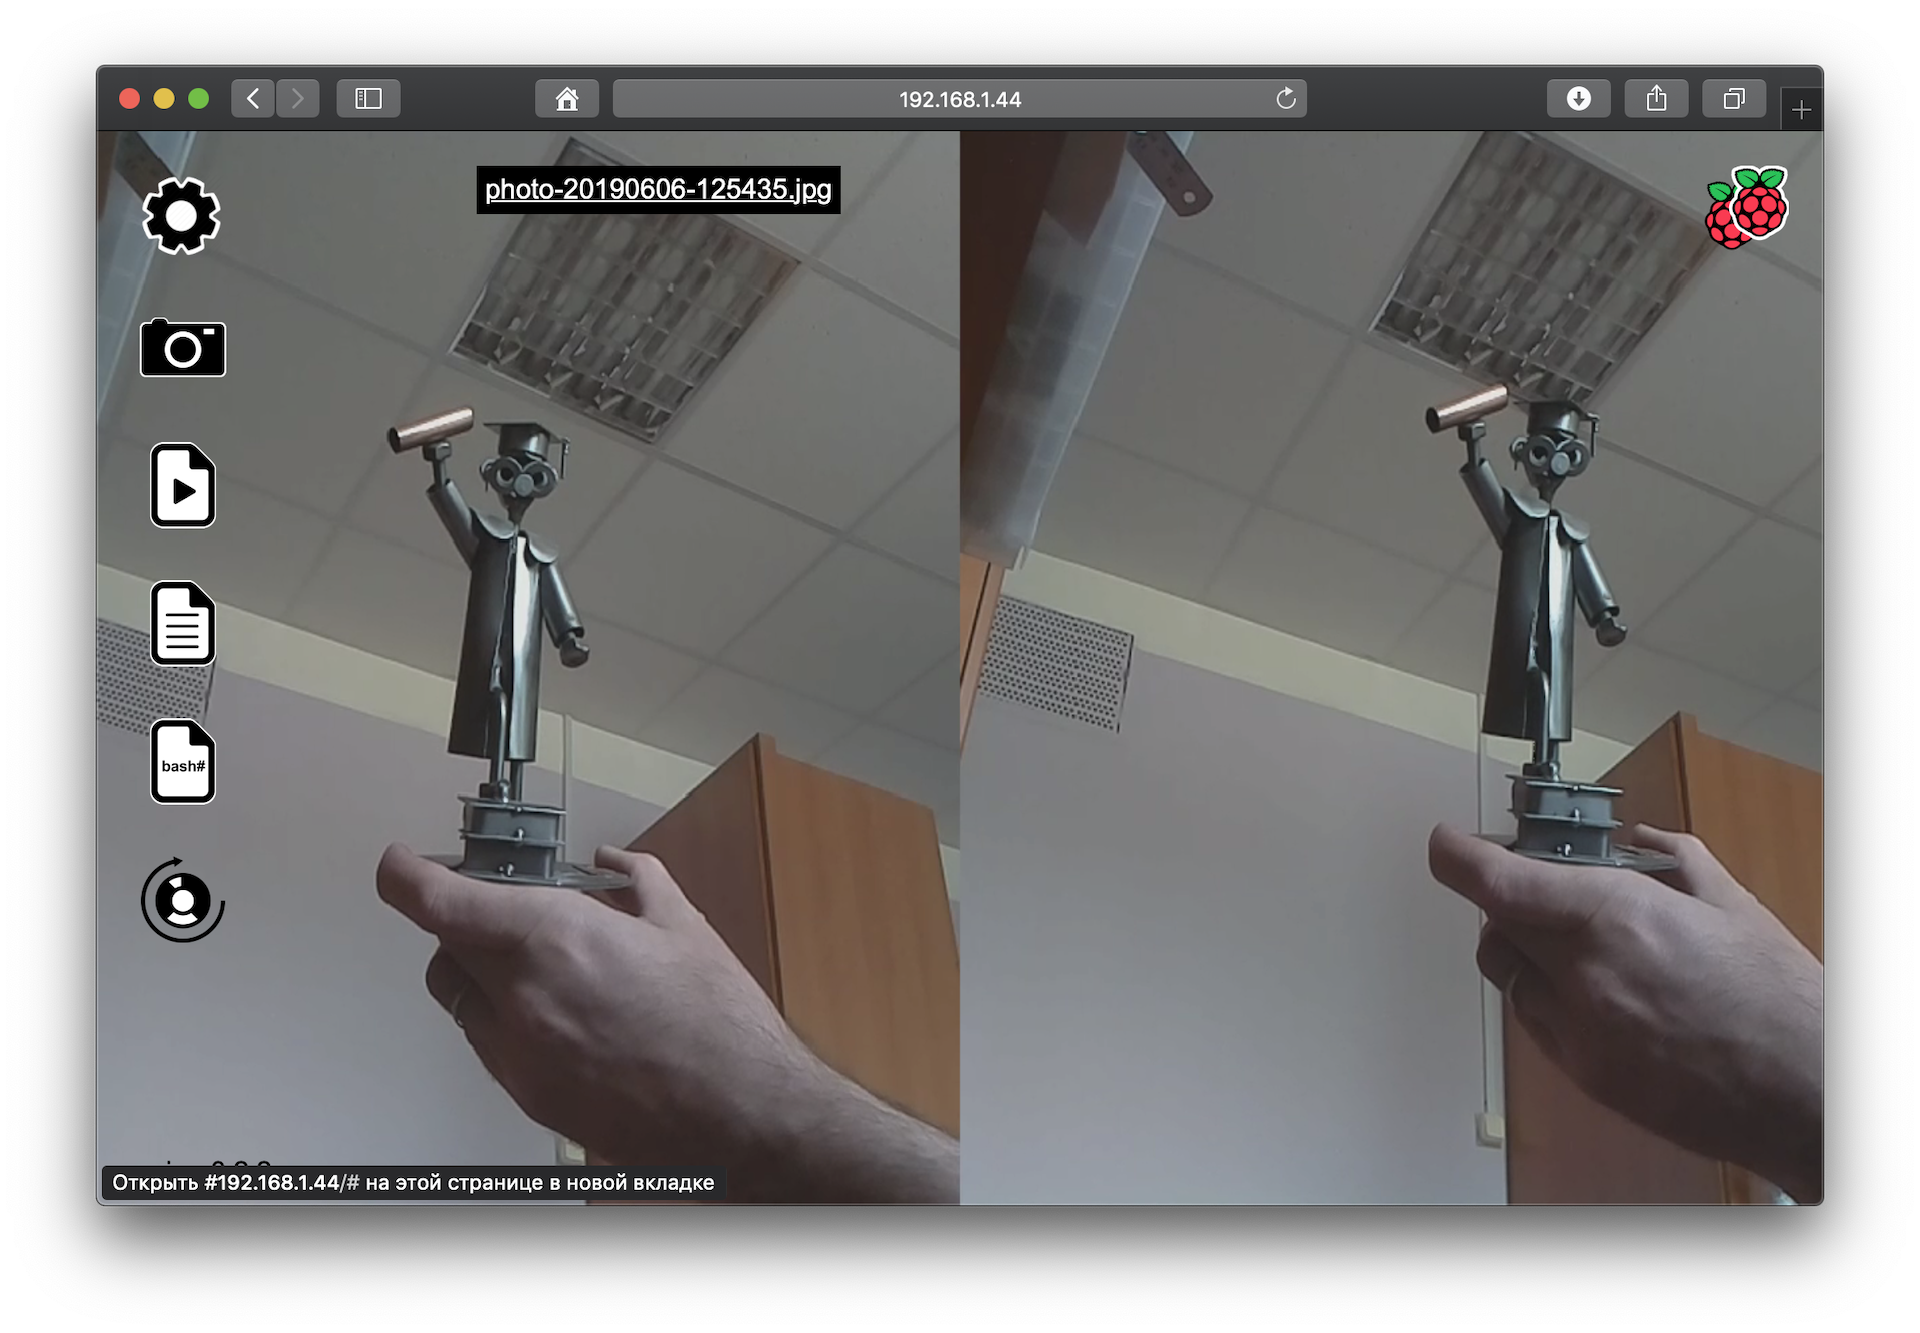
If you click on the link, the respective photo will open up.
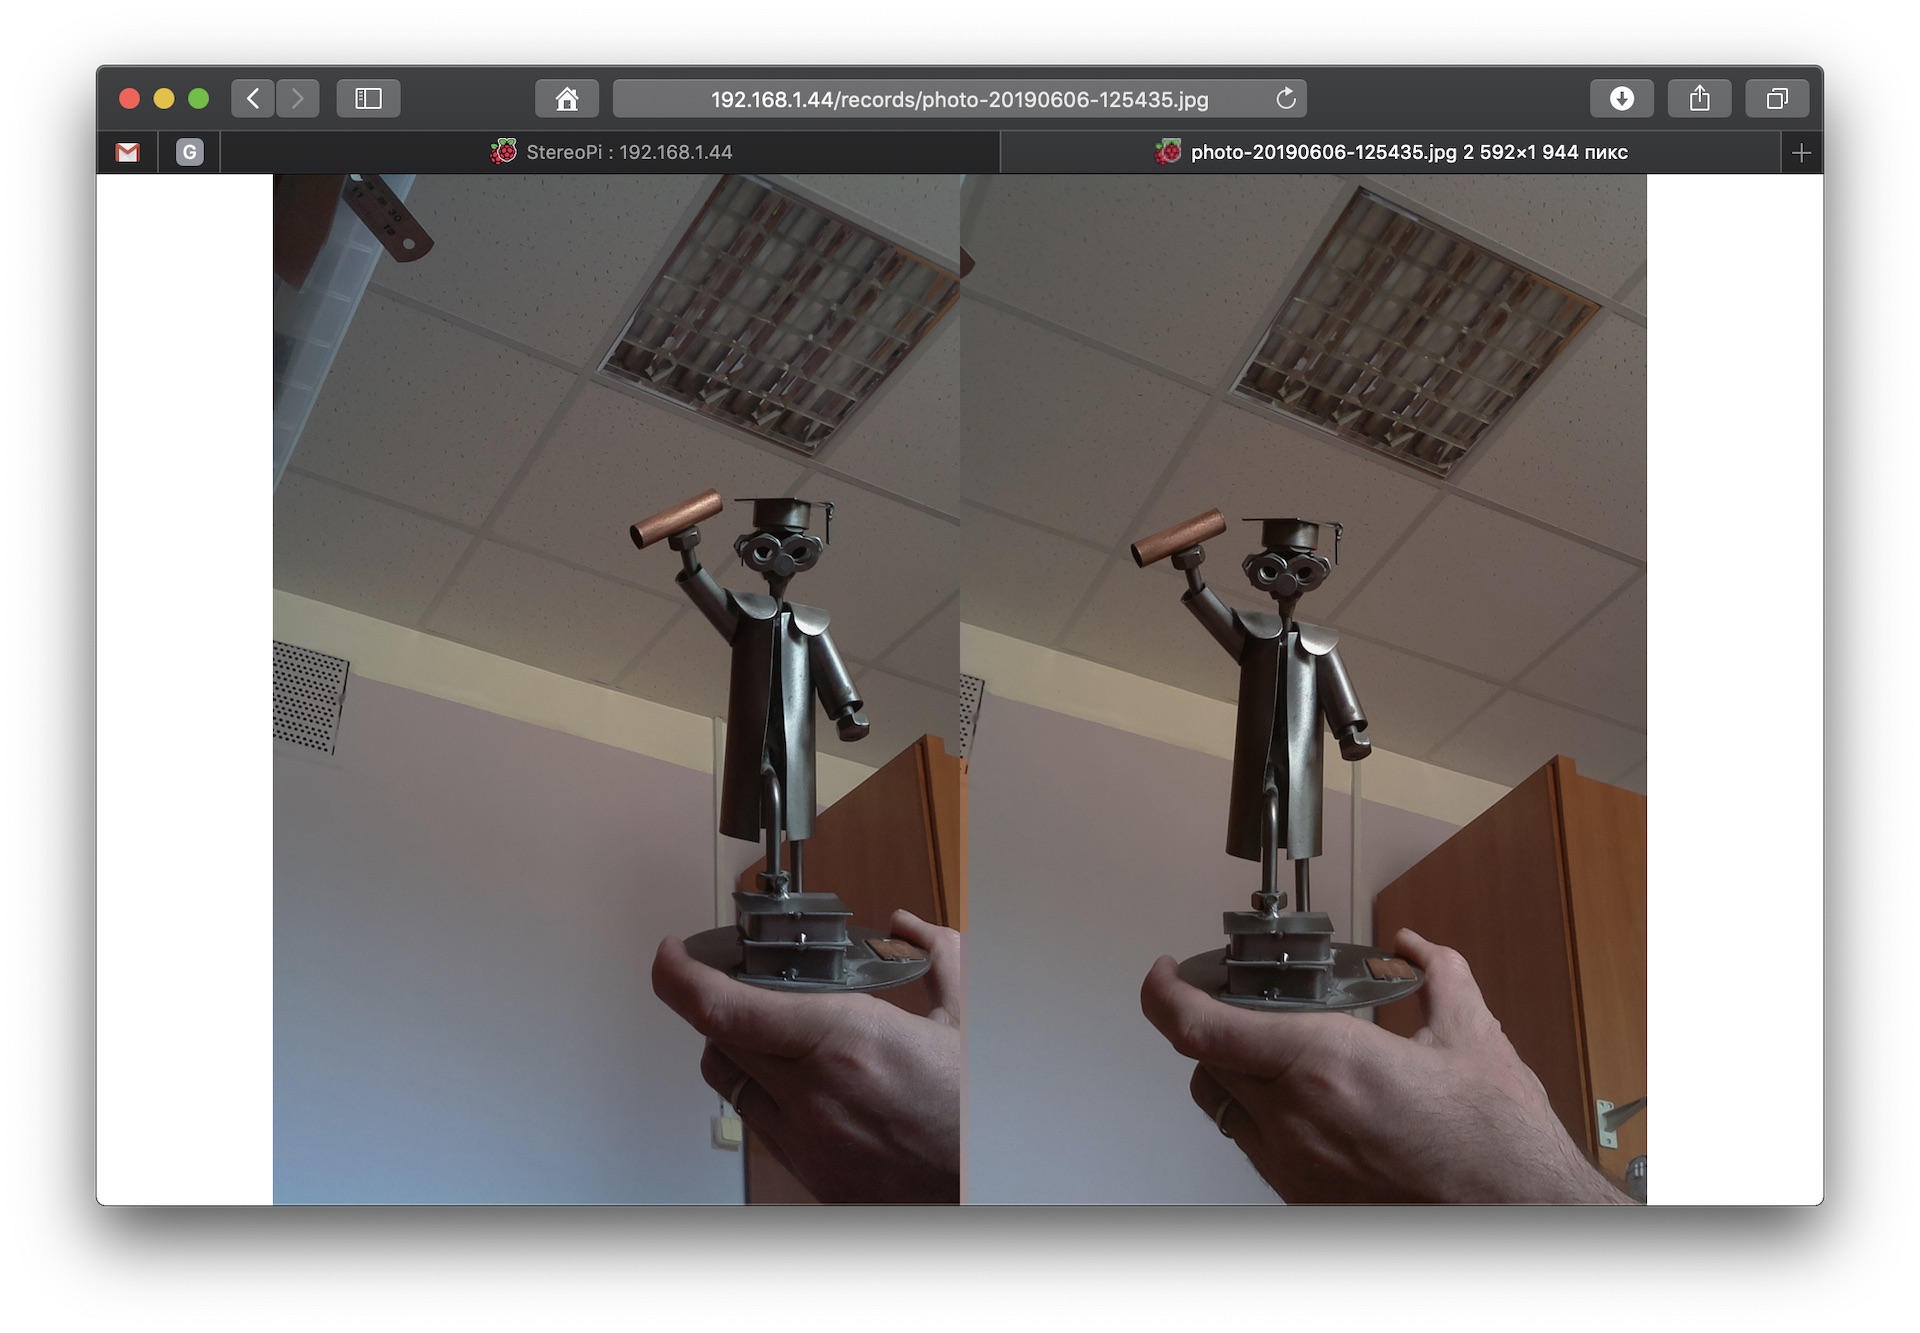
Note
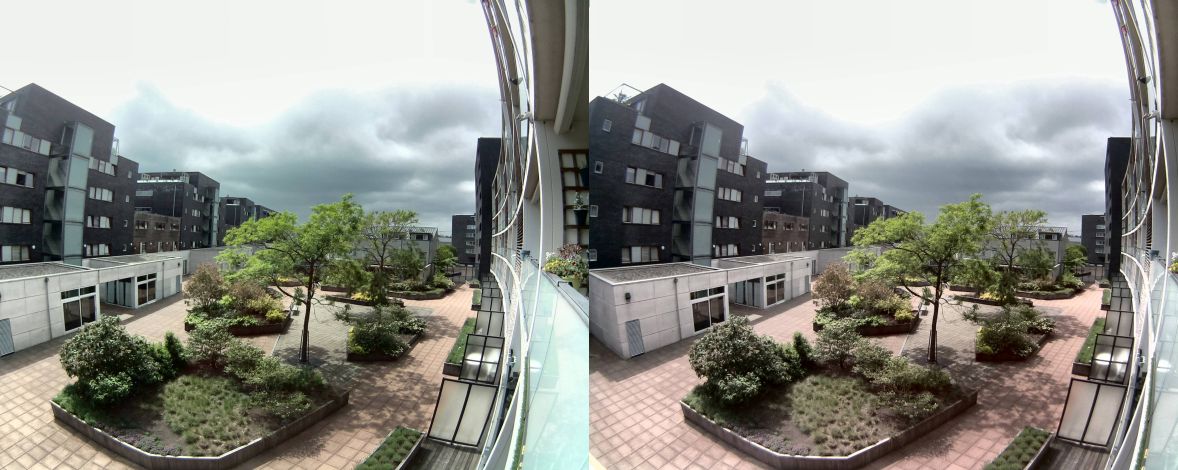
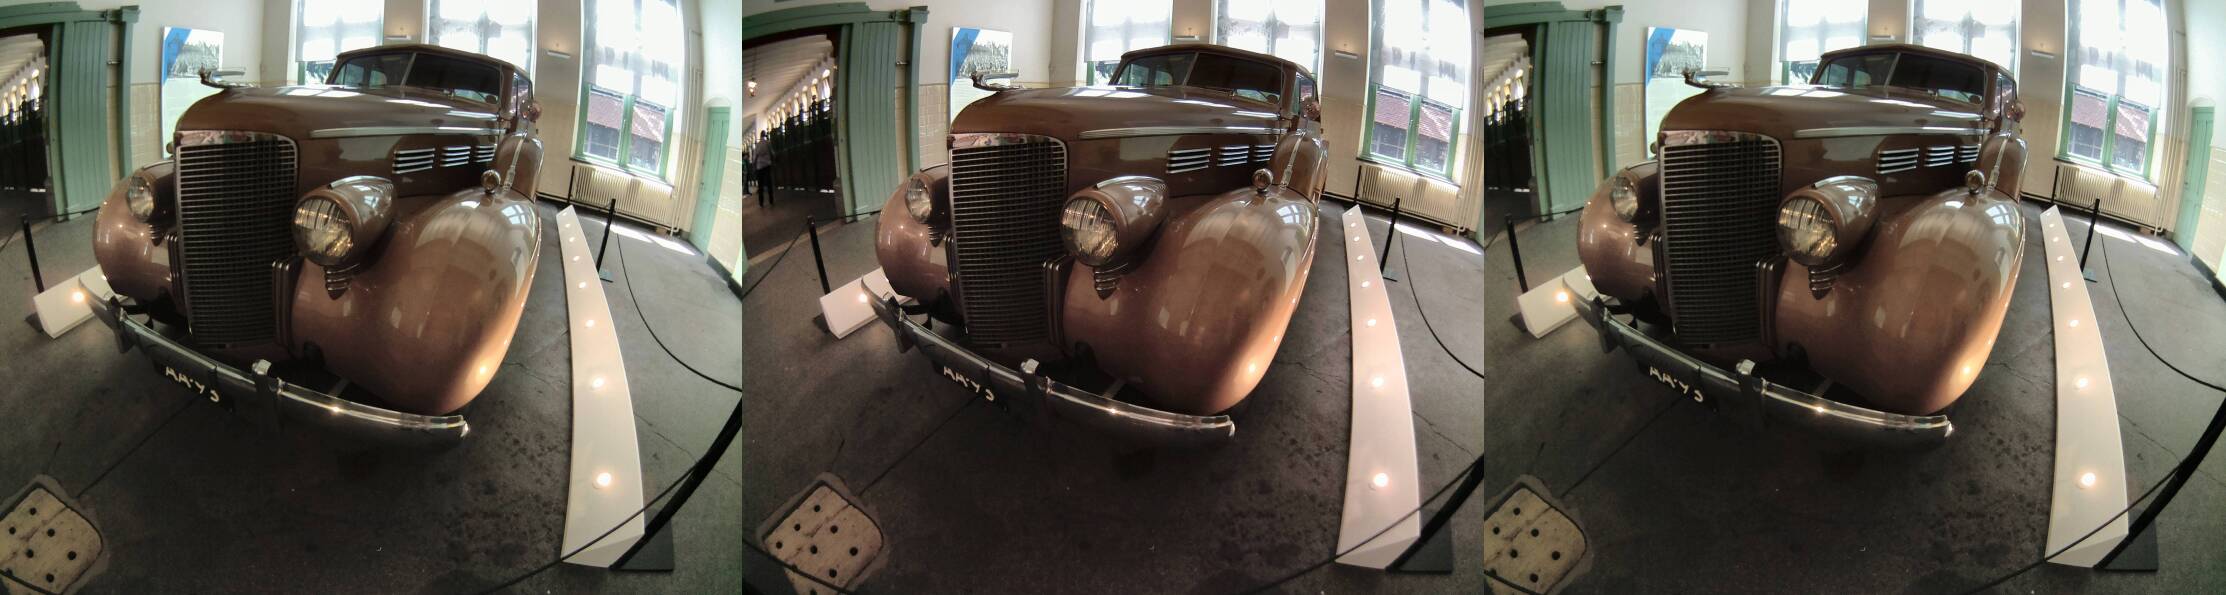
In this case, the system used the ‘Default’ photo resolution settings. This means that the final image fits into a frame with the maximum resolution for the camera (5 megapixels for V1 cameras). This is done by trimming each frame horizontally.
And this is what happens if you choose the ‘V1-full-size’ resolution setting. The final image has a resolution of 10 megapixels, as it is glued together from two 5 megapixel image:
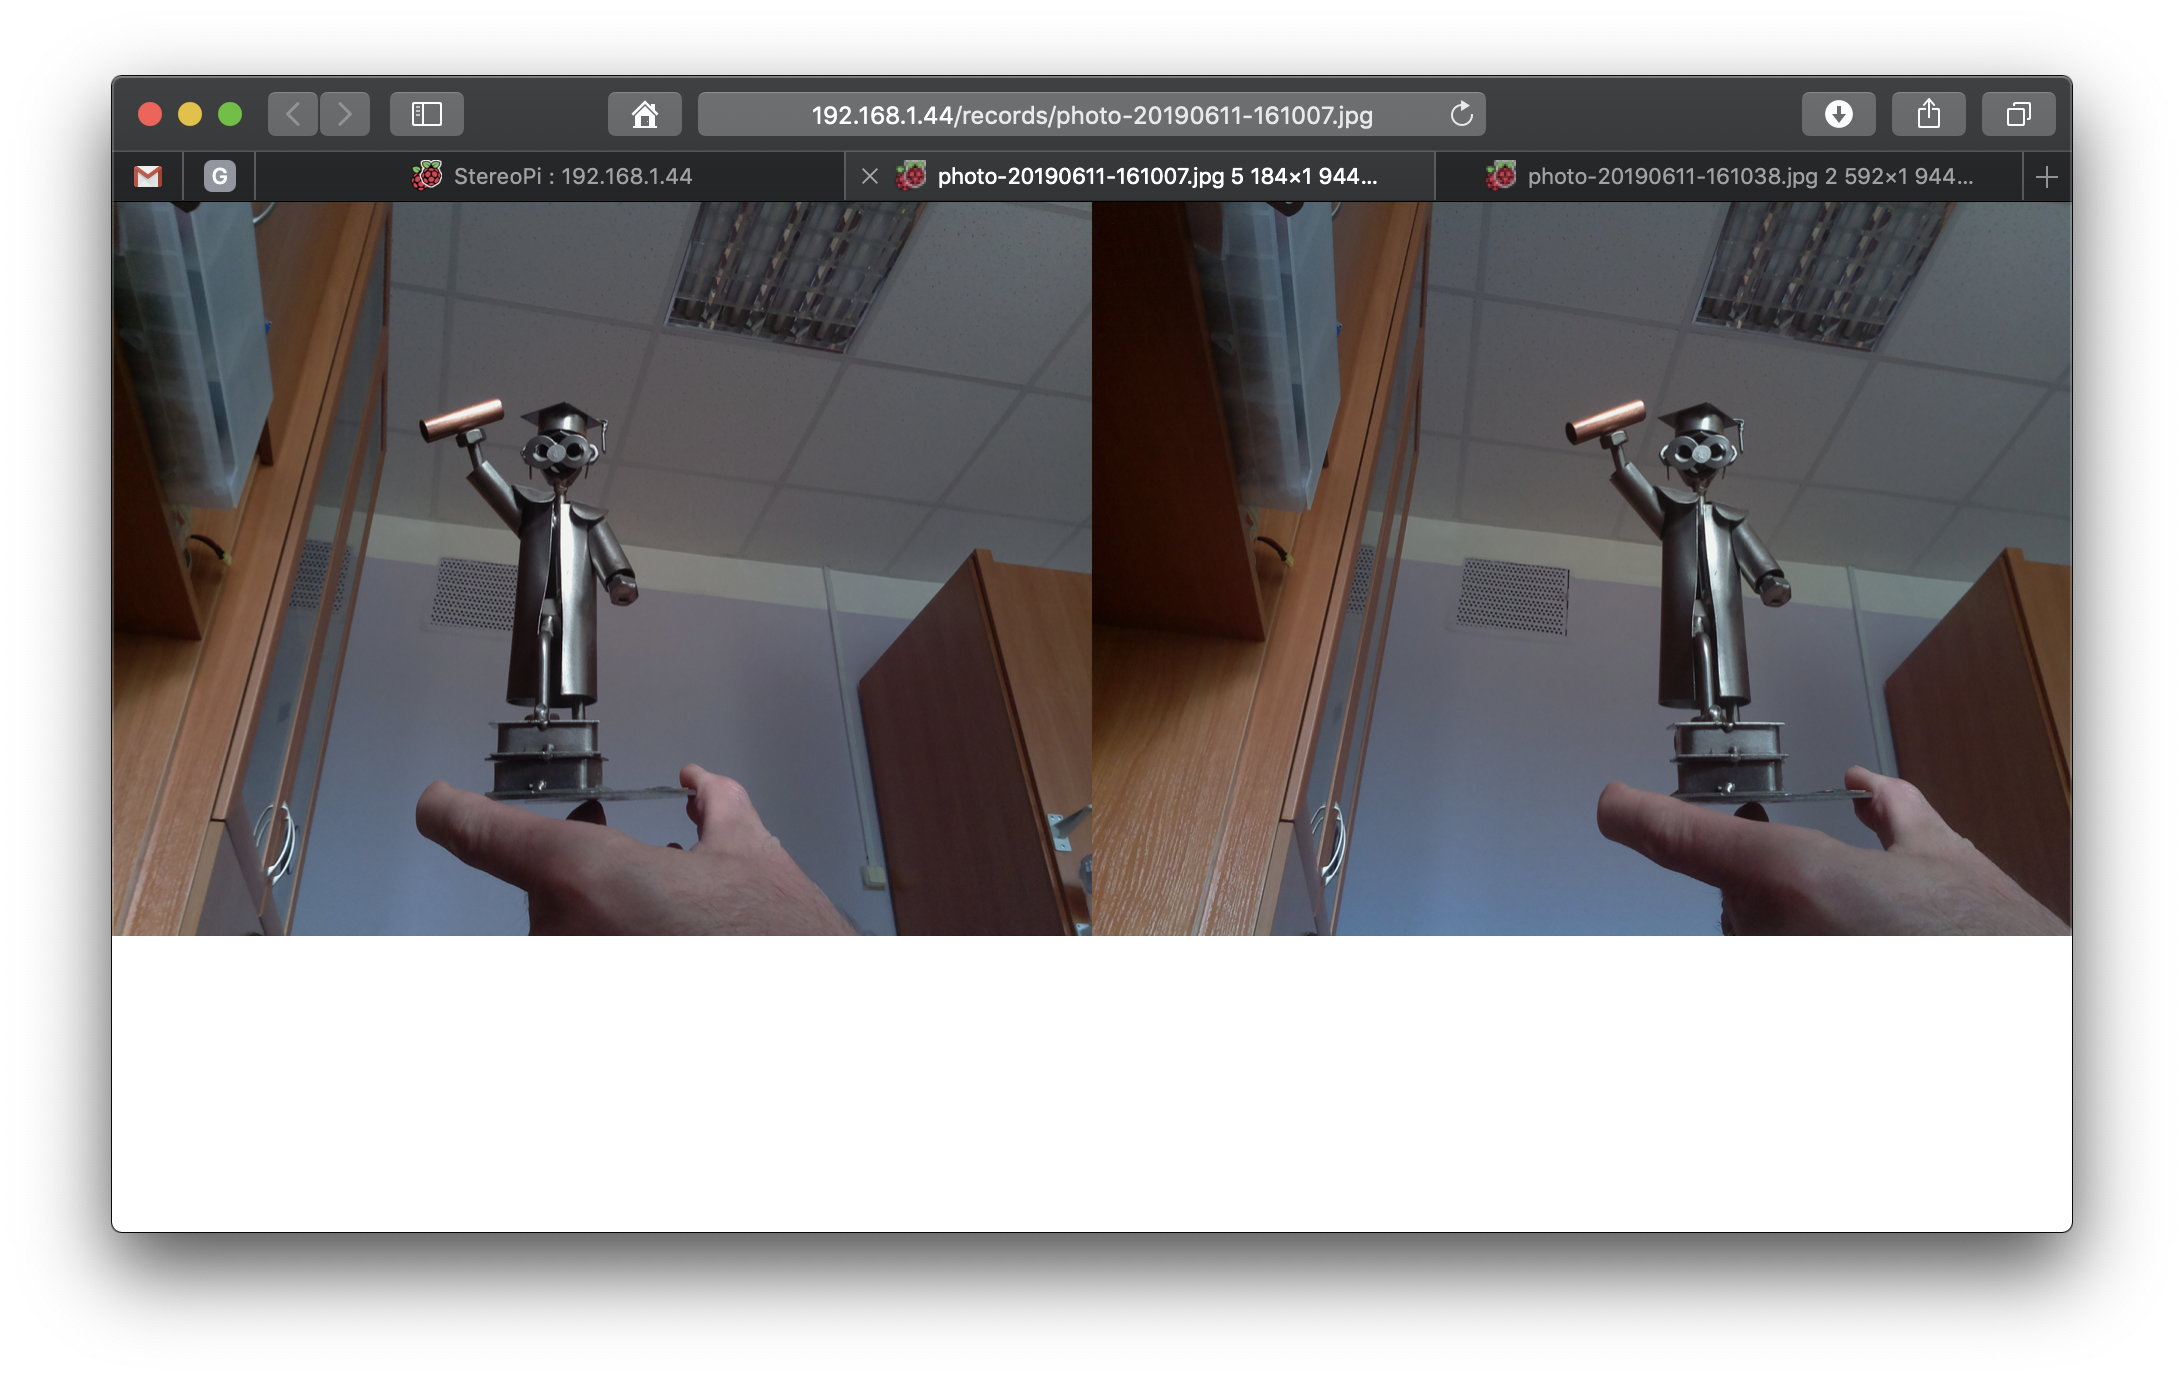
So the final choice of setting is up to you! ☺
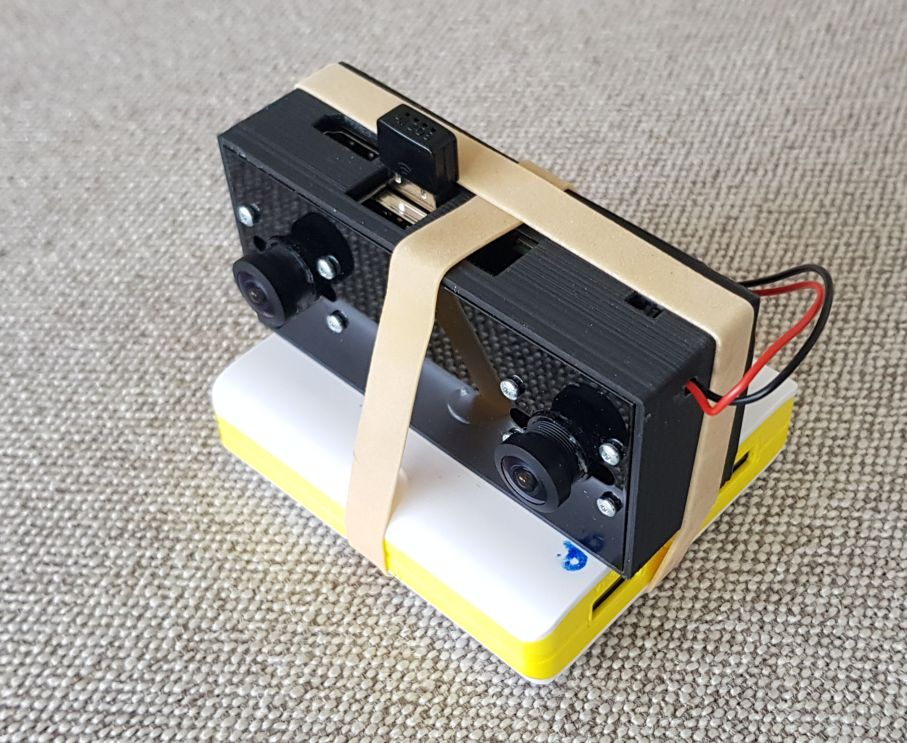
Assembling the device
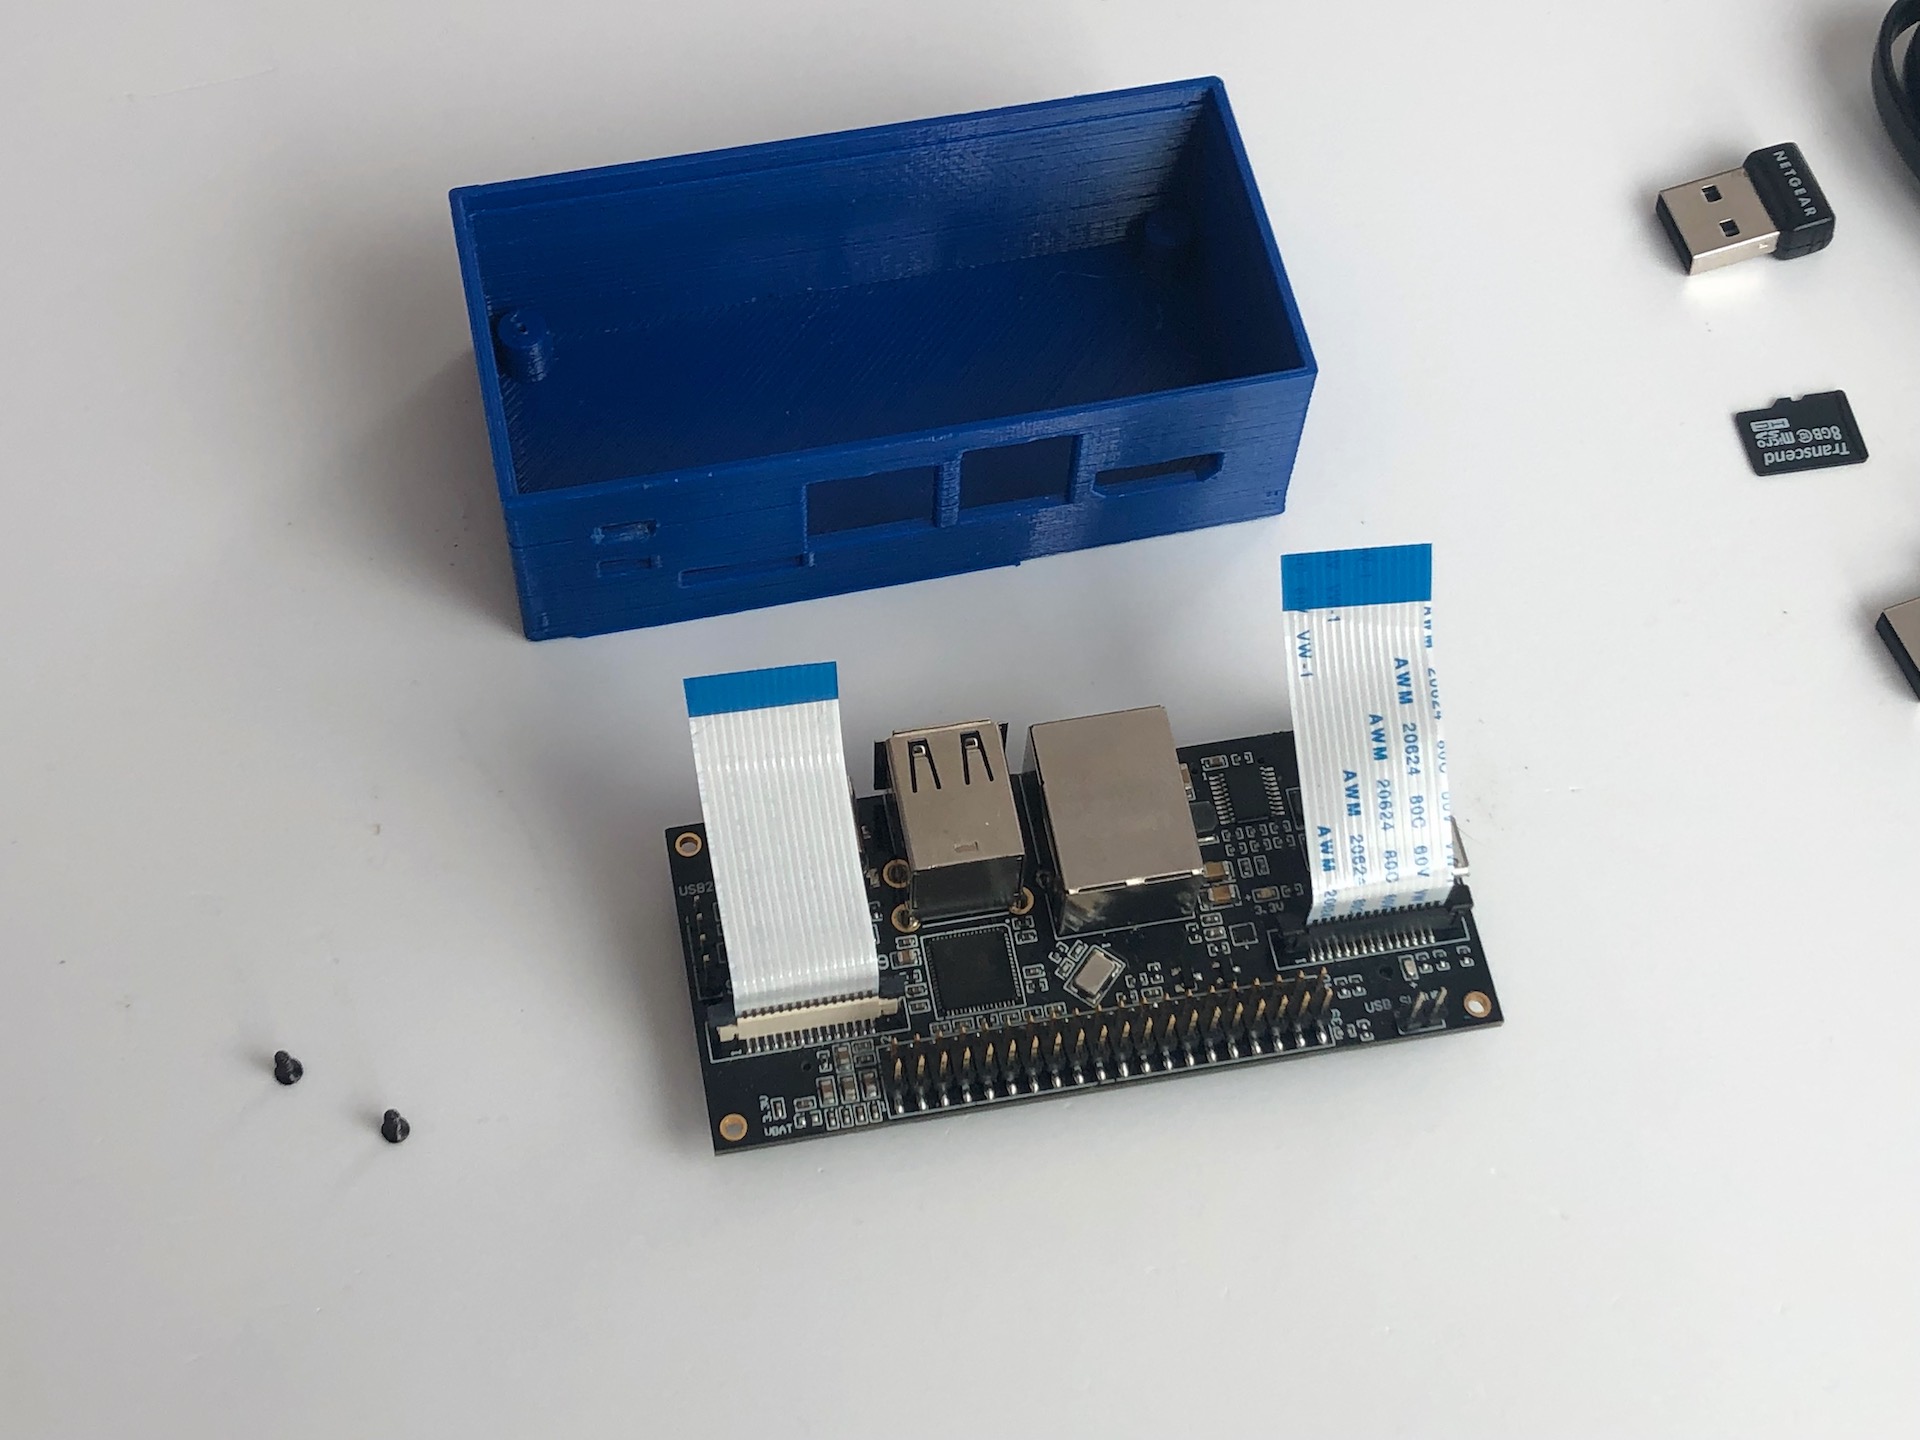
Install the flat cables into the connectors on the StereoPi
Tip: after installation in the case, access to the camera connectors is hampered by the cramped space. It’s more convenient to connect the cables to the connectors before installing the StereoPi into the case.
Check that the Compute Module is correctly installed in its slot.
After that, fix the StereoPi in the case and connect the cables to the cameras. Finally — install the micro SD and WiFi. If you plan to record video with sound — also install a USB microphone. Don’t forget to check the ‘Audio enabled’ box in the administration panel.
Finally, close the lid to complete the assembly. Now connect the power and check that everything works. If everything operates as expected, you can configure the WiFi settings with your mobile phone’s hotspot credentials, and check the device in mobile mode.
Note: keep in mind that on very old phones, displaying video in the browser can be a problem. If the video is jerky and ‘crumbles’ — it’s most likely a performance problem.
The first test photo shoot
After a full check, you can go to a beautiful place somewhere nearby and take a few test shots. In the process of photographing, remember the basic rules and advice given in our first article (The Art of Stereoscopic Photo, part 1).
- During your first outing, you can also decide on the most convenient work scenario for you.
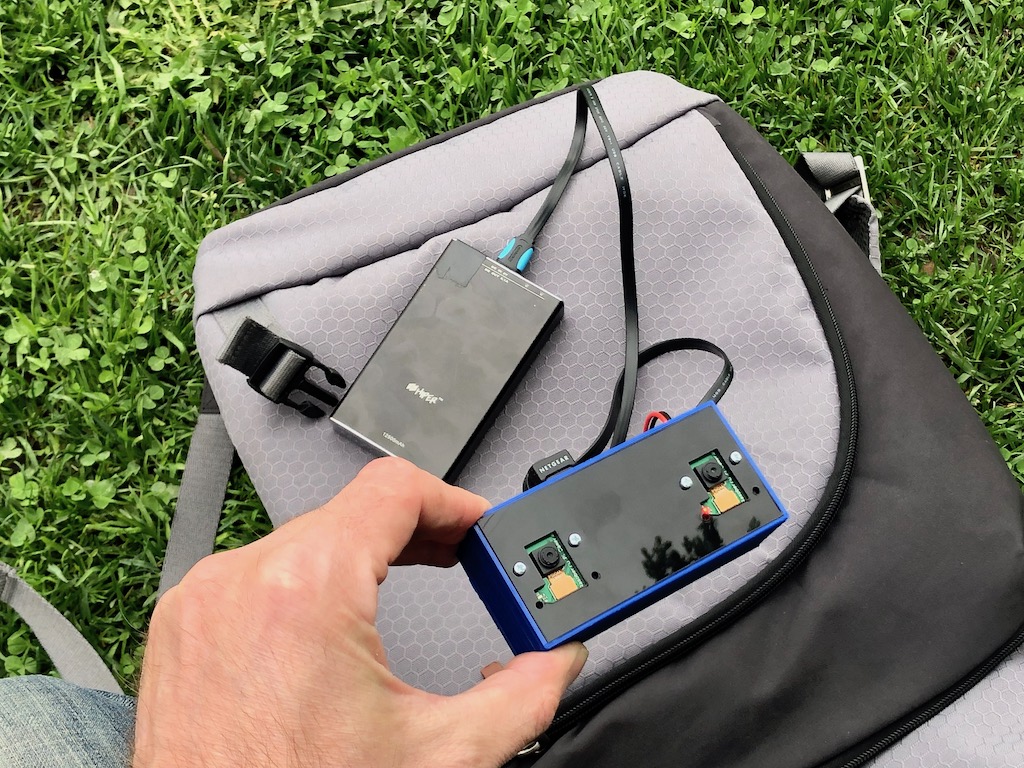
- For example, in my case it turned out to be convenient to keep the power bank in my pocket. I also noticed that the most comfortable modus operandi is holding the StereoPi pressed against the back of the phone. In this case, taking pictures is almost like the usual process of photographing with a mobile phone.
- I placed the StereoPi with its connectors up (so that the WiFi module was visible). To do this, I changed the settings and ‘flipped’ the image in the admin panel (as described above in this article).
- When changing places, I did not switch the StereoPi off, since my external battery lasts for more than 7 hours of continuous camera operation. But I switched off my mobile phone, since the constant display of the video stream in the browser greatly affects battery consumption.
- During the first tests, I periodically opened the file browser in the administration panel to make sure that the captured photos were actually being saved.
If you accidentally zoomed the page and can’t return it to its normal state — just close and reopen the tab. With my iPhone, I just typed stereopi.local in the browser.
Processing the photos
So you came back with precious photos from your first session. The quickest way to download all the photos is to extract the micro SD from StereoPi, put it into your computer, and copy the folder containing them to your hard drive.
The second way is to connect the StereoPi to your home WiFi, and download the photos through the file manager in the control panel.
In general, photo processing is an art of its own. I am not an expert in photography, so I will not touch on the subject of color processing (brightness, contrast, white balance, and so on), so as not to accidentally set foot on what is holy ground for many. I assume that everyone will process the pictures to their own taste! ☺ I’ll just stick to correcting the stereoscopic defects arising from the non-ideal camera axis alignment. To do this, I use the StereoPhoto Maker app.
- Launch the application
- Click on ‘Open File’, and choose side-by-side parameters
- Point to the photo to be processed
- Click on ‘Automatic Alignment’
- Voila! Save the result
You can also process a group of files in bulk like this.
Here is a short screencast video. It shows first the automatic alignment of one photo, and then of a group of three pictures.
Tips for advanced users
1. Advanced photo settings
Camera support on Raspbian includes a ton of options (brightness, contrast, white balance, and so on). These are described in detail in the Raspberry Pi Camera documentation. If we added all the parameters to the administration panel, it would become indecently large.
But if you want to apply some of them, the easiest way to do this is to add the raspistill parameters you need to our photography script that can be found at this location:/var/www/html/make_photo.php
The line you need looks like so:shell_exec('raspistill -n -t 500 ' . $VIDEOMODE . $UPDOWN .
$SWAPCAMS . $PHOTO_RESOLUTION . ' -o ' . $path.$filename);
To edit the file, you can use the editor built into our administration panel.
Important! Before editing, make sure you click the ‘Unlock FS’ link at the top to make the files available for editing and saving!
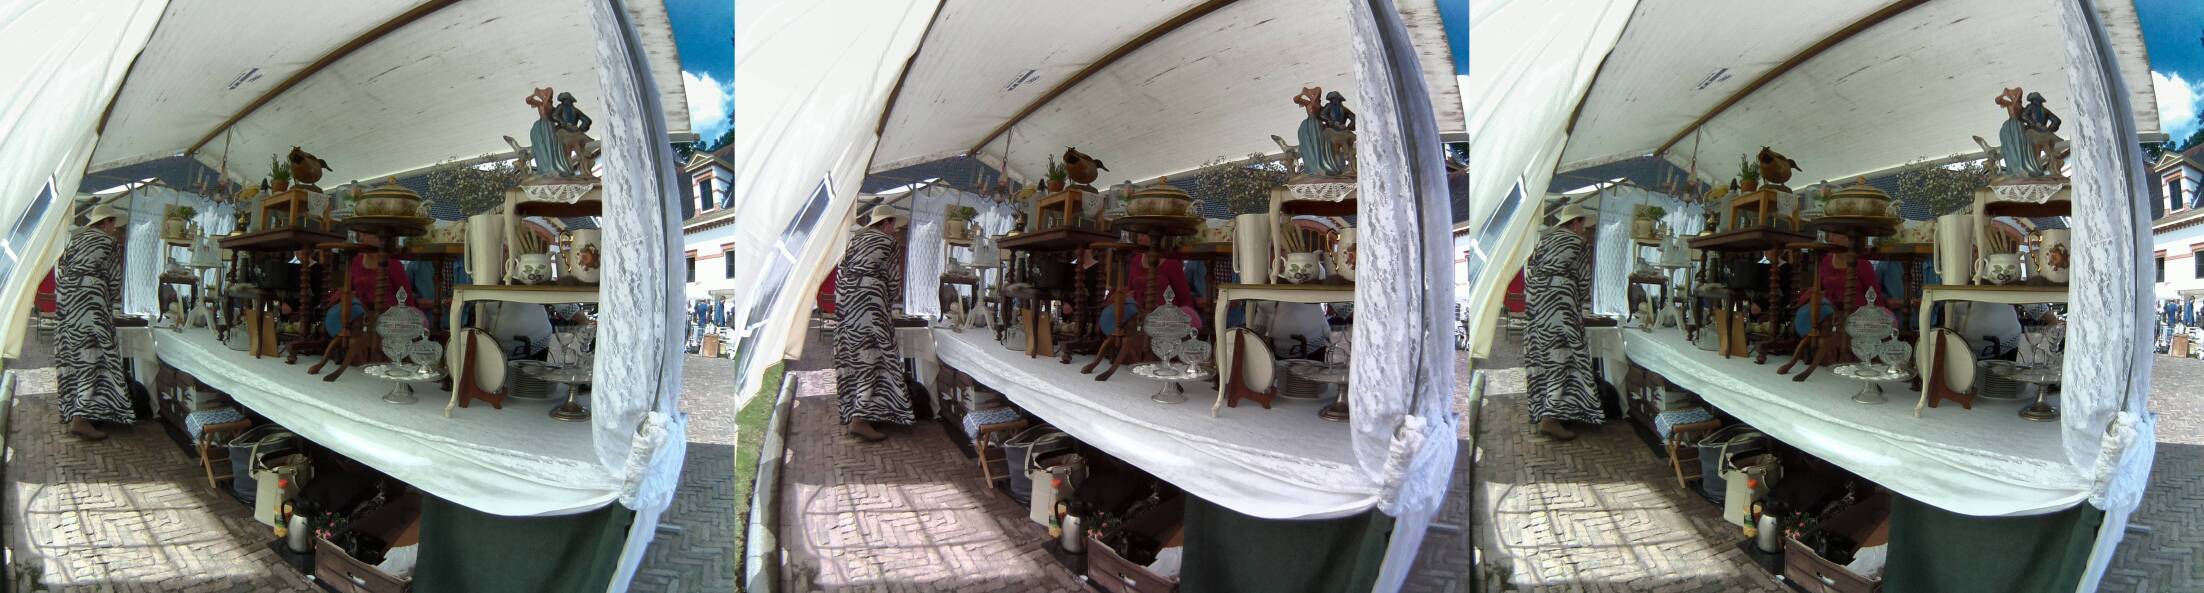
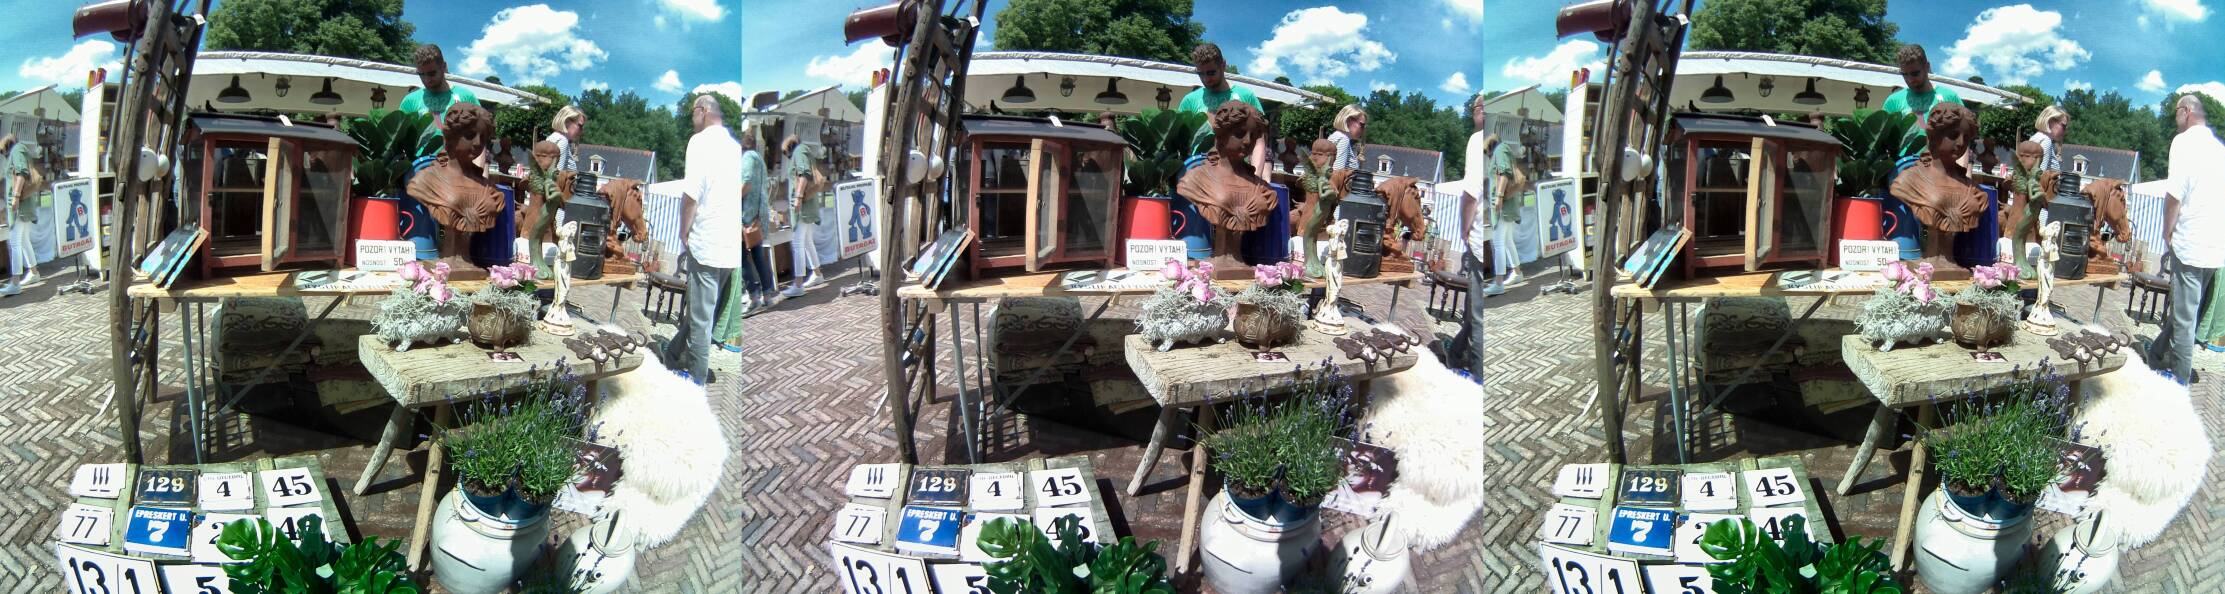
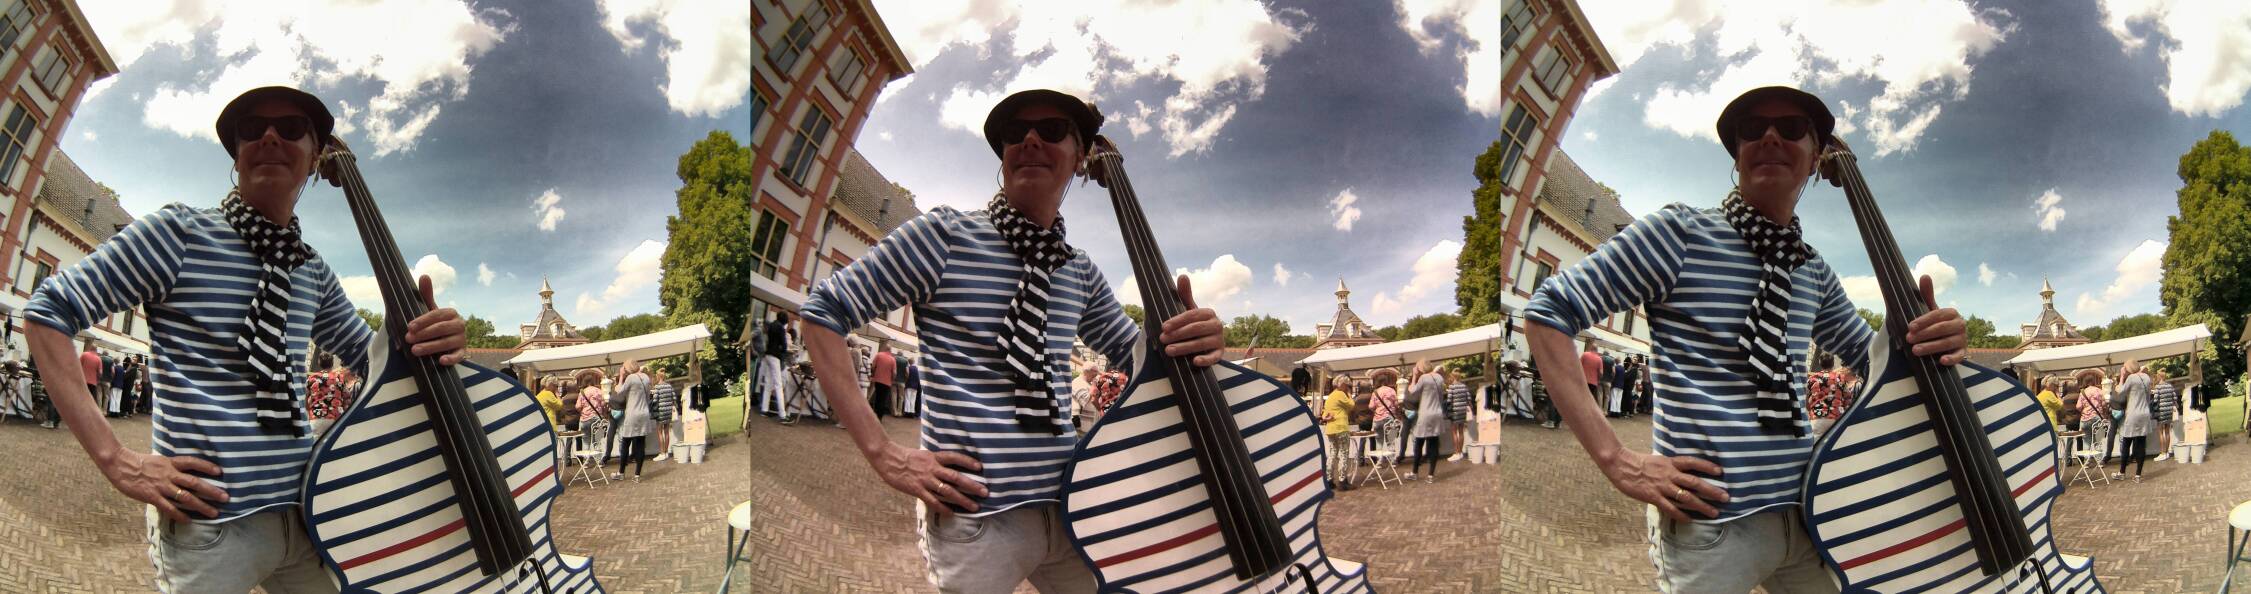
2. Wide-angle cameras
You can use wide-angle cameras. Here is an example of the first assembly by user Jan, known in our forum under the nickname Stereomii:
And here’s one of the stereo photographs he made with this setup:
Using wide-angle cameras requires some tricks to adjust the brightness and contrast. This can be done in post-processing. Jan uses ImageMagick for this, which he described in detail on the forum.
3. Wall-eyed or cross-eyed viewing?
As you might have heard, there’s a holy war going on between stereoscopic photographers concerning best way to display stereoscopic photos. Some prefer wall-eyed view images, where the left image is displayed on the left side and the right one is on the right. Others prefer cross-eyed view, where the left and right images are swapped. I use wall-eyed view, as it is similar to viewing stereo images on Google cardboard-like devices.
However, after some questions on our forum, I decided to check out another approach, and now I can use both techniques. :-) I’d like to thank user Gtoal from our forum for his question “Viewing stereo images on the website” for pointing me to this problem!
So the key point here is that for different approaches you need to use different stereoscopic photo settings. If you do L-R images, users with cross-eyed approach can not reconstruct the 3D view, and the other way around with R-L images. But there is a simple solution — making L-R-L images. Here are some L-R-L images from Jan, Stereomii. So wall-eyed users can look at the first two images, and cross-eyed users can use the second pair.
Here is a brilliant explanation of 3D perception specifics (link from user Gtoal):
http://minerbits.com/how-to-view-3D.html
4. Advanced image multiprocessing
I decided to include here a guide from Jan (a.k.a. Stereomii), published on our forum.
For those interested: Here are my ImageMagick (windows) procedures. Note that these are rather rude, no errorchecking is done and they create temporary files and a temporary folder in the current folder. These are cleaned-up afterwards but strange results may occur if you have “_TMP_” prefixed files/folders in your current directory.
All procedures operate on all .jpg files in the current folder, output files are prefixed depending on the operation, except mgk_LRL, output is postfixed with L and R.
mgk_clahe.bat (clahe correct image)if not exist .\_TMP_\ mkdir .\_TMP_
for %%i in (*.jpg) do (
magick %%~ni.jpg -clahe 25x25%%+128+3 .\_TMP_\c%%~ni.jpg
)
move .\_TMP_\*.* .\
rmdir /Q .\_TMP_
pause
mgk_lrl.bat (make LRL format picture)if not exist .\_TMP_\ mkdir .\_TMP_
for %%i in (*.jpg) do (
magick convert -crop 50%%x100 +repage %%~ni.jpg _TMP%%d_.jpg
magick _TMP0_.jpg _TMP1_.jpg _TMP0_.jpg +append
.\_TMP_\LRL_%%~ni.jpg
del _TMP?_.jpg
)
move .\_TMP_\*.* .\
rmdir /Q .\_TMP_
pause
mgk_q.bat (reduce size to 25%)if not exist .\_TMP_\ mkdir .\_TMP_ for %%i in (*.jpg) do ( magick convert -scale 25%%x25 %%~ni.jpg .\_TMP_\q%%~ni.jpg ) move .\_TMP_\*.* .\ rmdir /Q .\_TMP_ pause
mgk_scale.bat (scale half-sbs picture to full size sbs)if not exist .\_TMP_\ mkdir .\_TMP_
for %%i in (*.jpg) do (
magick convert -scale 200%%x100 %%~ni.jpg .\_TMP_\s%%~ni.jpg
)
move .\_TMP_\*.* .\
rmdir /Q .\_TMP_
pause
mgk_split.bat (split into L and R parts)if not exist .\_TMP_\ mkdir .\_TMP_
for %%i in (*.jpg) do (
rem magick convert -crop 50%%x100 +repage %%~ni.jpg .\_TMP_\lr%%~ni-%%d.jpg magick convert -crop 50%%x100 +repage %%~ni.jpg .\_TMP_\_TMP_%%d.jpg
ren .\_TMP_\_TMP_0.jpg lr%%~ni-L.jpg
ren .\_TMP_\_TMP_1.jpg lr%%~ni-R.jpg
)
move .\_TMP_\*.* .\
rmdir /Q .\_TMP_
pause
5. Recording video with sound
In this article, we focused mostly on photos, not on video. But if your goal is to record stereoscopic video, then you can connect a USB microphone to the StereoPi (it’s shown in the photo at the beginning of the article). Make sure you check the ‘Audio enabled’ option box in the administration panel.
Conclusion
In this article, we gave practical advice on building a simple DIY stereo camera based on a StereoPi, controlled from a mobile phone. We hope that this article will become the starting point for your experiments in stereo photography!
Many thanks to all the users who helped us with testing new features of our SLP Raspbian Image on our forum. Special thanks to the user Jan a.k.a. Stereomii for his active assistance and participation in development!
Link to the previous article: The Art of Stereoscopic Photo