DIY VR headset for the StereoPi. 10 ms latency for just $135

A friend of mine does psychological research in the field of human perception. He was impressed by our experiment with Oculus Go, and wanted to use this solution in his research.
But he had one very strict requirement: the video latency should not exceed 10 ms.
We took up this task, and we came up with an inexpensive solution sporting a delay of about 10 ms. And the cost of the headset with an AMOLED screen came out at about $135, including all the components. We had to solve a series of problems and circumvent several technical limitations to create this gadget. This solution may not be suitable for all projects. At the end of the article, we summarize and list the pros and cons of this approach.
In this long article, we will explain step by step how we configured the gear, what problems arose and how we resolved them.
Fighting the latency
For the Oculus Go the delay is about 100–150 ms. The video is captured from the cameras, compressed in H264, then sent via WiFi to the Oculus Go. Inside the headset, the video undergoes an inverse transformation — it gets received, decoded and shown to the user. This isn’t an instant process, hence the latency.
We considered the option of connecting the Oculus Go with a cable. Since it runs Android, there’s the option to try using the network via USB tethering. But we still would have to first compress the video on the StereoPi, and then decompress it on the Oculus. This meant there was no way we would be able to meet the 10 ms target.
So we needed to transfer video faster. And the quickest transmission method available to us is displaying the picture via HDMI. The standard raspivid utility from Raspbian can produce a picture instantly, even before the compression stage. Alright, this bit seems to be solvable for now.
The only thing we needed to figure out at this stage was what we could use to display the picture. We needed a good and inexpensive solution that could handle this task. So we decided to make a simple VR headset. For this, we needed a miniature screen with a good resolution, and a way to mount it on the head.
The screen
We went for this 5.5" Waveshare AMOLED screen for our project:
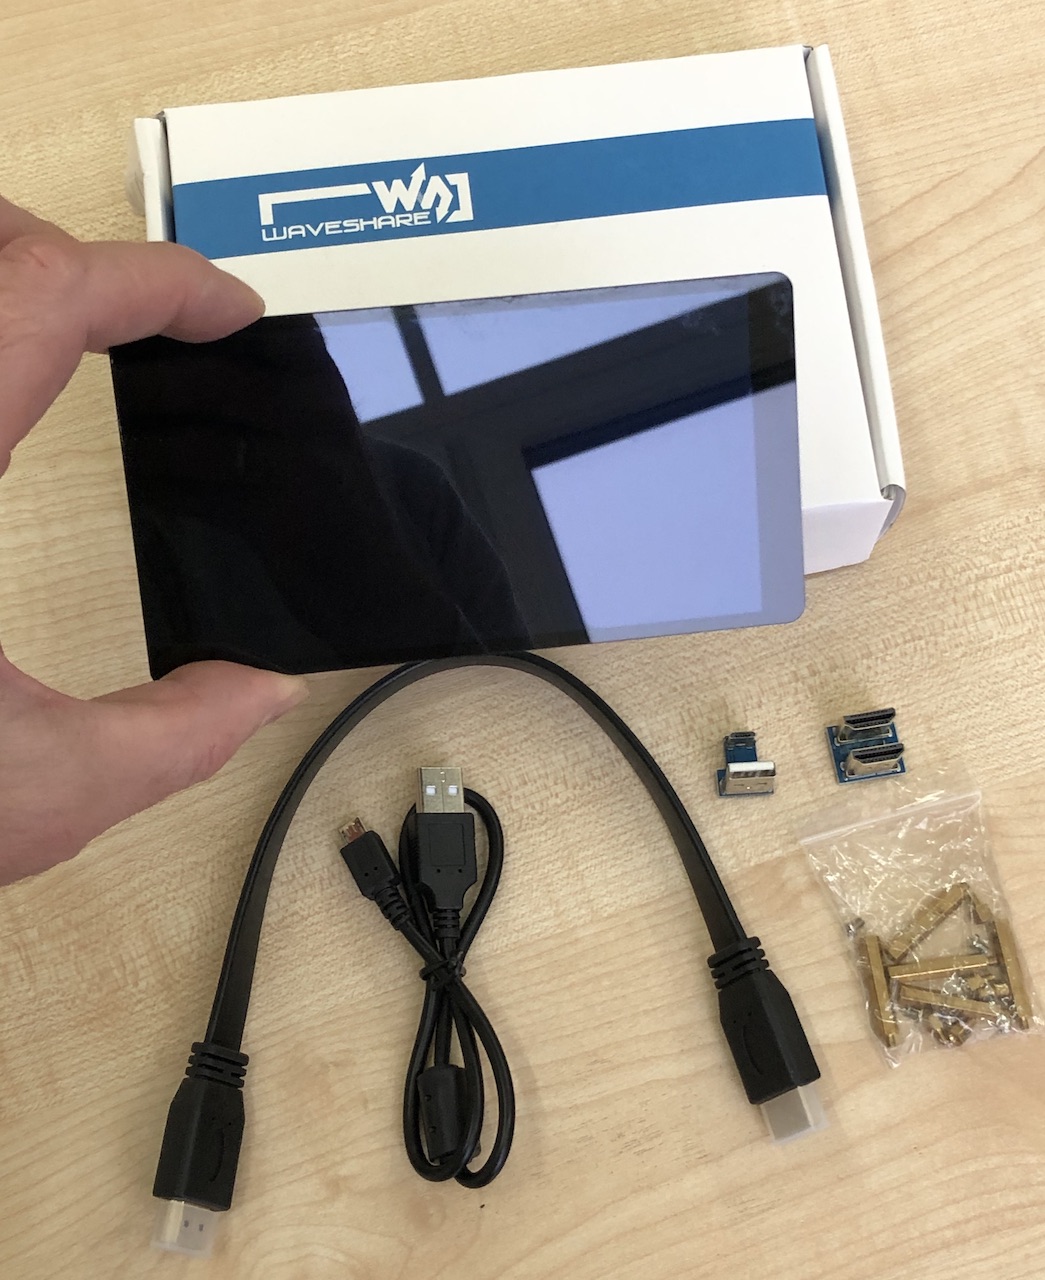
It has a resolution of 1080x1920, which should be enough for our purposes.
The head mount
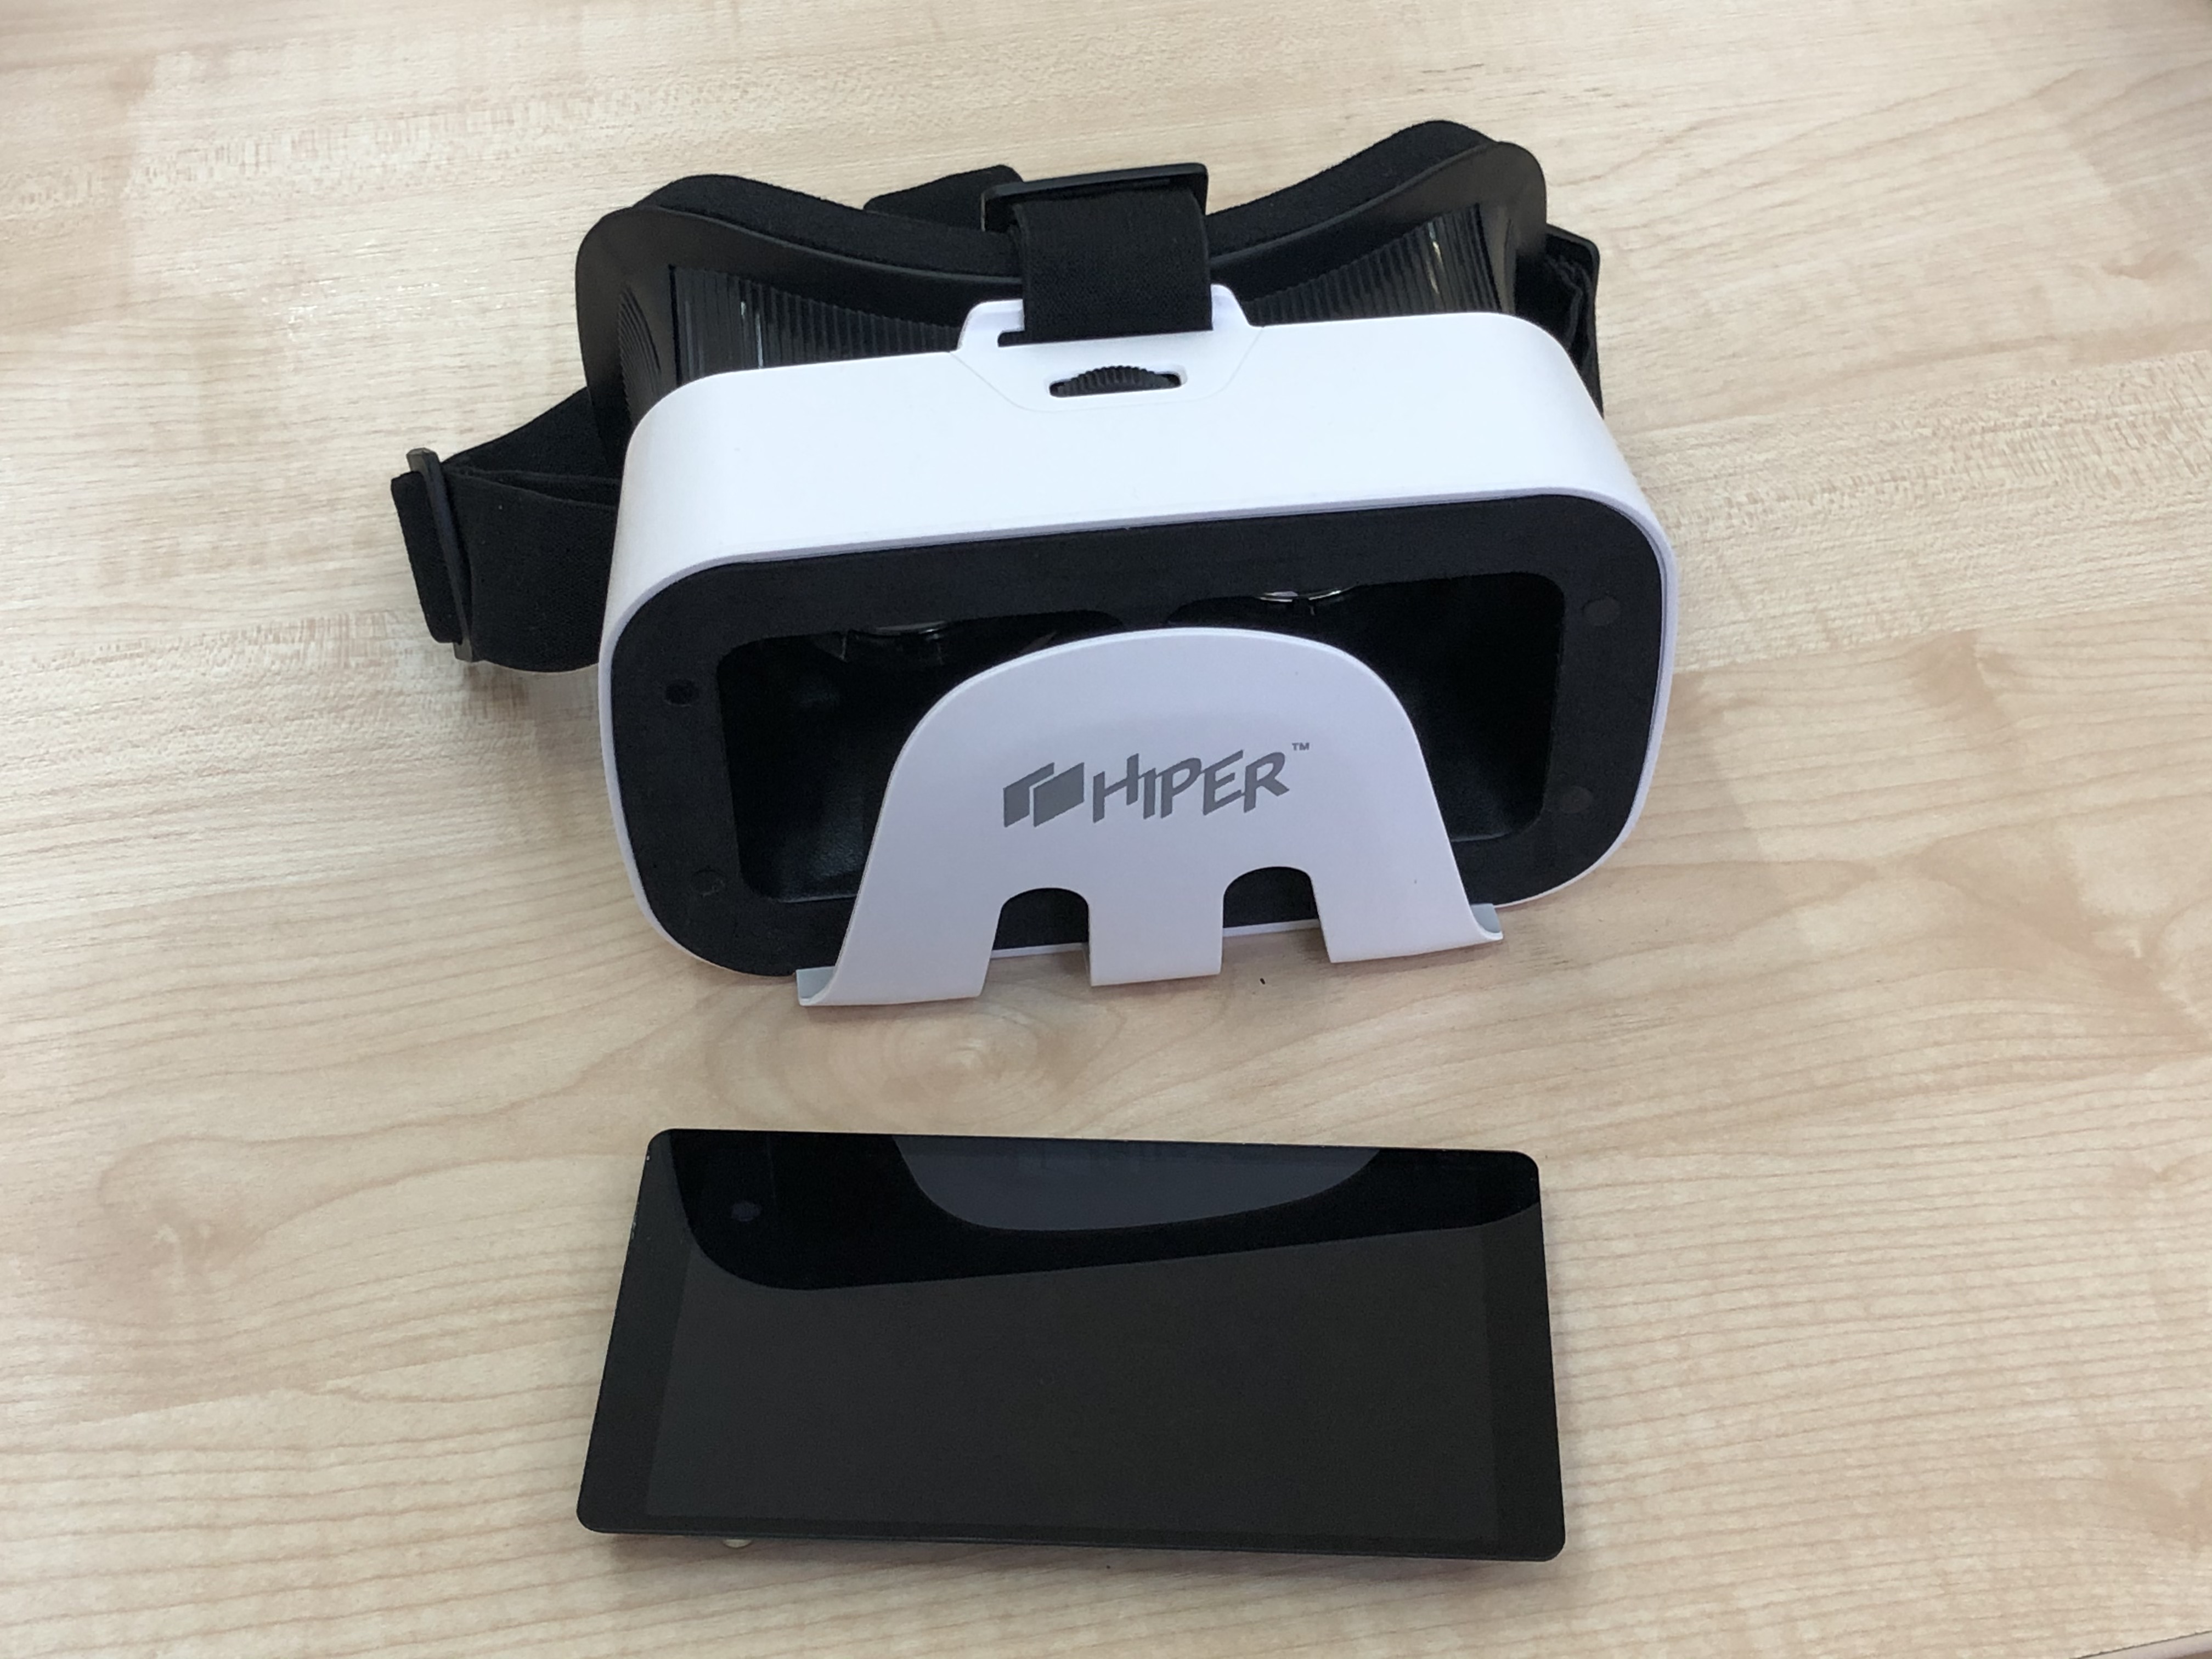
The market is currently saturated with huge numbers of plastic variations on the Google Cardboard that can turn your phone into a VR headset. We chose this model:
To ensure the screen has a long and happy life, we designed and 3D-printed a protective cover for it.
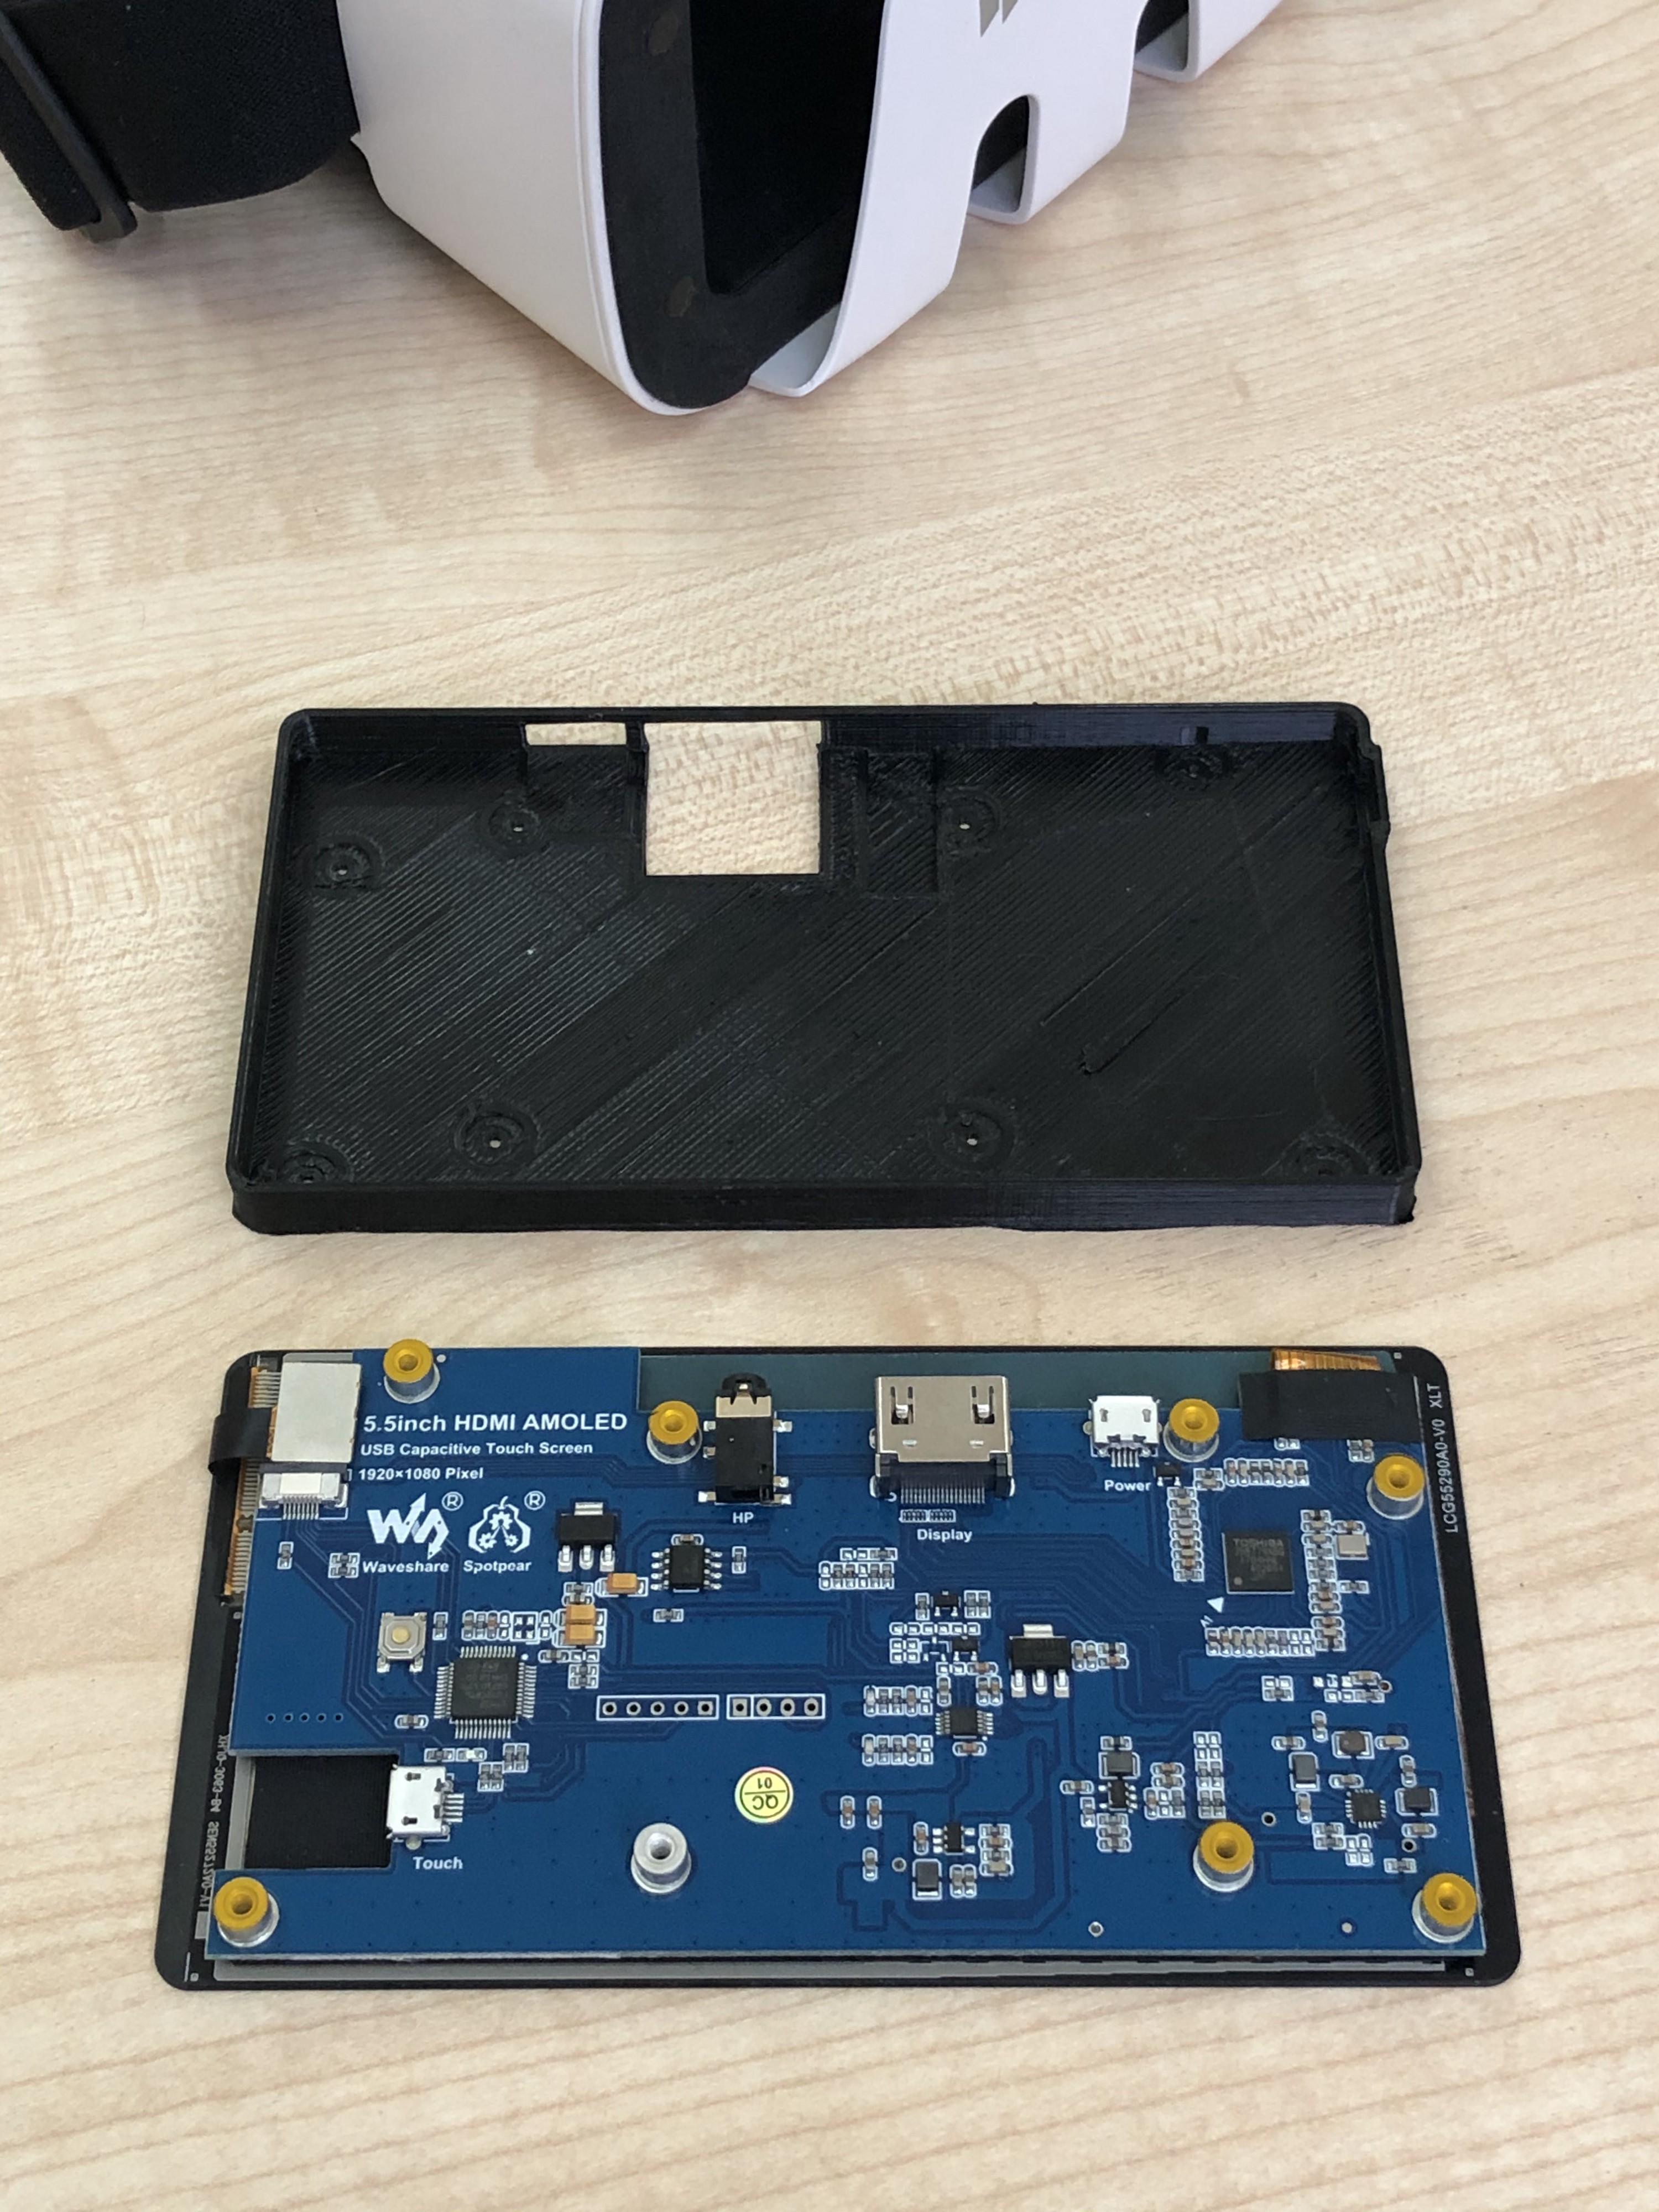
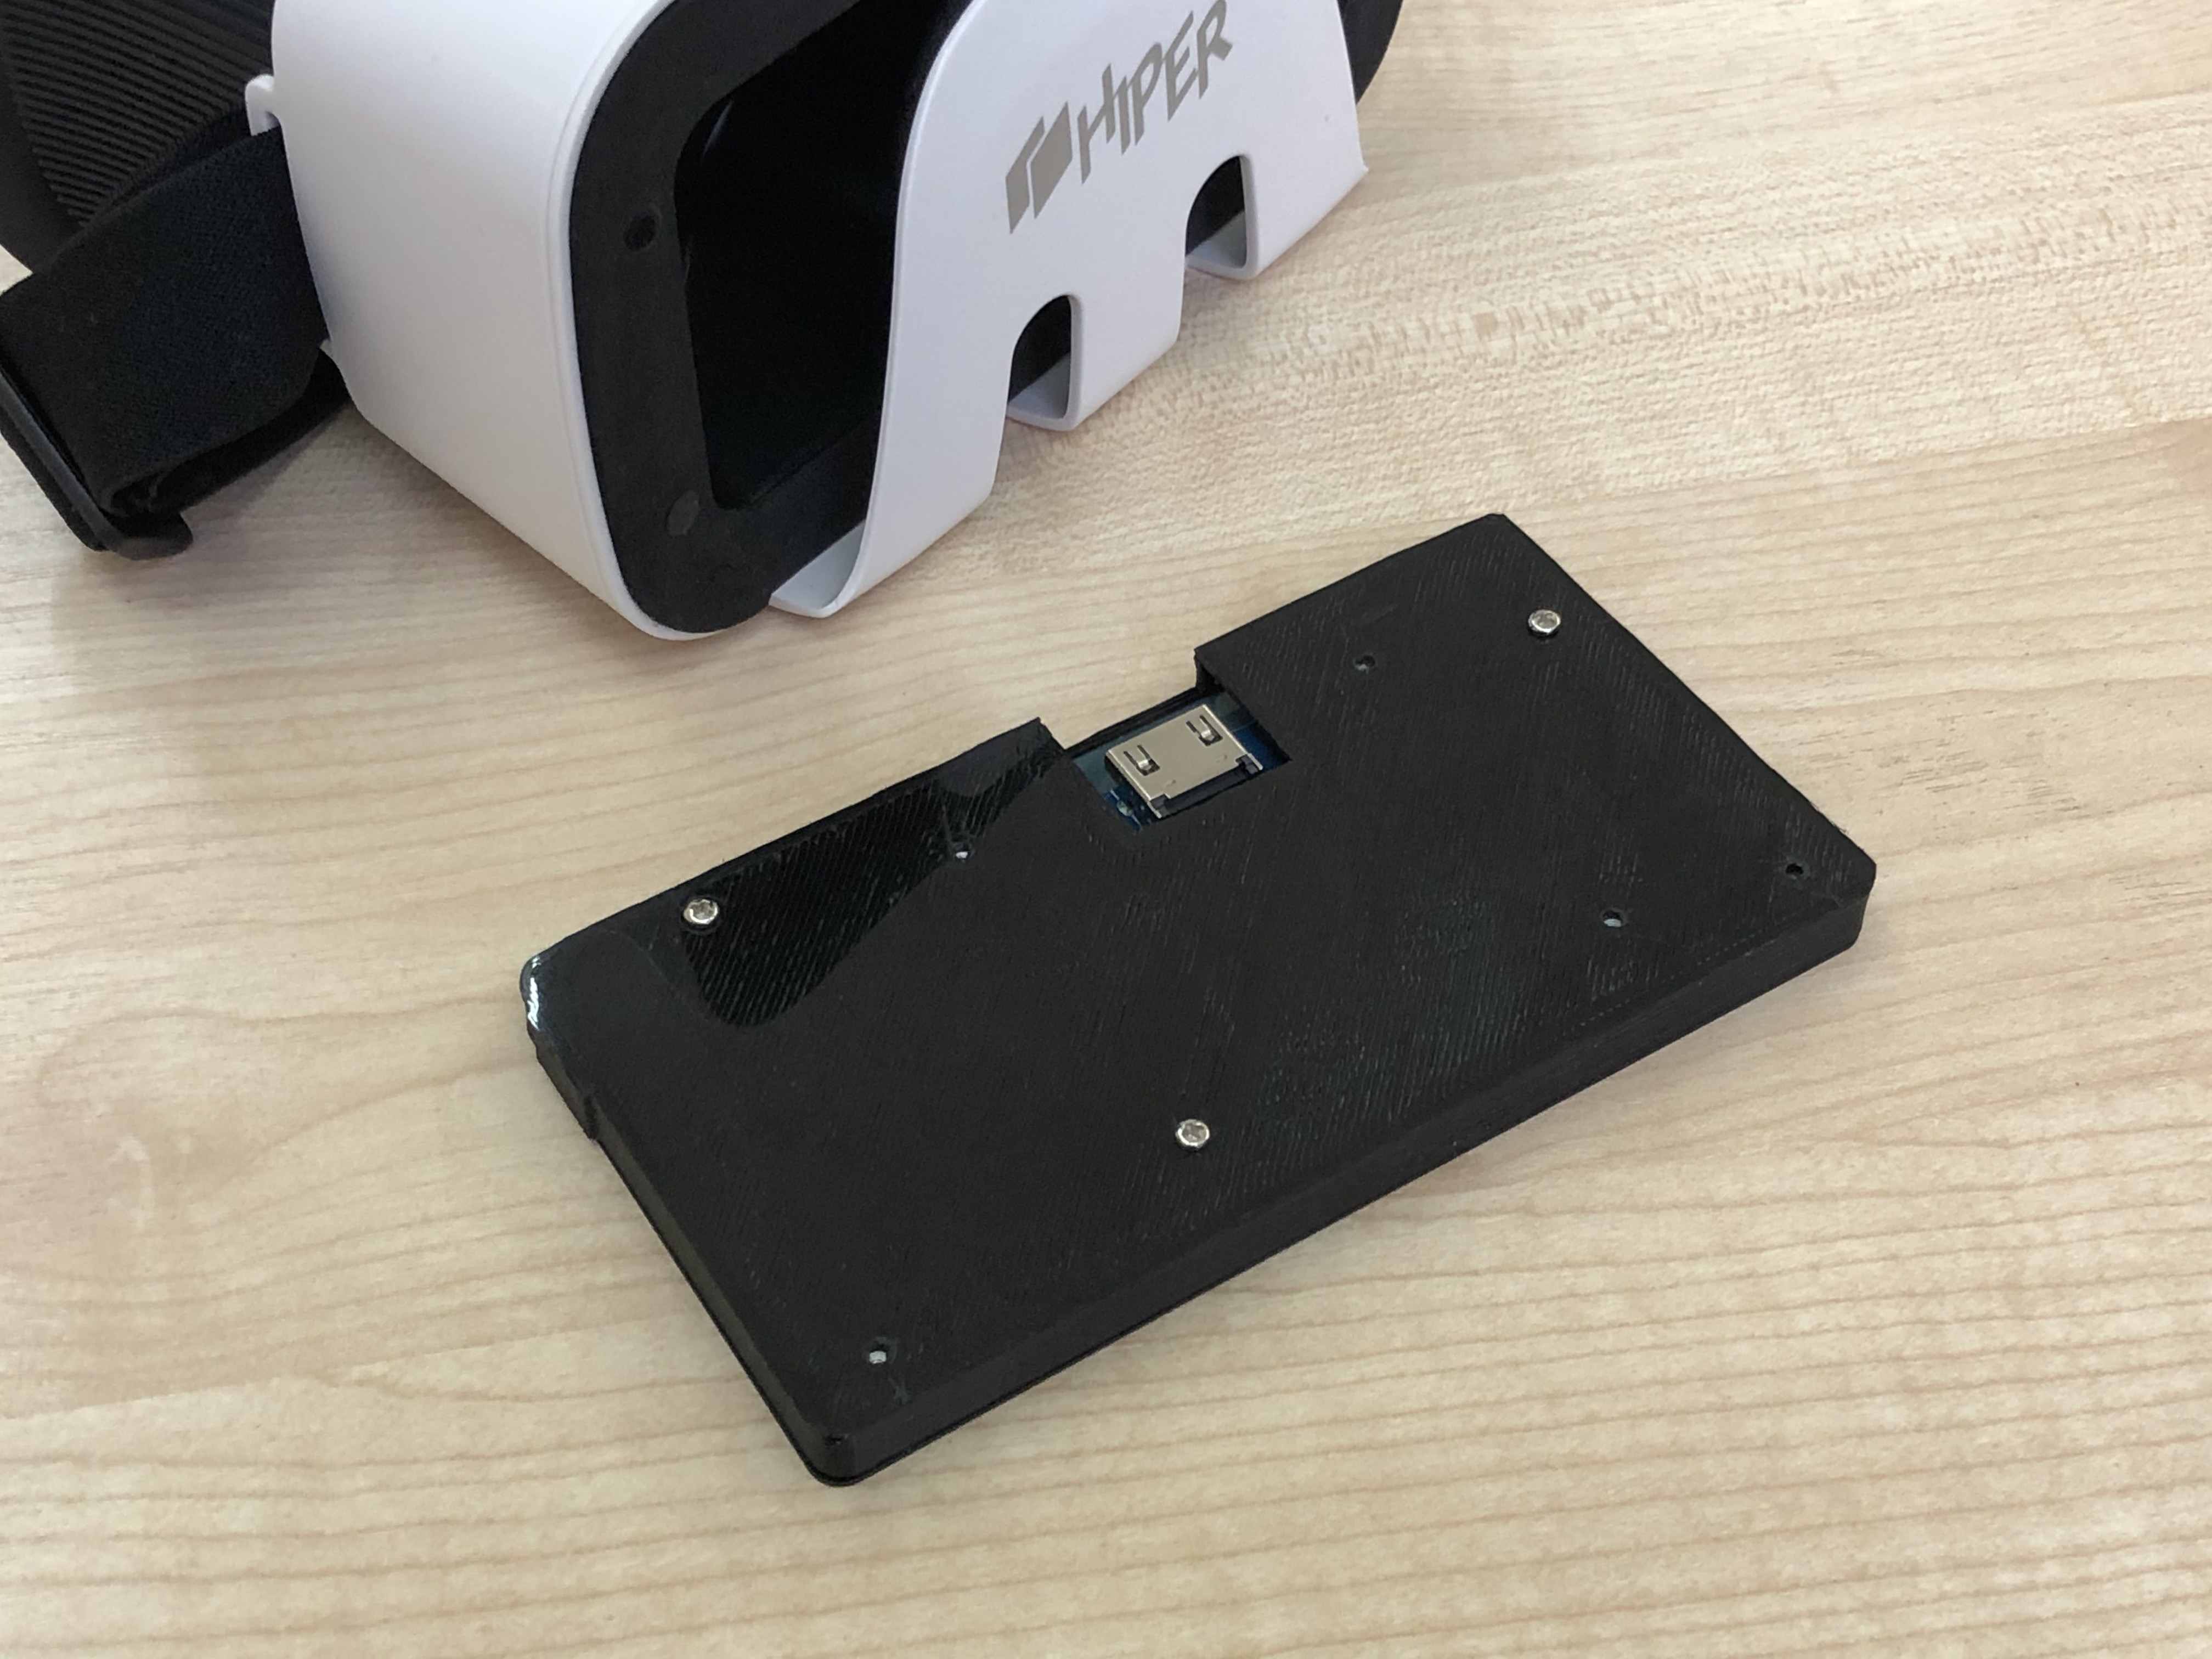
Then we attached it to the screen with a few screws.
Integration tests:
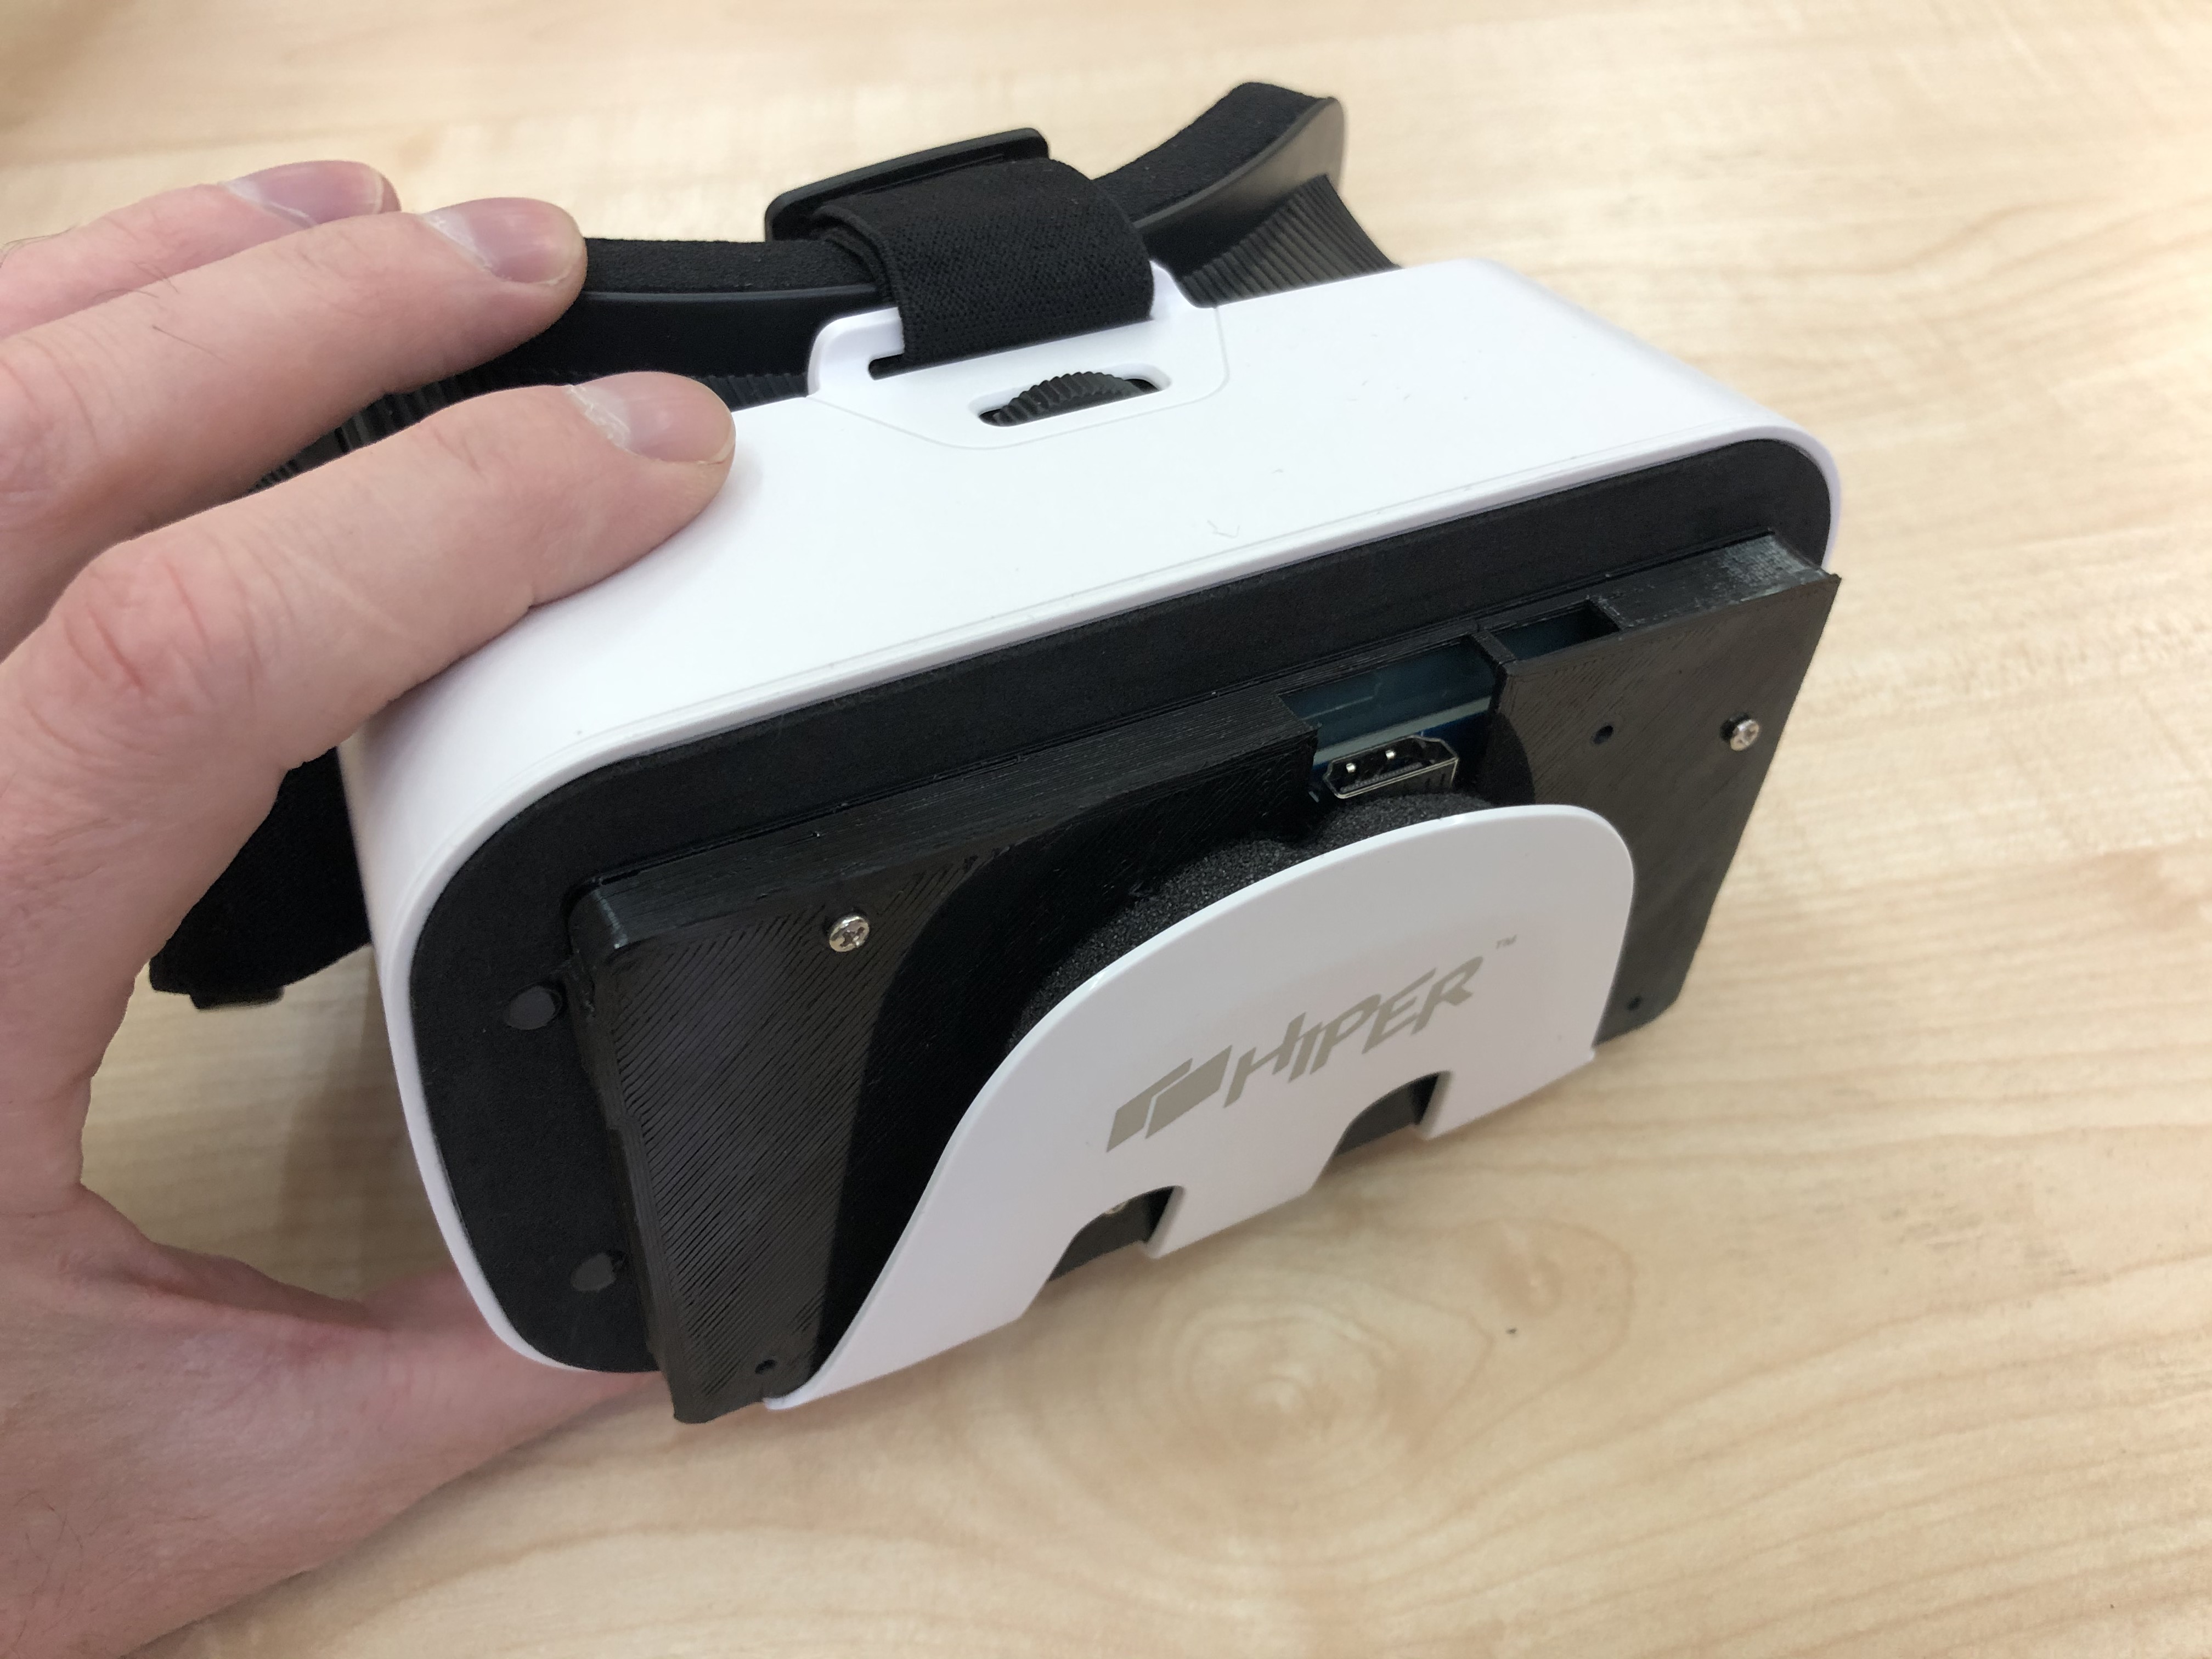
Since we don’t use touch screen support in this project, we left openings for two ports only — the HDMI for video transmission and the micro USB for powering the screen.
The software
We used our Raspbian SLP image as base since it’s geared specifically for such tasks.
The whole thing will be configured via WiFi, so, according to our Wiki, you need to define three parameters in the stereopi.conf file:wifi_iface=wlan0
wifi_ssid=my-access-point-name
wifi_psk=mypassword
And to simplify the first tests, let’s use the single camera mode for now, so in the linevideo_mode=3D
change 3D to 2D so that the line reads:video_mode=2D
Great. Now let’s set up support for the screen.
Setting up the screen
The Waveshare Wiki has a piece of code that you need to insert into the config.txt file.
Here it is:max_framebuffer_height=1920
max_usb_current=1
config_hdmi_boost=10
hdmi_group=2
hdmi_force_hotplug=1
hdmi_mode=87
hdmi_timings=1080 1 26 4 50 1920 1 8 2 6 0 0 0 60 0 135580000 3
For this example we’ll configure all the settings directly from the SLP administration panel. If you prefer doing the configuration over SSH, all the steps are exactly the same.
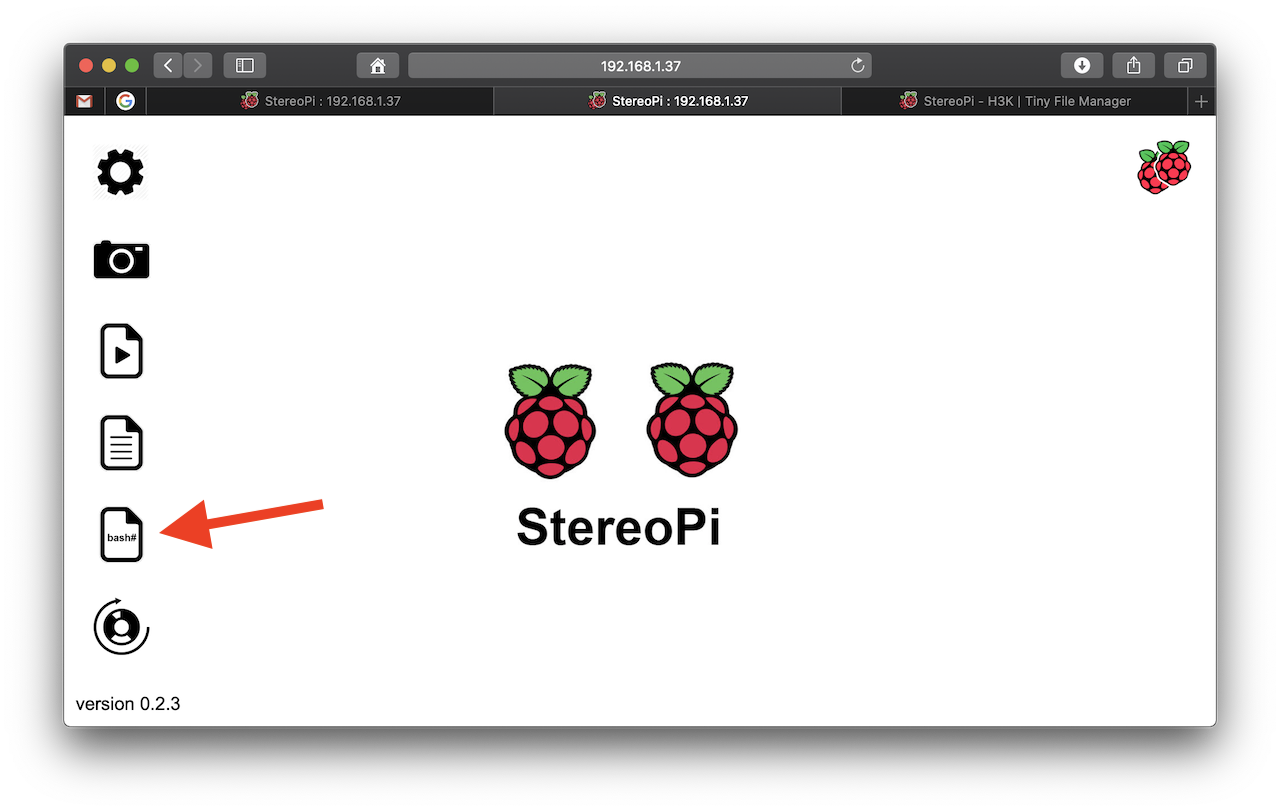
After connecting your StereoPi to your network, type stereopi.local in a browser and it will take you to the admin panel:
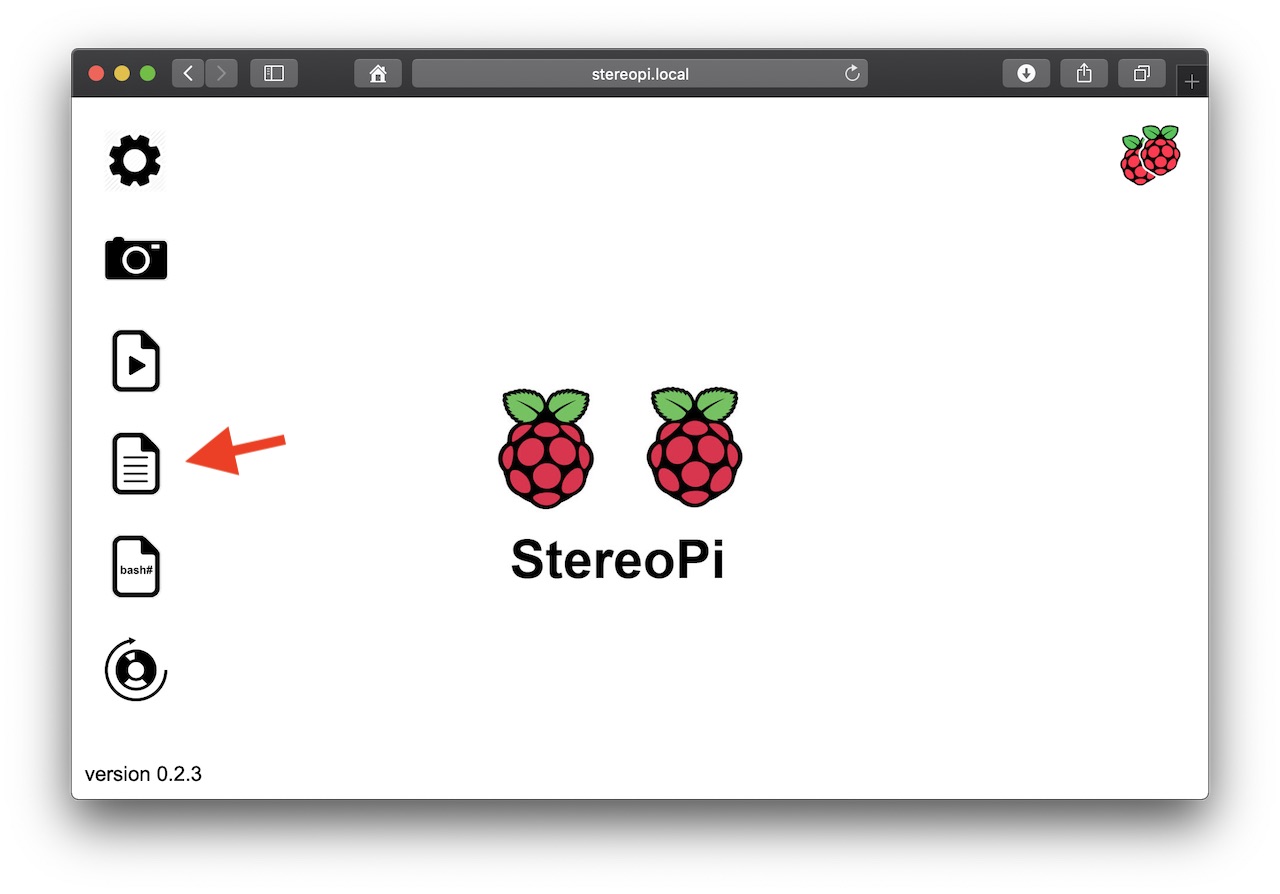
The red arrow points to the file manager icon. Click on it to get to the list of files:
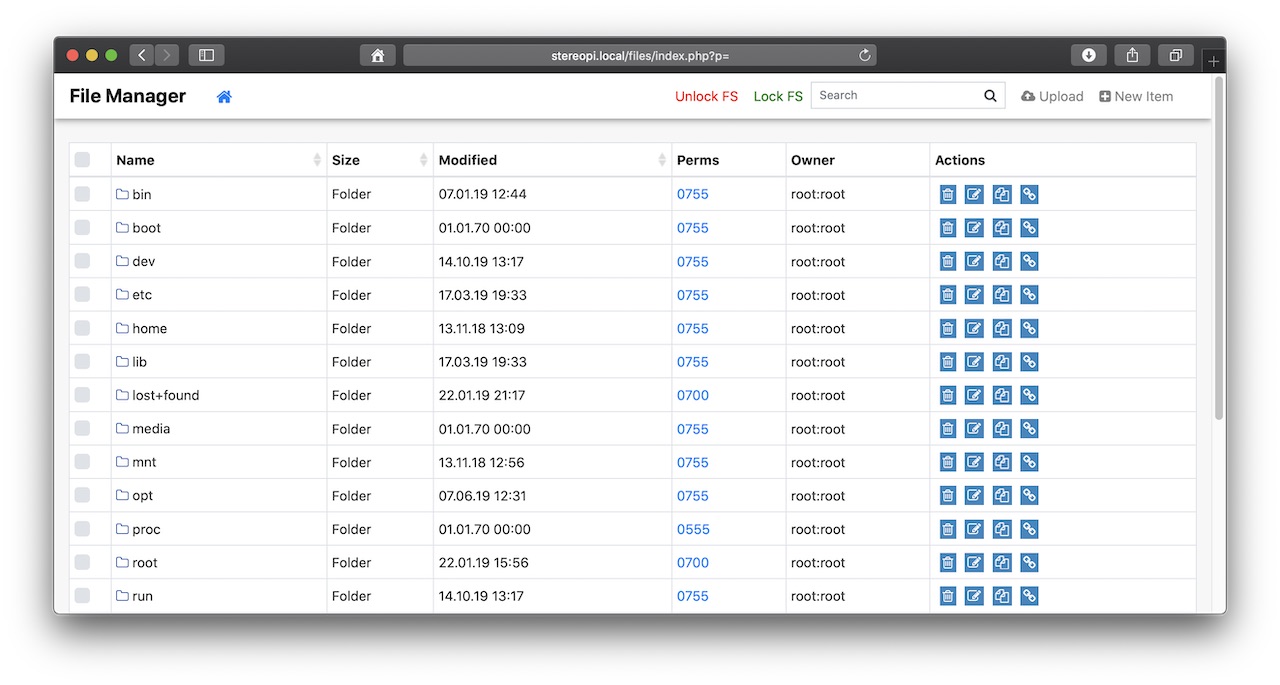
Since by default the file system is in read-only mode, click on the red ’Unlock FS’ link at the top of the screen and confirm in the dialog box that you want to unlock the file system.
Next, go to the boot folder and click on the config.txt file:
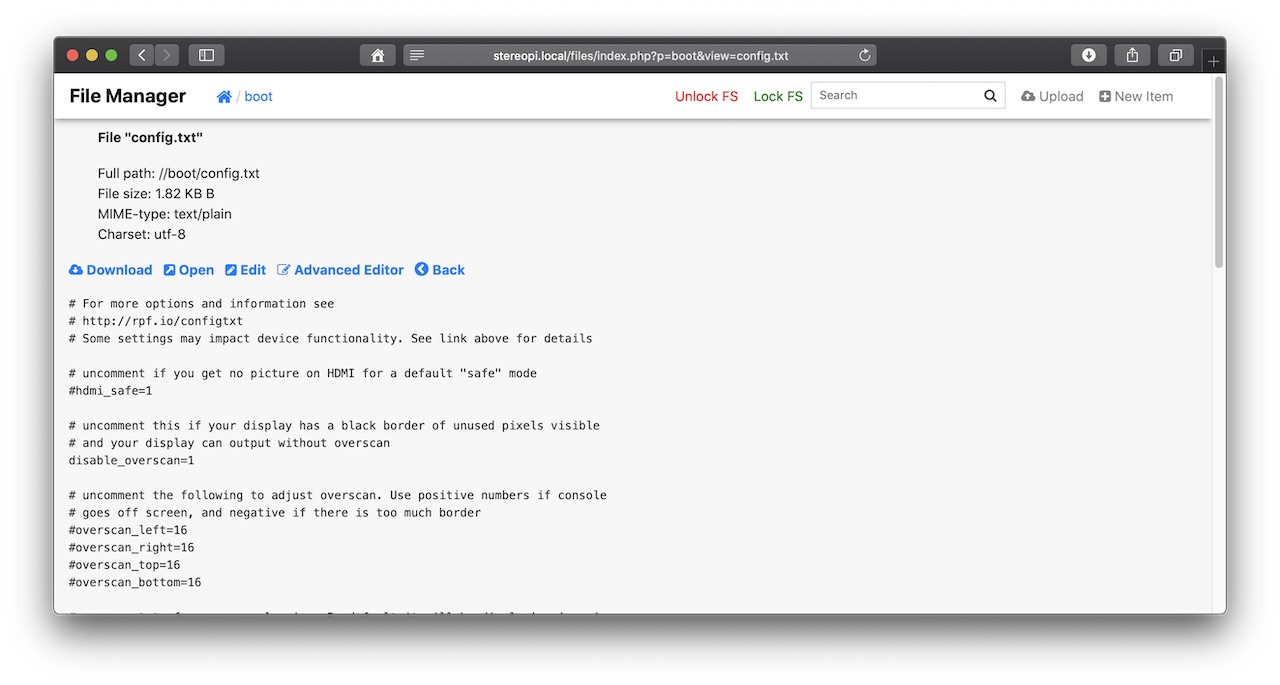
Click on the ’Edit’ button, scroll to the very bottom, and insert the configuration data for screen support:
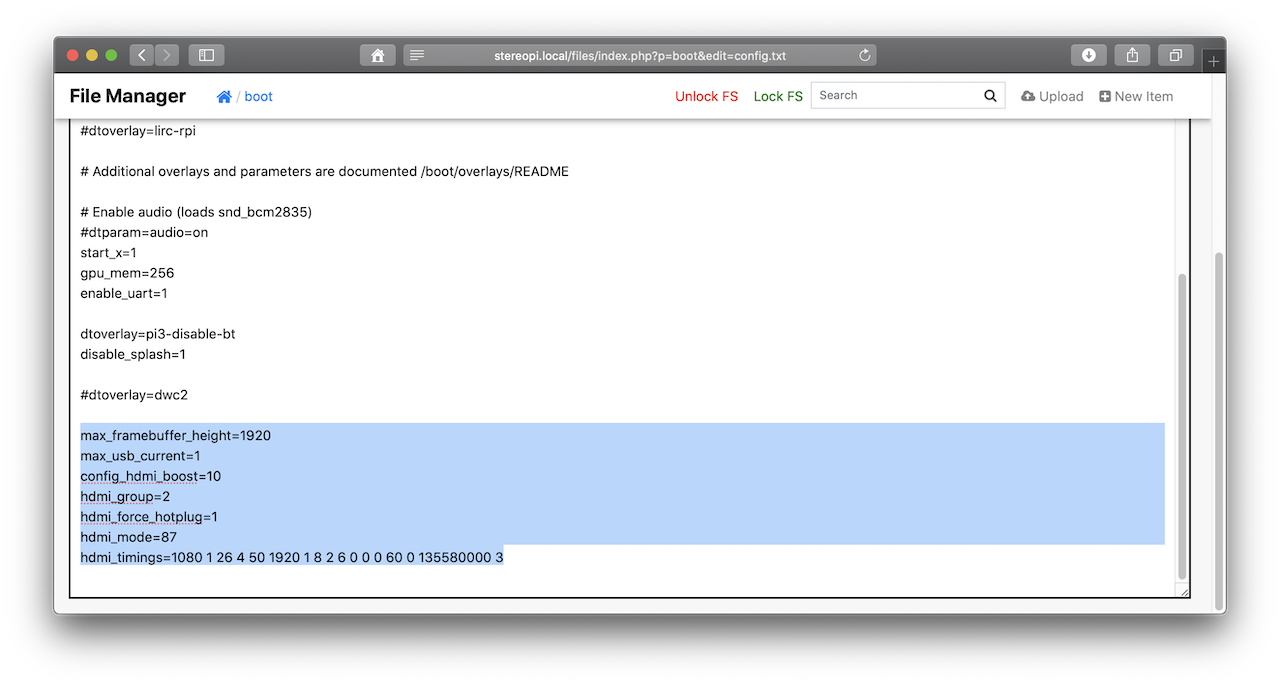
Scroll back to the top and click the ’Save’ button in the top right corner. After that, click the ’Back’ button there, and scroll to the very bottom to make sure that the data is in place.
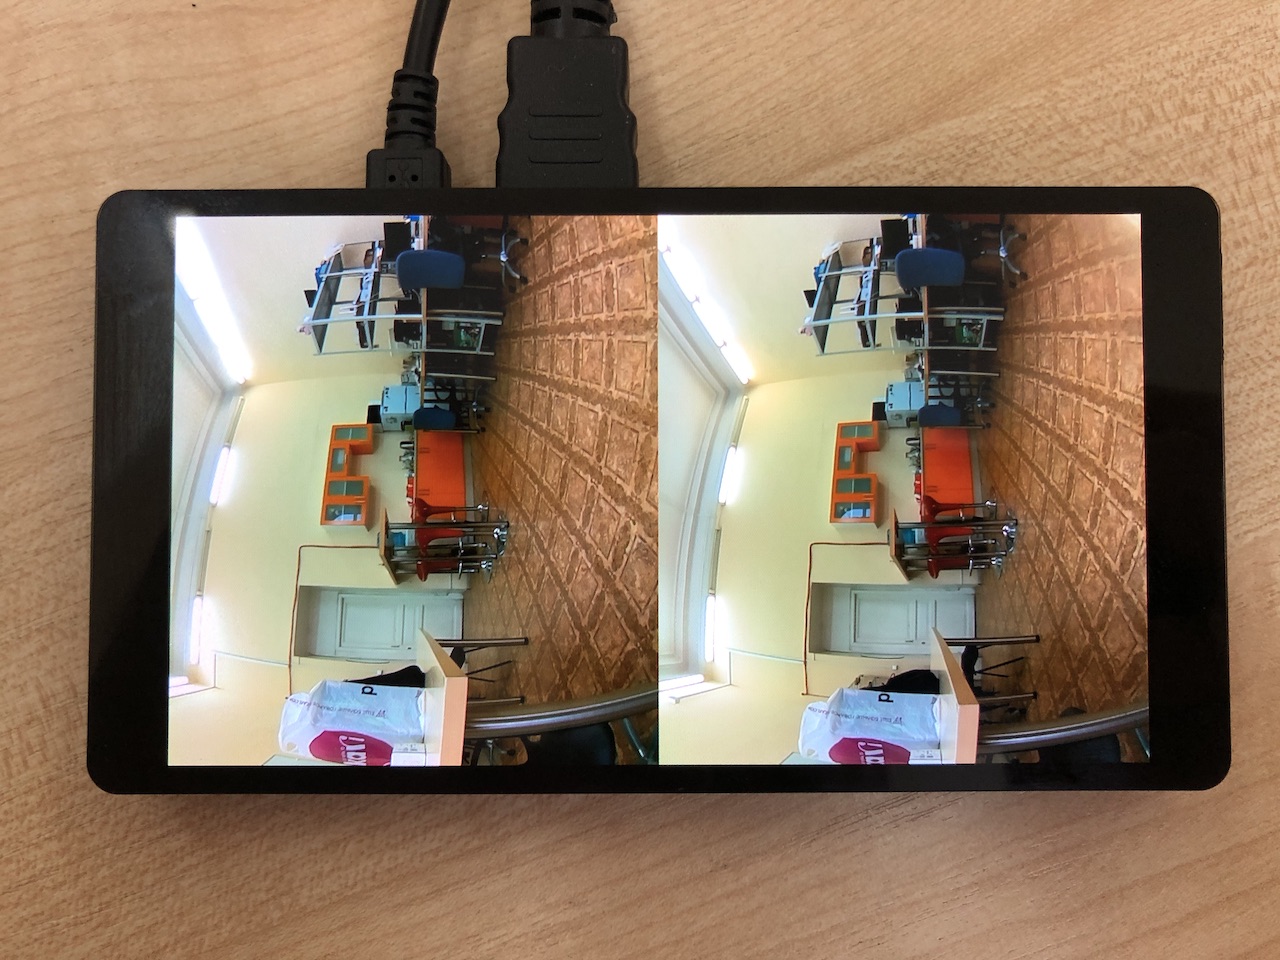
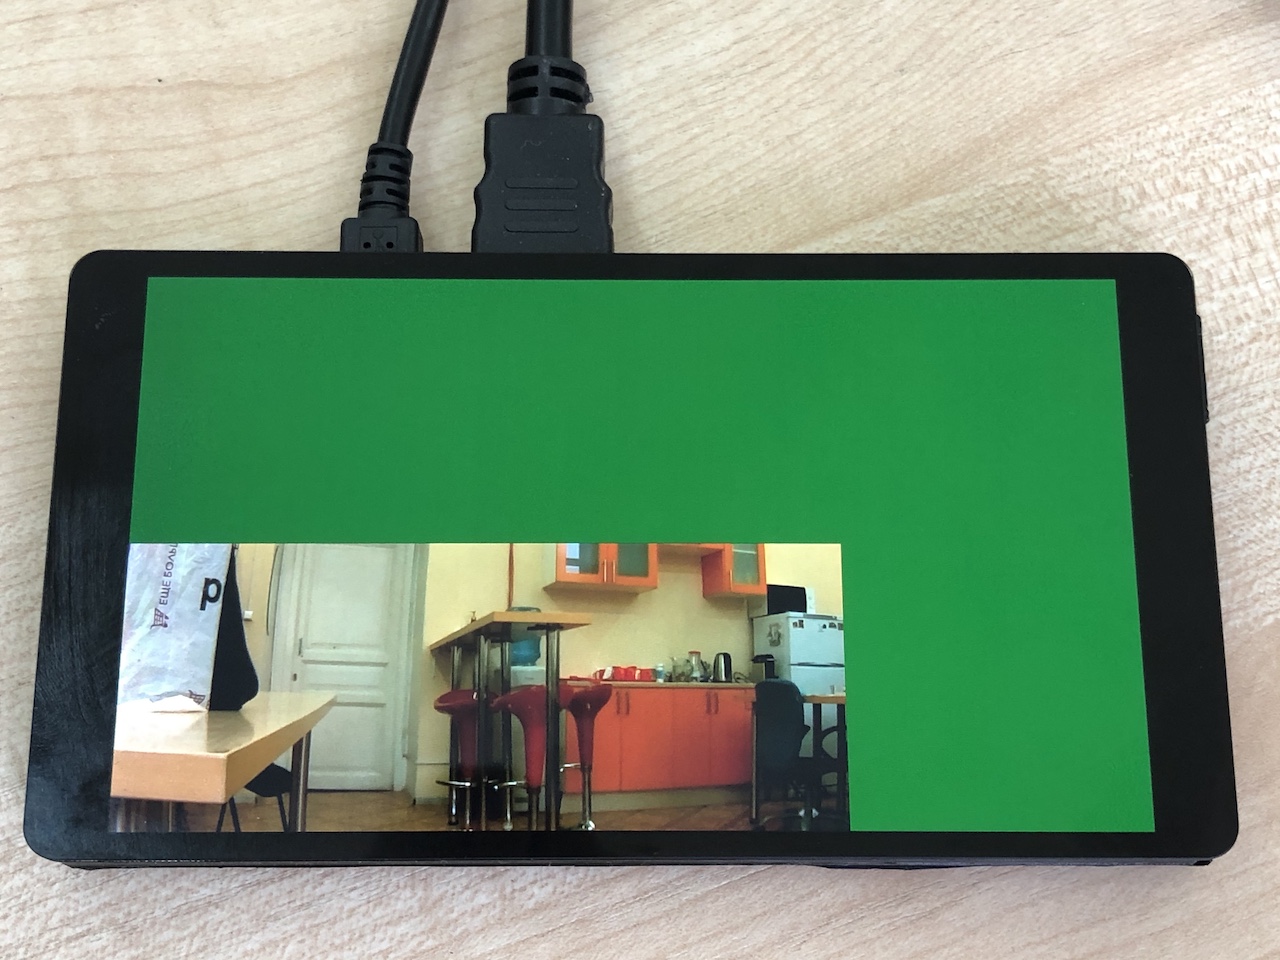
Connect the screen, restart the StereoPi, and you’ll see the first picture:
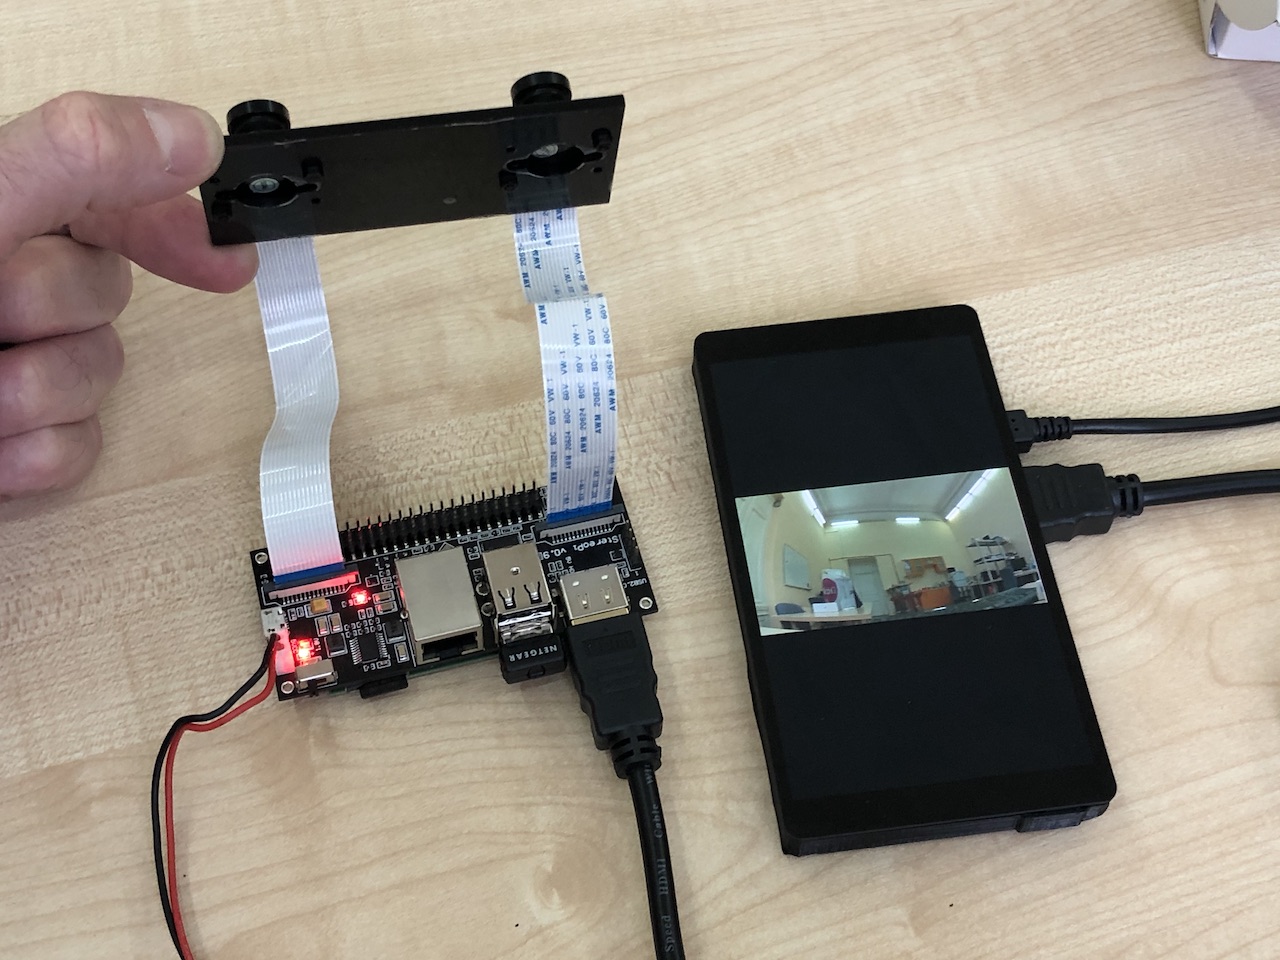
The video is very smooth, the latency is almost imperceptible to the naked eye. Hurrah!
This is where the simple part of the project ends, and we enter the adventure zone.
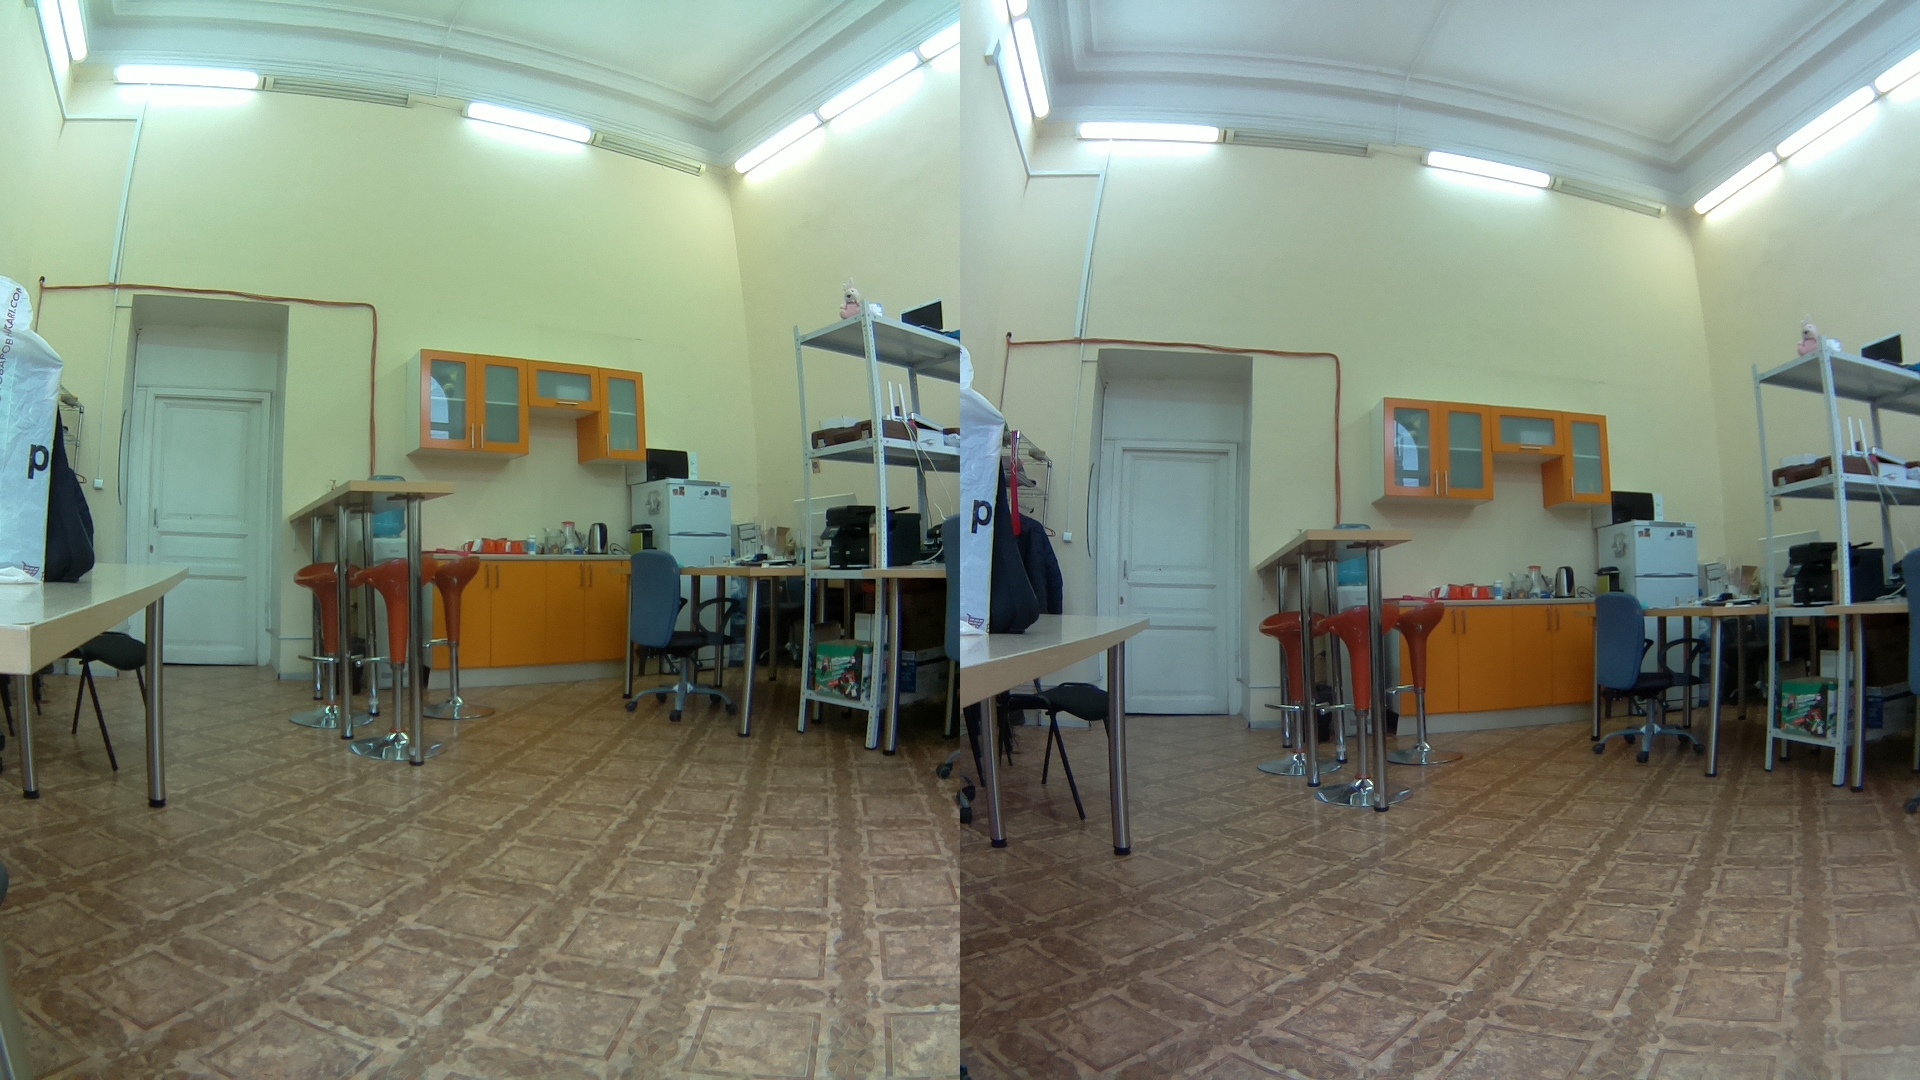
Problem #1: Watching stereo video on HDMI
Fun fact: Raspbian’s built-in video capture utilities (raspivid and raspiyuv) are unable to display stereoscopic pictures on the monitor. The same is also true for the utilities for capturing individual frames. All of them assume that the user connects to the HDMI a monitor with 3D support (for example, a 3D TV).
Unfortunately, the Raspberry Pi Foundation does not plan on introducing such support in the foreseeable future. If you’re interested in technical details, check the discussions on the Raspberry forum and on Github.
But we needed this mode from the very beginning (in particular, for FPV on drones). Therefore, we made small changes to the raspivid source code and turned on the stereo image display mode for regular screens. By default, the raspivid that we compiled works as usual, but if you add the ’-fs’ switch (short for Force Stereo preview) in the parameters, it starts displaying a stereo image from two cameras. The ’-fs’ switch is best added immediately after specifying the video resolution settings.
This version of raspivid has been included in our SLP image since the very first release. Our version of the binary is in the /opt/StereoPi/bin folder.
So if you’re working with SLP, this mode will work ‘out of the box’. If you are building your solution on pure Raspbian, you need to take this fact into account and either use our binary or compile it from source with the respective changes.
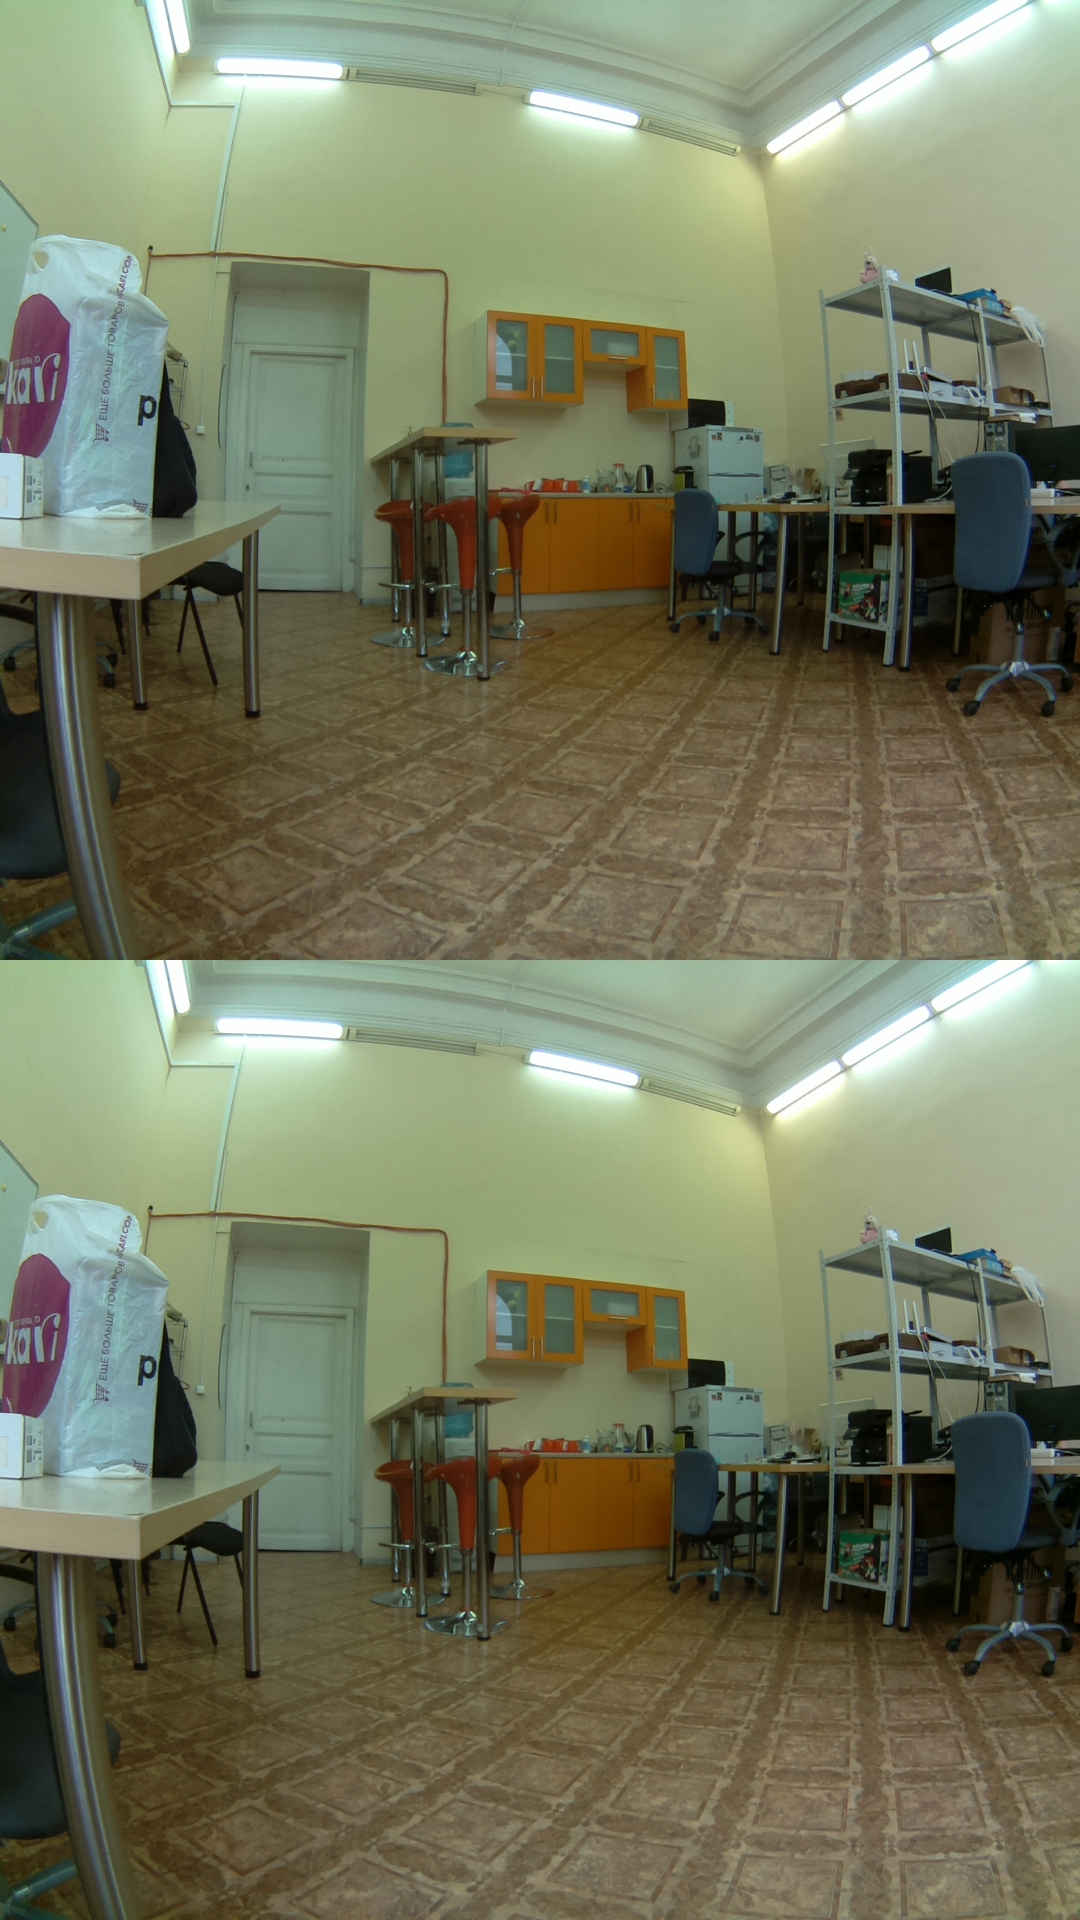
Back to our hardware. To enable the stereo mode, click on the gear in the upper left corner of the screen in the administration panel, select ‘3D’ in the ‘Image mode’ drop-down list, and click the ‘Save’ button at the very bottom.
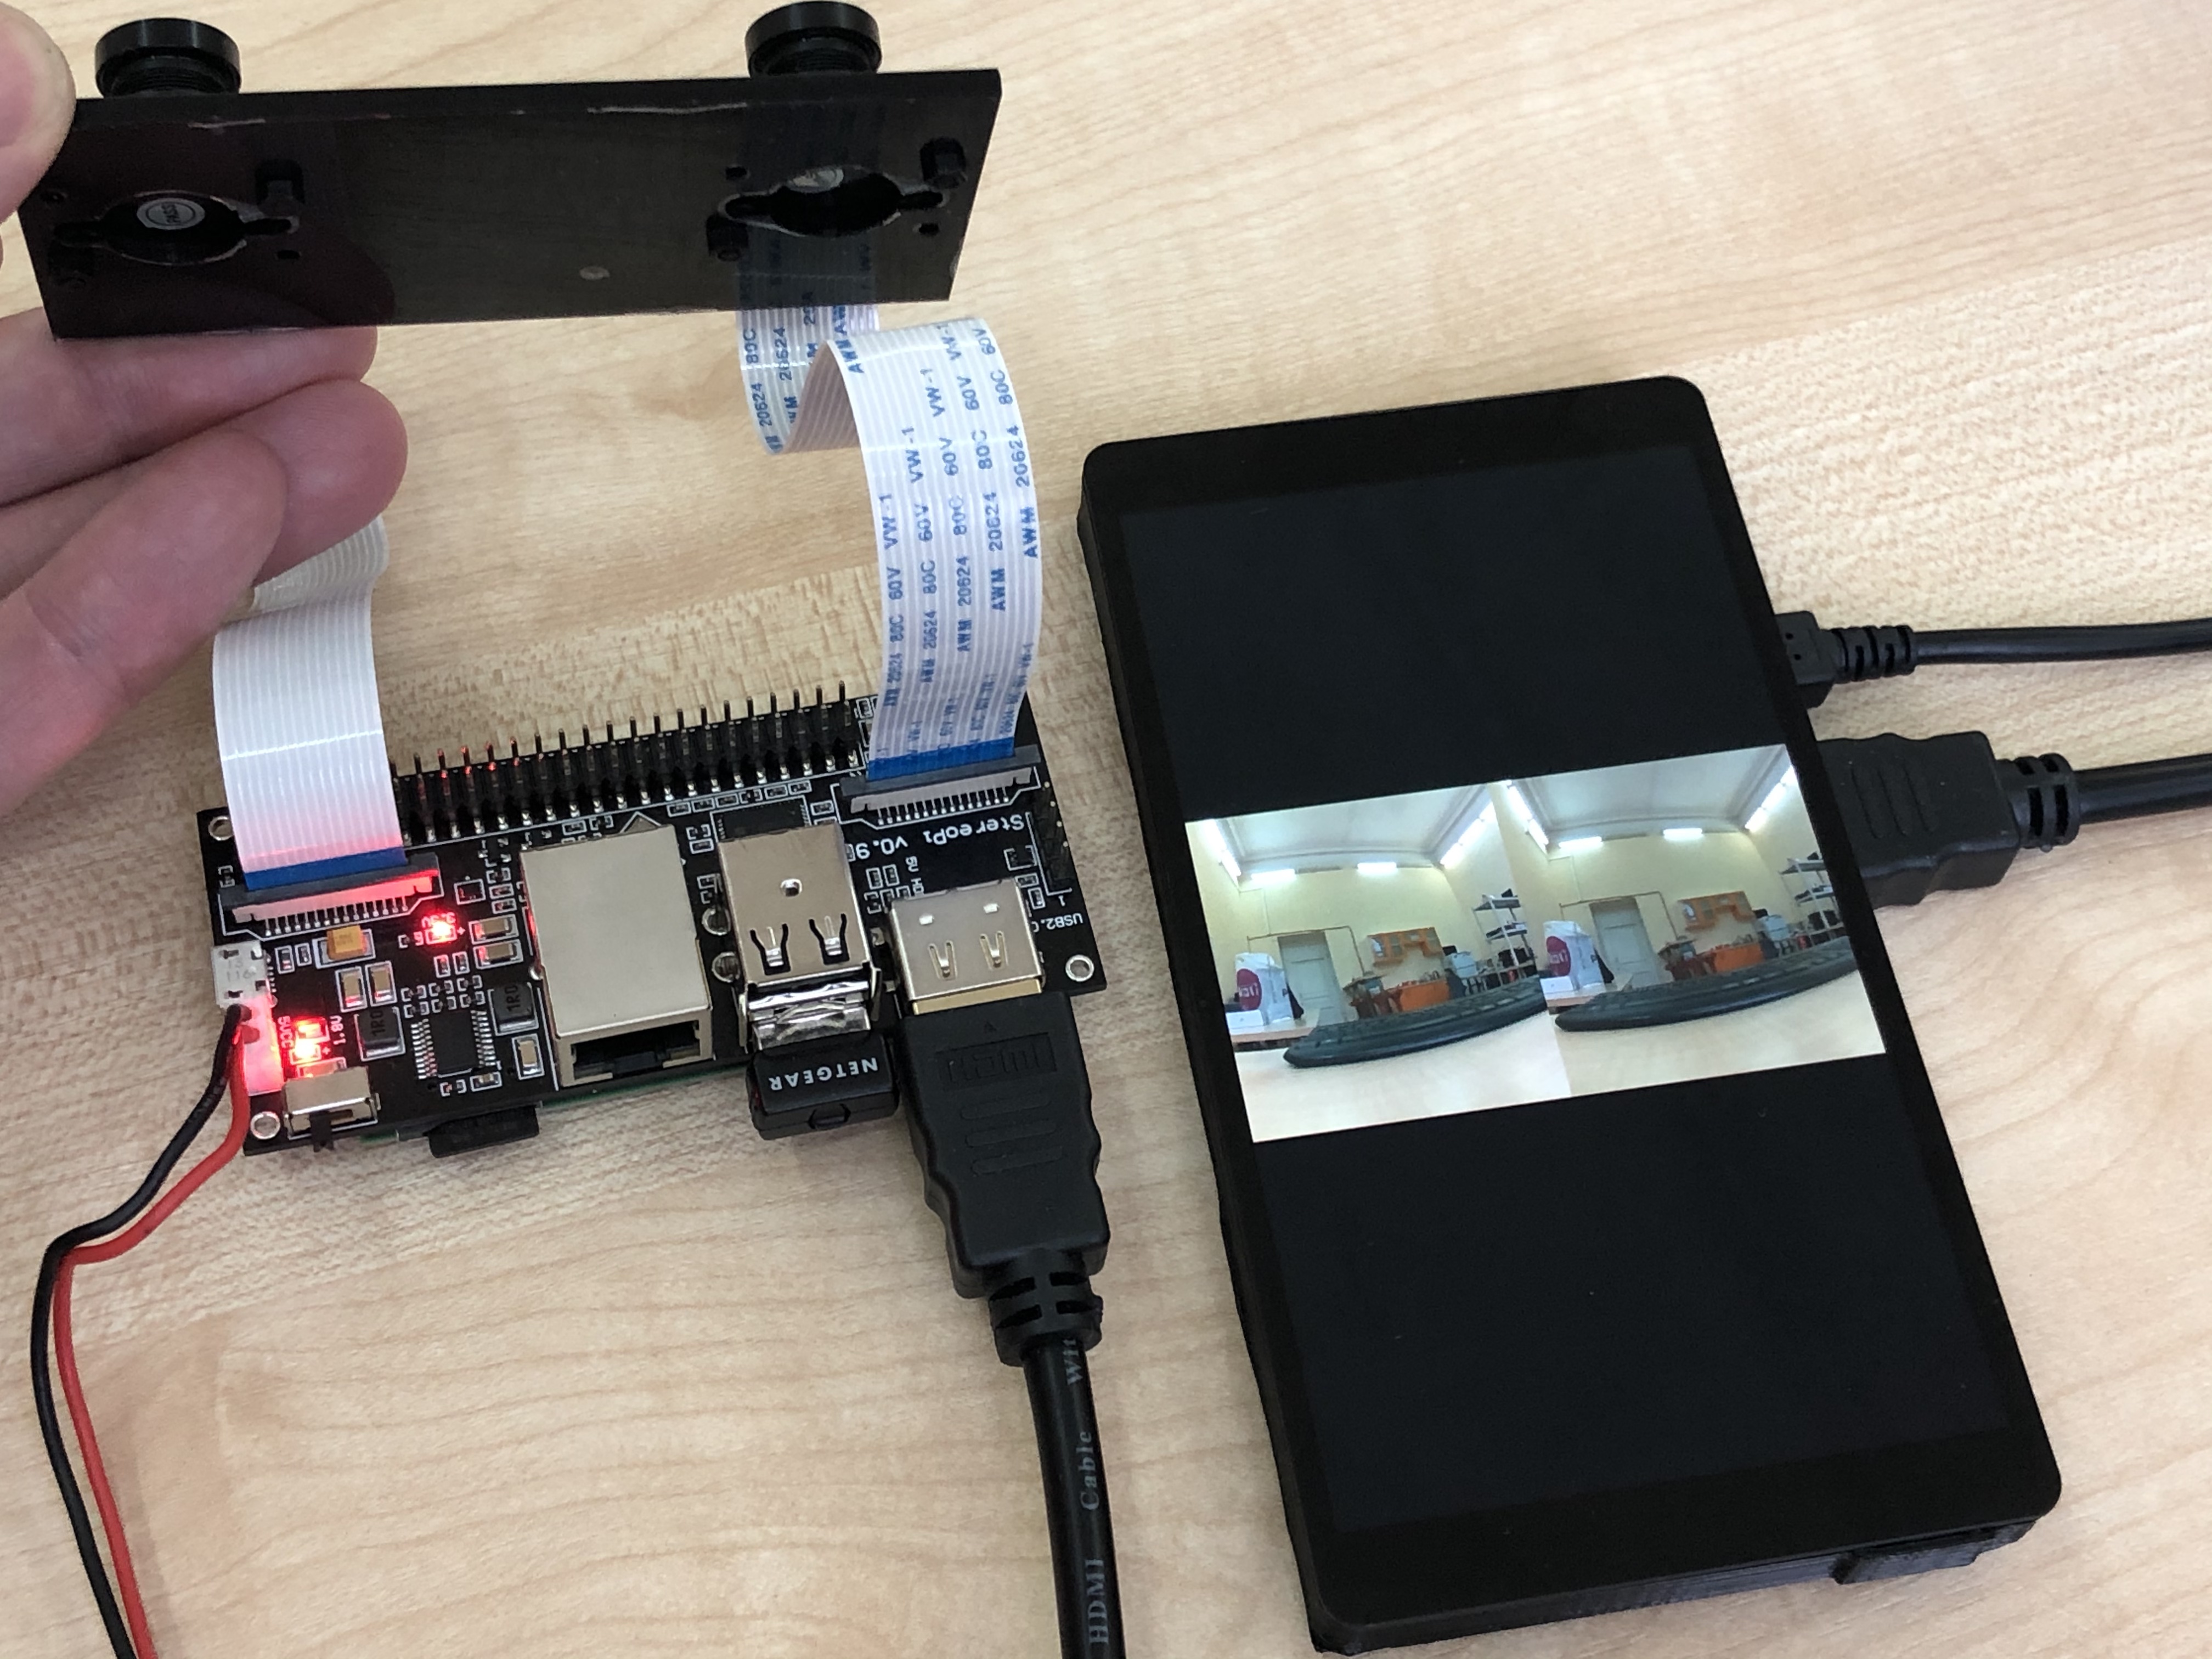
We got stereo mode! The picture is smooth and very quick.
Problem #2: Waveshare 5.5 AMOLED native screen resolution
The picture does not take up the entire screen area, but only a small part in the center.
Some attentive readers may have noticed a strange thing in the specified resolution: 1080x1920. This is very similar to 1920x1080, but it’s not the same thing. This screen has a portrait orientation, and its native resolution is exactly 1080x1920.
It would seem there should be no problem. Should we rotate the screen in Raspbian settings?
Let’s try that.
In the Waveshare Wiki you can see the parameters for rotating the screen:display_rotate = 1 #1: 90; 2: 180; 3: 270
Add this line to the config.txt file just below the screen settings that you added earlier.
Reboot, and you’ll see this:
Well, can we cheer out loud?
No.
In this mode, the video has a noticeable delay, and the frame rate drops. Moreover, during abrupt movements in the frame, the picture is redrawn with strange diagonal artifacts. Here is an excerpt of a slow motion video:
Let’s look deeper into this problem. It turns out that the display_rotate parameter we specified is performed by Raspberry’s on-board video adapter, which is not strong enough to handle such tasks. To reduce the load, we tried lowering the resolution, as well as reducing the screen’s refresh rate from 60Hz to 30Hz (in the hdmi_timings line of the screen configuration). But this didn’t help — the artifacts persisted.
We turned off the 3D mode and checked the stream from one camera — the problem was still there.
We increased the amount of video adapter memory to 256 MB in config.txt — the problem remained in place.
For the purity of this experiment, we tried to connect this screen to a Windows computer. The OS correctly identifies it and rotates the image using the video adapter without losses in speed or quality.
A small technical comment. As you know, there is a native TFT screen for the Raspberry Pi that connects to a special Raspberry connector. To rotate the image on that screen, there is a special command — ‘lcd_rotate’. The important bit for us is that in this case the rotation is performed by the screen’s built-in controller and not by the video adapter. Unfortunately, the Waveshare screen does not have such a built-in function. So our only option is to rotate the picture using the GPU of our Raspberry Pi Compute Module.
Dead end?
No. Nothing will stop us!
Solving problem #2
The raspivid application is actually very cool because it works with hardware at the lowest level. And it allows you to do some tricks that don’t immediately come to mind.
So, we’re working with a stereo picture in side-by-side mode. This means that we need to display on the screen a ‘wide and low’ picture made up of two pictures ‘glued’ together. For example, like so:
But the stereo mode also has a top-bottom mode. In this case, one picture is displayed on top of the other, like so:
Let’s try brute force: let raspivid capture the picture in top-bottom mode and display it on the screen like that.
And we’ll turn off the image rotation using the GPU. For this, before further experiments, we’ll comment out this line here:display_rotate = 1 #1: 90; 2: 180; 3: 270
For further actions, we’ll run test commands from the console. But before that, you need to go to the folder with our scripts, stop the scripts (they use the camera), and then go to the folder with our fixed raspivid binary and experiment from there.
Go to the web console (the respective icon is marked with an arrow above).
Next, go to the folder with the scripts:cd /opt/StereoPi
stop the video:./stop.sh
Then go to the folder with our raspivid:cd ./bin
Try to run a simple command with HD resolution:./raspivid -3d tb -w 720 -h 1280 -fs -t 10000
It works! You should see a stereo picture full screen for 10 seconds!
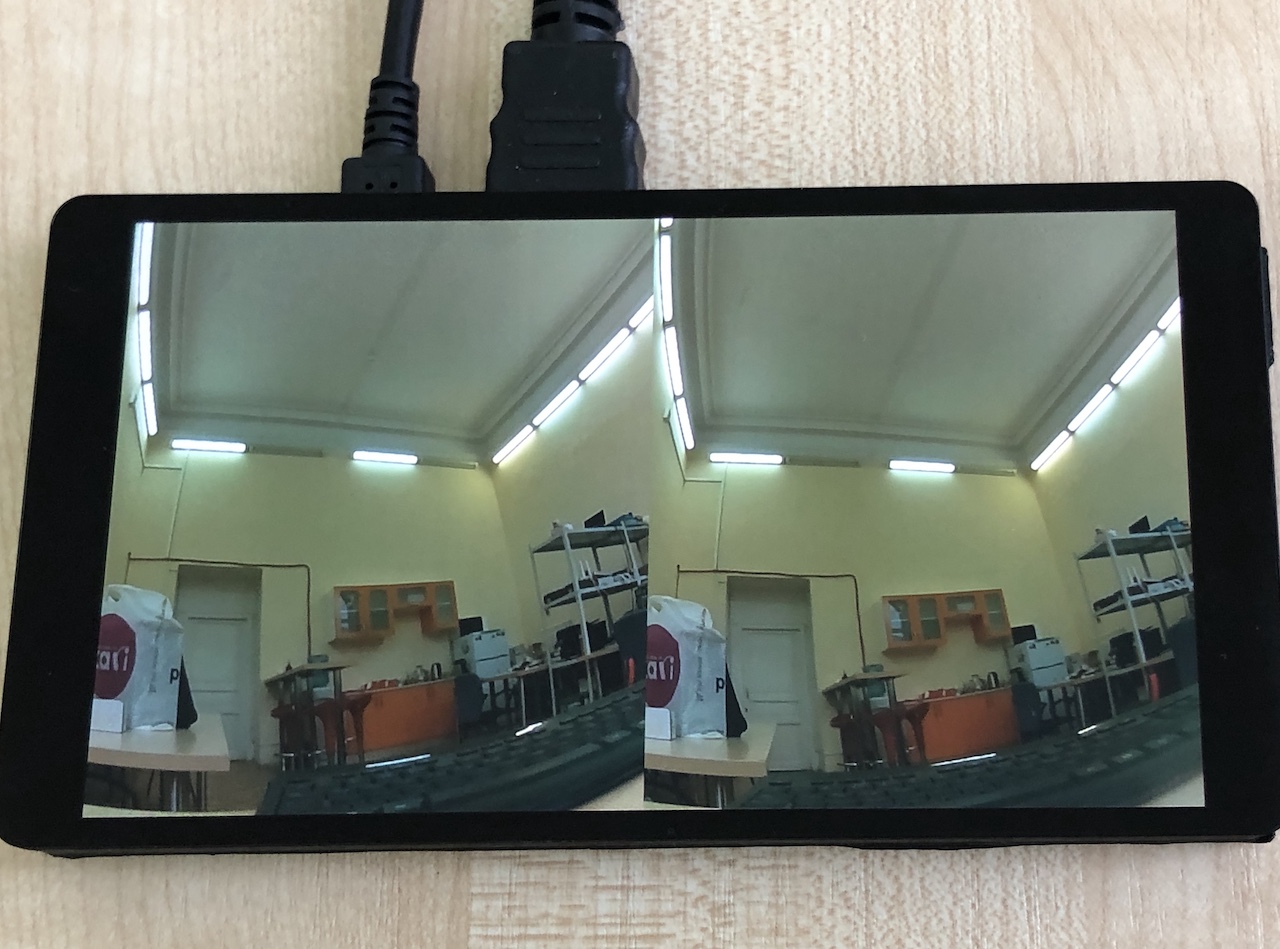
Now let’s try with FullHD:./raspivid -3d tb -w 1080 -h 1920 -fs -t 10000
Well, now we have a stereo image in FullHD resolution, which is displayed on the screen without delays or artifacts.
But …
Problem #3: the cameras are rotated by 90 degrees
Both pictures from the cameras are now rotated by 90 degrees. We’re displaying the stream in top-bottom mode, not side-by-side.
At this point you should remember that raspivid can rotate the picture by 90 degrees. Moreover, this is done for each camera, and not for the entire stereo image. Add the parameter ’-rot 90’ and run the updated code:./raspivid -3d tb -w 1080 -h 1920 -fs -rot 90 -t 10000
And you’ll see this:
Nope, it doesn’t work. Unfortunately, not all image processing functions that raspivid can do when working with a single camera work correctly in stereo mode with two cameras.
Well, folks, we’ve almost reached the very end, and it doesn’t feel like giving up at this stage at all.
If the software part is against us today, then let’s solve this issue… mechanically!
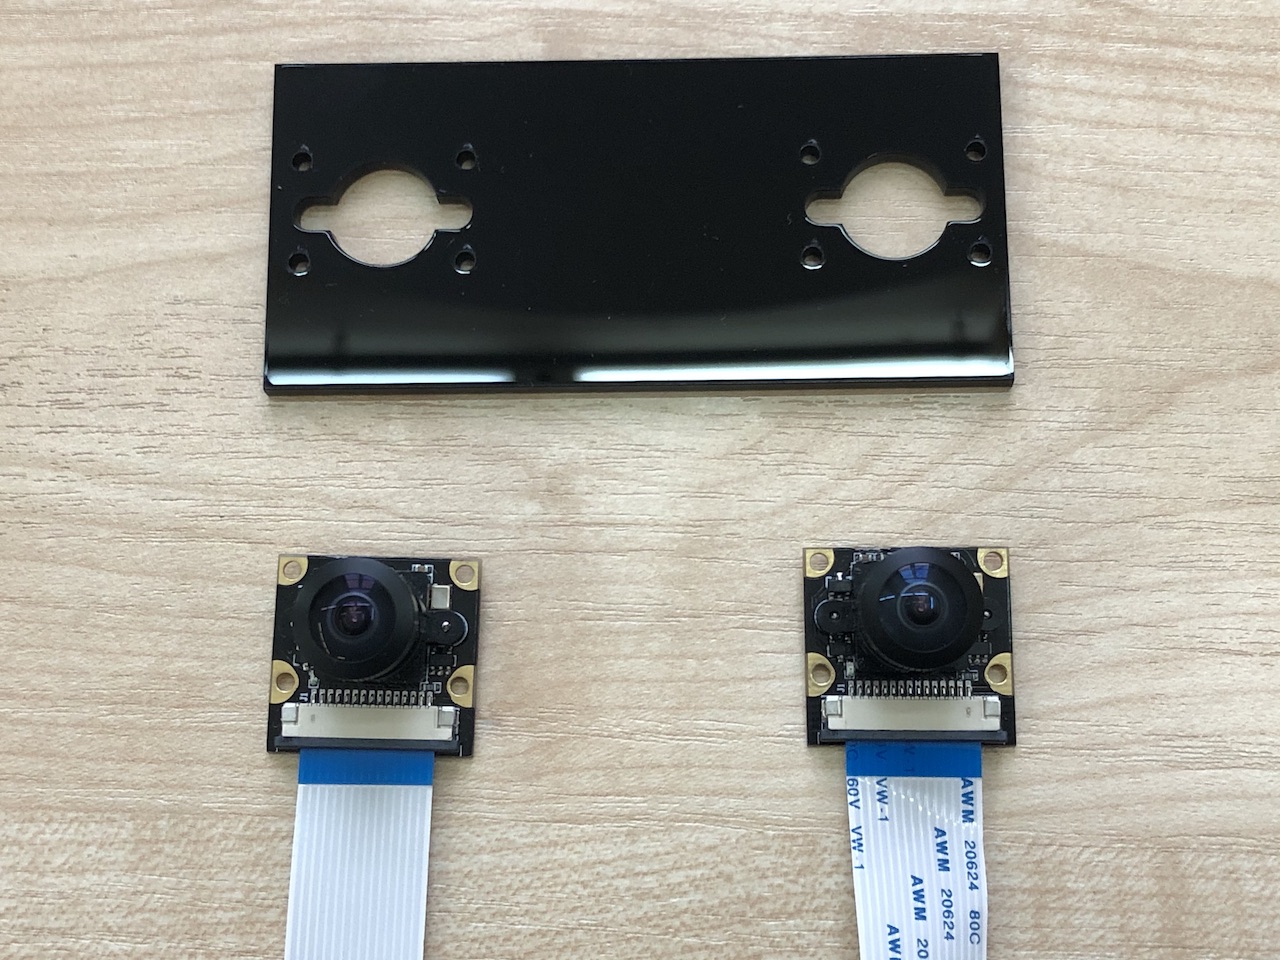
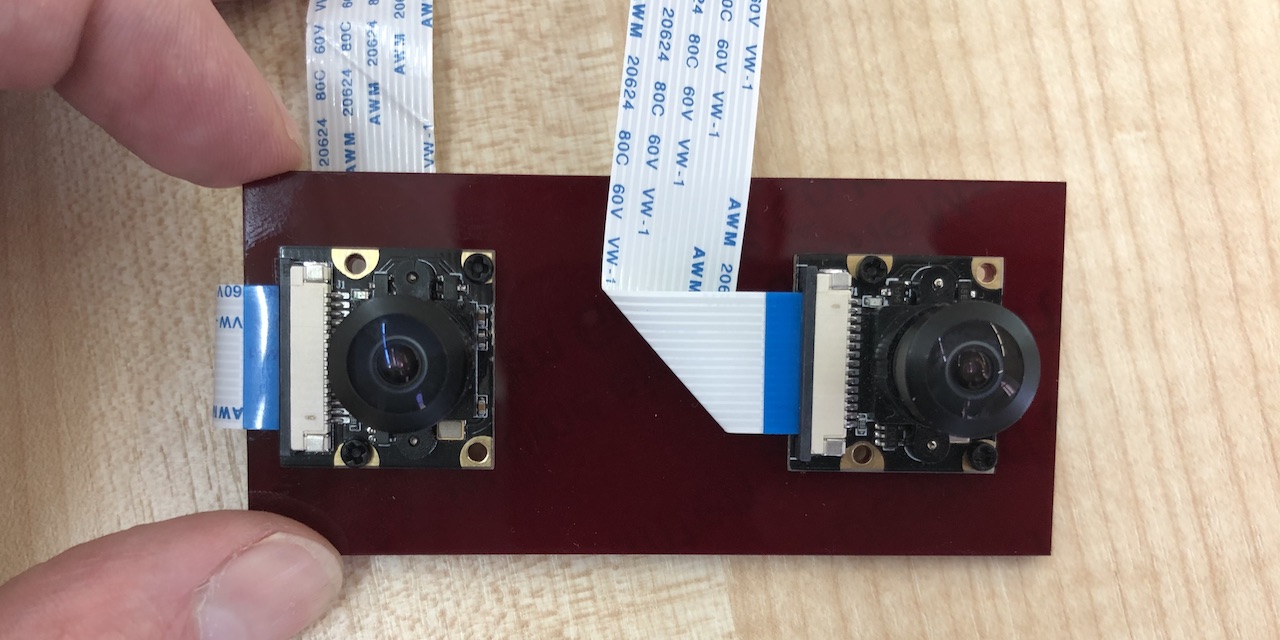
Usually, we use plates like these to place the cameras:
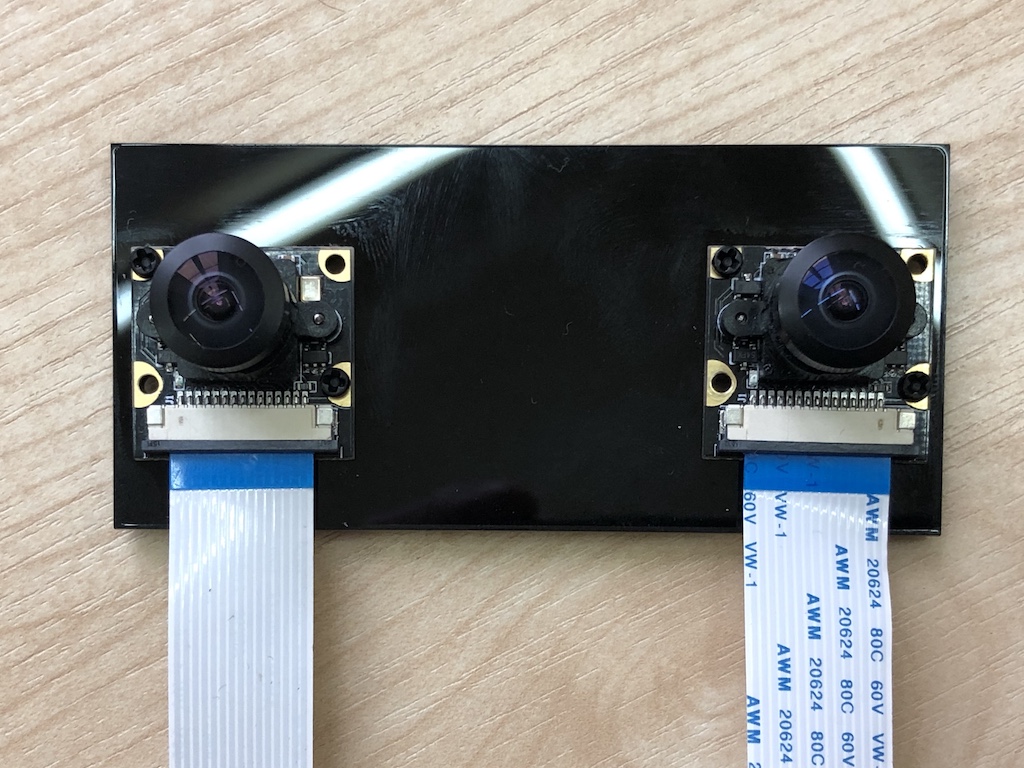
Here is a view with the cameras installed:
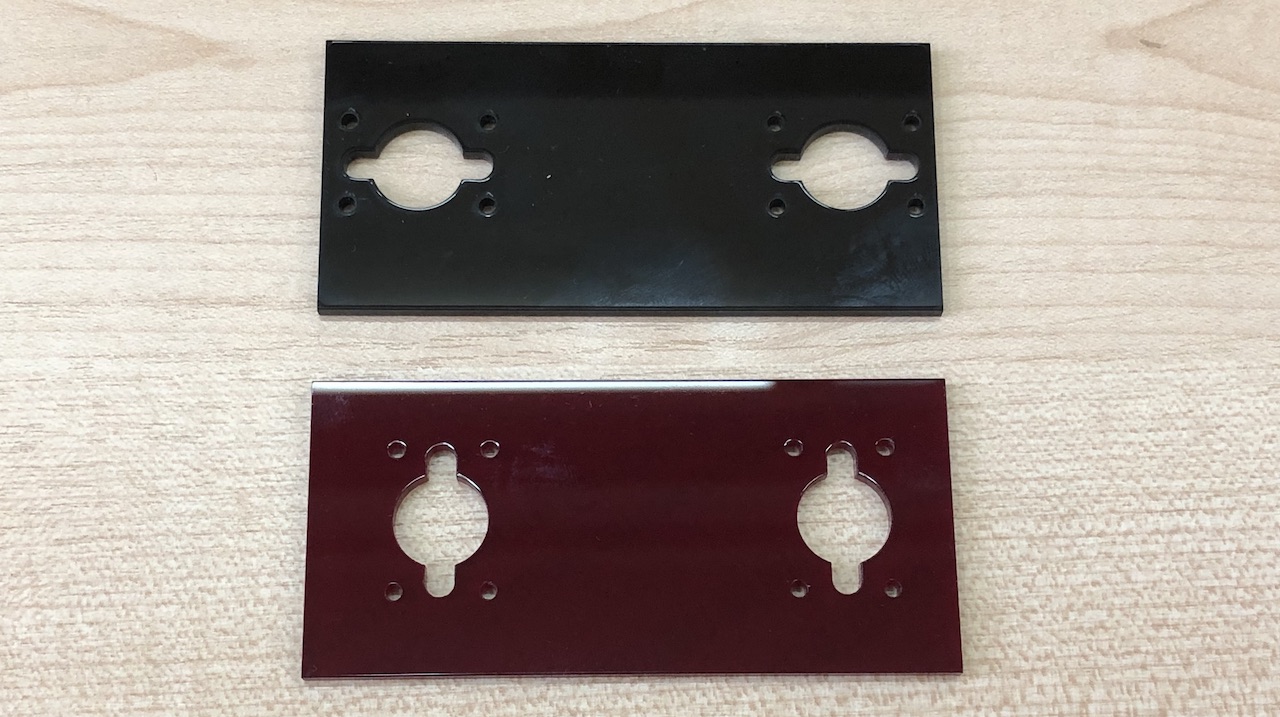
We cut out a plate for installing the cameras with a 90-degree rotation. It’s the lower one in this photo:
Let’s try on the cameras:
The position is chosen correctly, so you can now secure the cameras in place.
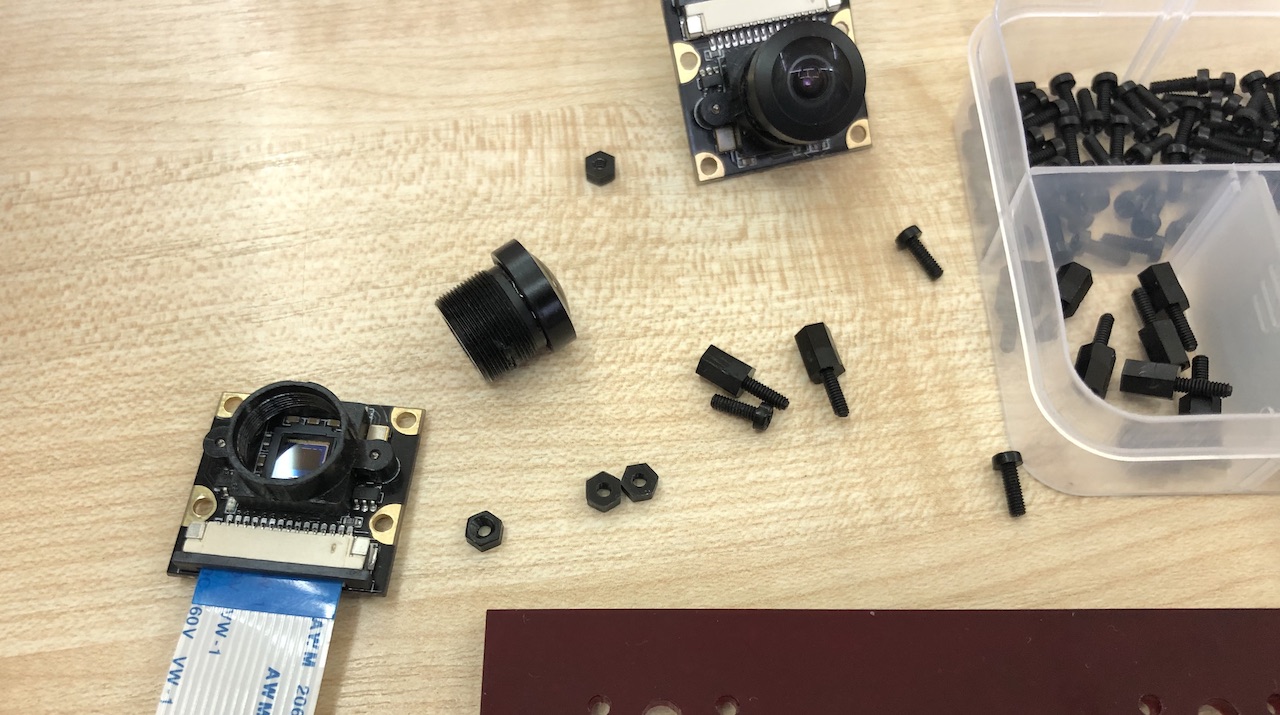
Unscrew the optics and get a box with 2mm plastic spacers closer:
Secure the cameras with the spacers and you’ll get this assembly:
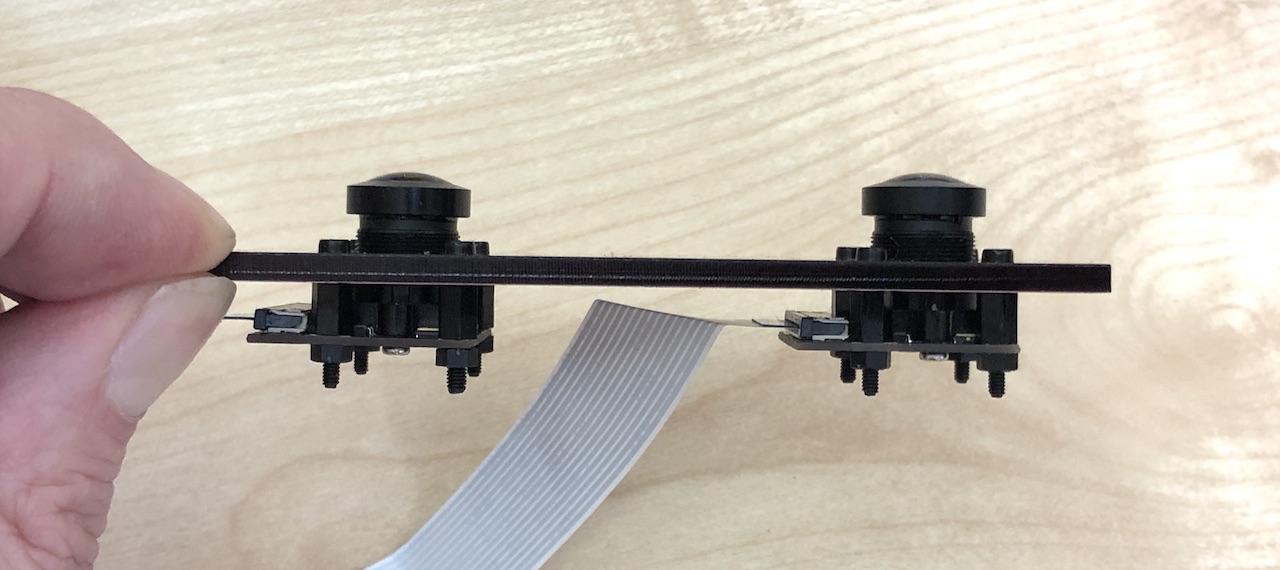
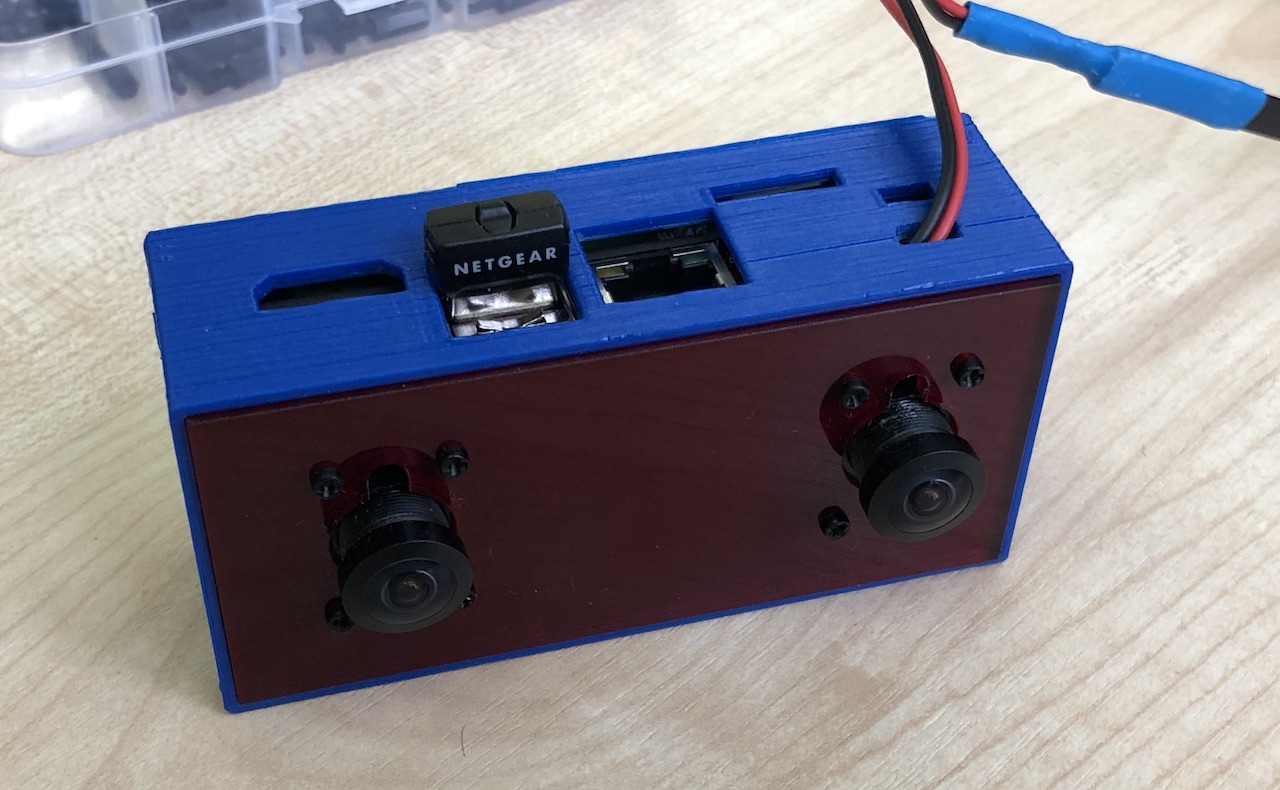
This assembly fits into our standard 3D-printed case. You’ll need to trim two protruding plastic screws, and correctly bend the cameras’ cables.
Here is the result:
Now, in order for the needed video to be displayed automatically at system start, you need to add the respective line to the autorun script.
The script lives here:/opt/StereoPi/scripts/video-source.sh
Replace the last line in the script, starting with ‘./bin/raspivid -t 0 $DEC_STR…’, with our code:./bin/raspivid -3d tb -w 1080 -h 1920 -fs -t 0
That’s almost it. Only one last problem remains.
Problem #5: starting the screen after reboot
During the tests, we discovered another feature of this screen. If you restart StereoPi from the console (sudo reboot), then the screen works correctly, displaying the entire reboot process. But if you turn off the power on the StereoPi, then after turning it back on, the screen doesn’t show anything. You have to turn the screen’s power off and back on again so that it ‘comes back to life’. If you run the screen’s power cable together with the HDMI cable coming from StereoPi, and plug it into the StereoPi connector, then the power switch on StereoPi simultaneously powers both the stereo camera and the screen.
Result:
We got an alternative assembly for the ‘Third-Person View’ project on Oculus Go, which has a very small latency.
We carried out standard video latency tests: we started a timer on one phone and put it in front of the StereoPi camera streaming to our screen. Using a second phone in slow motion mode we recorded both the timer screen and the test screen. The difference between the timer readings ranged from 5 to 10 milliseconds.
Conclusions:
– In the end, everything worked :-)
– The Waveshare screen has an excellent picture, is fast and compact
– The StereoPi easily gives a FullHD stereo video stream at 30 FPS (without compression) via HDMI
Things that you need to consider when developing your own solutions:
– The built-in controller of the Waveshare 5.5 AMOLED screen doesn’t have an image rotation function. If your single-board system is unable to quickly rotate the image, it’s a problem with rapidly changing screen content (for example, video).
– We couldn’t solve the problem of automatically ‘picking up’ the screen after rebooting StereoPi via the power switch — the screen starts only after it’s reset. However, this problem does not occur with other HDMI screens.
– The Raspberry Pi’s video card doesn’t rotate the 1920x1080@60FPS image by 90 degrees quickly enough to work with this screen. When working in the console and with text files, you may not even notice this problem. But when dealing with rapidly changing screen content (such as video), this can be a problem.
– Not all raspivid functions that work in single-camera mode work correctly in stereo mode.
– At the end of the day, any problem can be solved. It is only a matter of time and money. Well, that you knew already, right? ☺