Hardware Details for DIY Ninjas
Slim Edition Micro USB Connector
First, let’s answer a question from one of our backers. The description for StereoPi Slim Edition mentions it has Micro USB for burning firmware, but there are no Micro USB connectors shown in the photos. Where’s the Micro USB connector? The Slim Edition will indeed have the Micro USB connector soldered onto the board. Our plan has always been that the Slim Edition will be as hackable as possible, which includes the ability to upload firmware to the Pi’s eMMC. The board used for taking photos was a revision without this connector, but the final production board will include it. Thanks to all the attentive backers who noticed!
RPi CM1 Power Consumption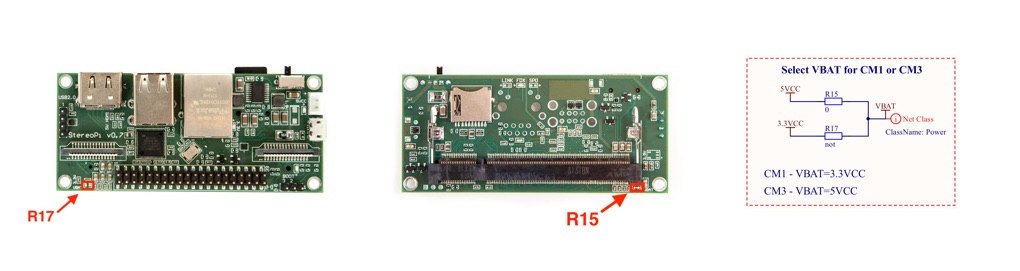
While developing StereoPi we intentionally kept support for the Raspberry Pi Compute Module 1. It has enough performance to capture and encode video to H264/MJPEG, and also consumes approximately three times less power than other modules. To enable CM1 support you need to do some minor soldering, which is now described in our wiki. We’re happy to report that StereoPi fully supports all three generations of Raspberry Pi Compute Modules.
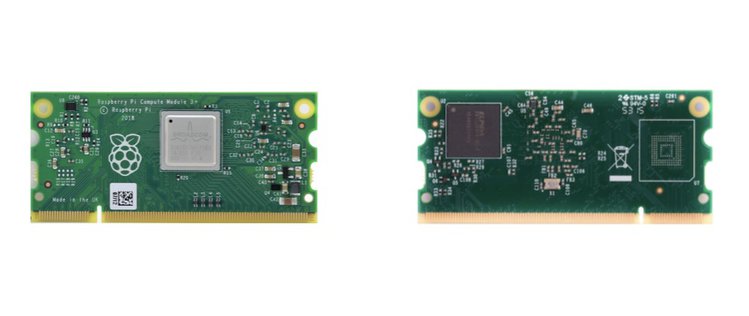
RPi CM3+ Compatibility
We did some additional testing with the newest Compute Module, the CM3+ Lite. It works as expected, and we used our original device tree file without any modifications. The only requirement is to use a recent Raspbian kernel (November 2018 or later), which is available in all current Raspbian distributions or via rpi-update on older versions. So, any Raspbian image that works with Raspberry Pi 3B+ will also work with the StereoPi, as they use the same SoC.
CM3 or CM3+ in Starter and Deluxe Kits?
Backers also asked whether we’ll use CM3 or CM3+ in the Starter and Deluxe Kits. At the start of our campaign, the CM3+ was not even announced. We’re working now to find the CM3+ in the quantities we need. If we can, we’ll bundle CM3+ in our kits. We’ll keep you posted.
Device Tree Source Files
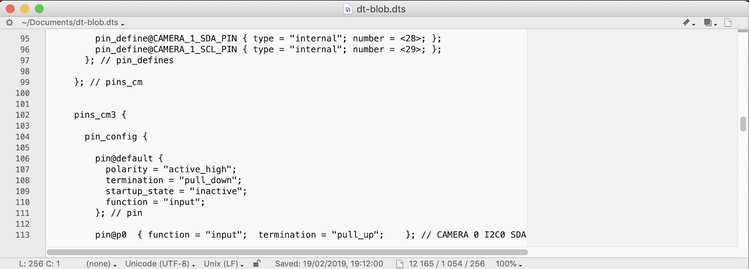
Yesterday, we posted our device tree files and compiled binaries (dt-blob.bin). These files already have all the settings for CM1 and CM3, so you can use them with any version of the Raspberry Pi Compute Modules. As noted above, you do not need to add any additional settings for CM3+.
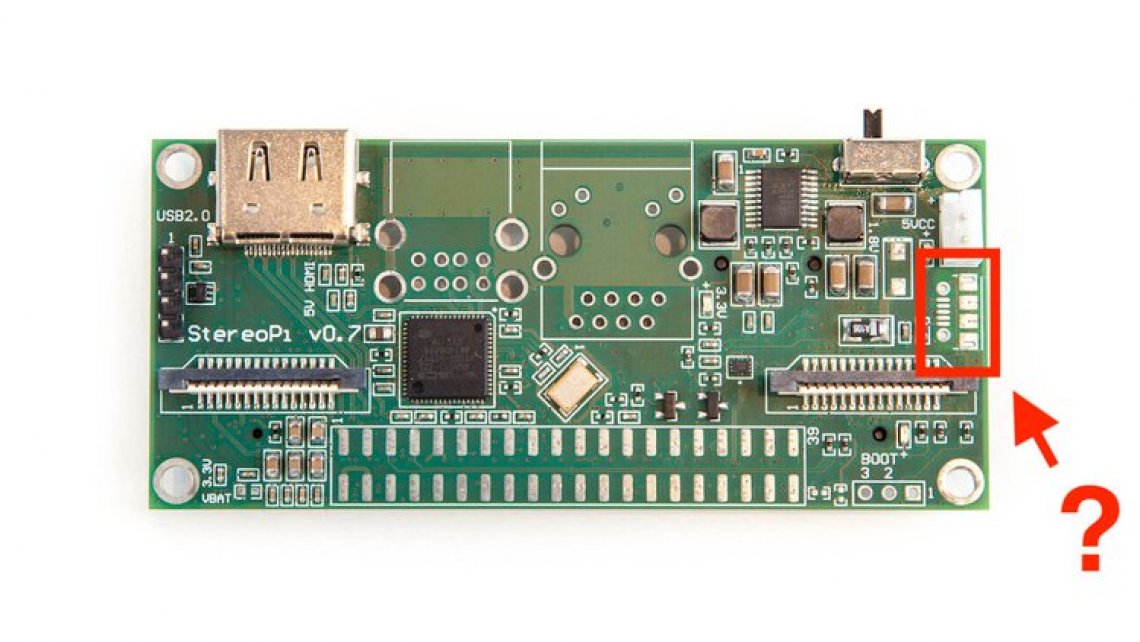
Undocumented Feature!
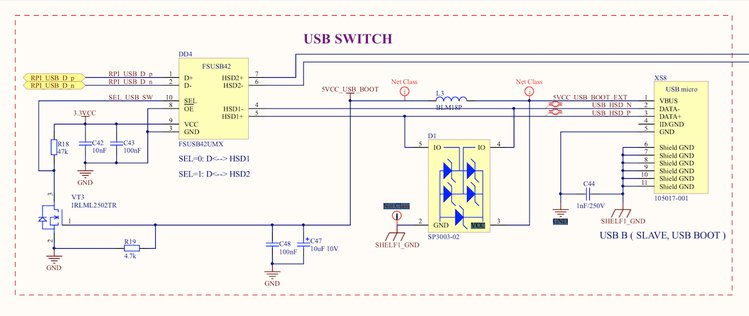
StereoPi has one undocumented feature. As you may know, the Compute Module only one USB port available. So, to add more USB ports and a LAN, we hooked up the one USB port to a Microchip LAN9513. But you may also know that the Pi Zero and A/A+ have no USB hub or LAN, and their USB is exposed directly to a USB connector. This feature allows you to use the usb-gadget API to turn on, for example, RNDIS network over USB, UART, USB camera, and a lot of other features. And you can use this feature on StereoPi too! If you connect StereoPi to your computer via Micro USB cable, and don’t install the USB SLAVE jumper on StereoPi, then the CM’s USB pins will be exposed to the Micro USB connector. In our wiki, we also added a part of StereoPi schematic to explain how this feature works under the hood.
We plan to publish all schematic right after sending boards to backers. Original StereoPi schematic was created in Altium, and now we’re trying to choose an appropriate open source tool. At the moment, we like KiCad. If you have some ideas which tool we should use for opening our schematic, please let us know via Twitter @StereoPi.
Finally, you can find all the above information in our wiki’s DIY Ninjas section here.
If you can not open our wiki due to DNS issues mentioned in our previous update, you can use a saved PDF version as a temporarily solution.